To help facilitate the modelling process, I decided to use my 2D tile designs I did in Adobe
Illustrator as a reference guide in Blender by importing its SVG image in Blender. With this method,
the modelling process was quite straight forward. However, what hindered me
greatly was my unfamiliarity with Blender as a software. I had to go back and forth with
Gemini AI and Youtube to find my way around the interface, and also to figure out simple tasks like
moving a mesh.
On the topic of dimensions, I decided to stick to a
4x4cm tile shape, same as my paper prototypes. I also added a 2.7cm x 2.7cm
indent at the bottom of the tiles to slot in the NFC tags.
Below are the three main things that I did to complete the model.
When I imported the SVG files, it also managed to keep the distinct layers of each element of the design, allowing me to alter them individually (I.E corner designs are seperated from the words). Thus, I could easily select and convert them to individual Mesh layers for modelling in Blender.
Probably the easiest part of the 3D model. All I had to do was to create a 3D block that is to the dimension of my tile (4cm x 4cm x 1cm). I then aligned the SVG meshes on its top face for the next step.
Not too complicated as well (once I got used to Blender). I selected all of the SVG meshes and gave them a slight extrusion upwards, creating raised textures that is similar to what we see on vintage Peranakan tiles.
I was actually pleasantly surprised with the outcome of the 3D modelling. I do like how the textures occupy the top space of the tile. It was not too busy nor too plain and I felt that the balance was there. Moving forward, I have to figure out how to color these tiles, but that is a problem for a later stage. Right now, I am focusing on getting my first test print to see how it looks like in real life.

Placing the SVG template on the top face
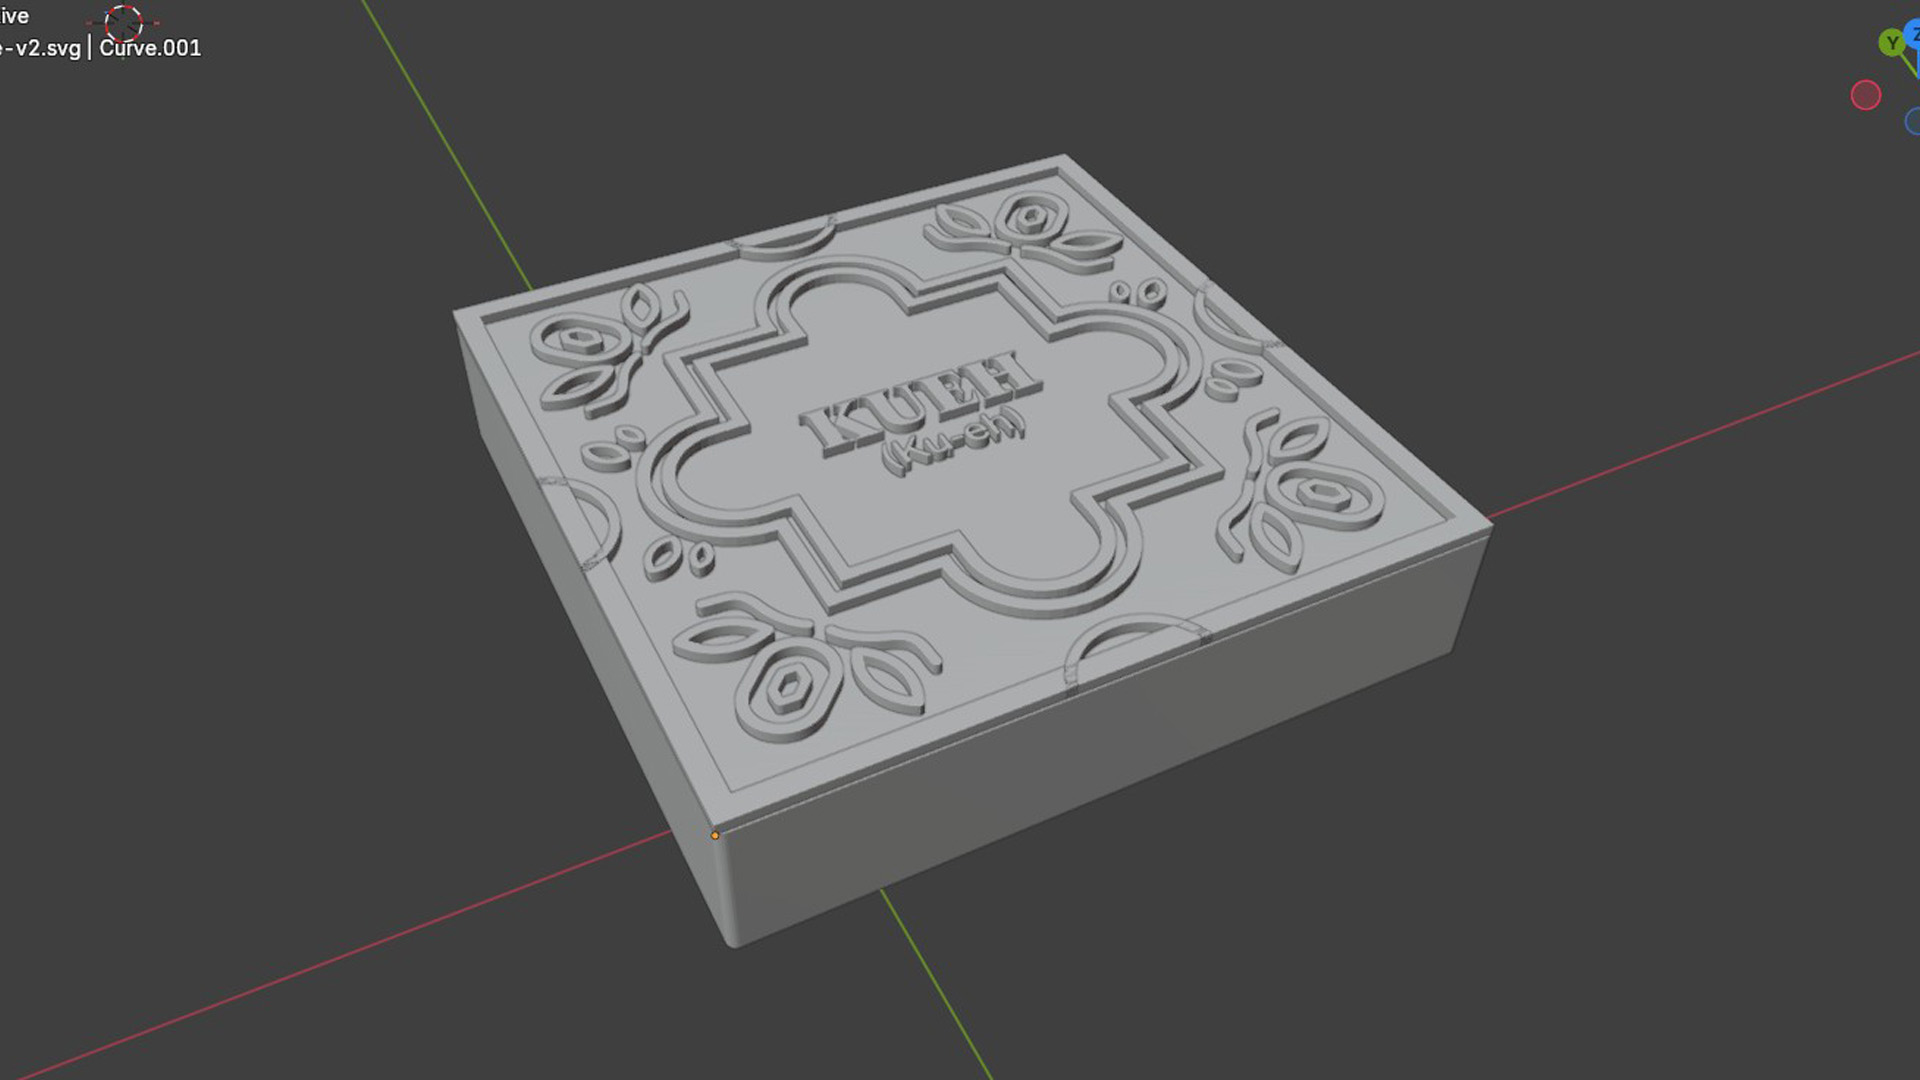
The completed model
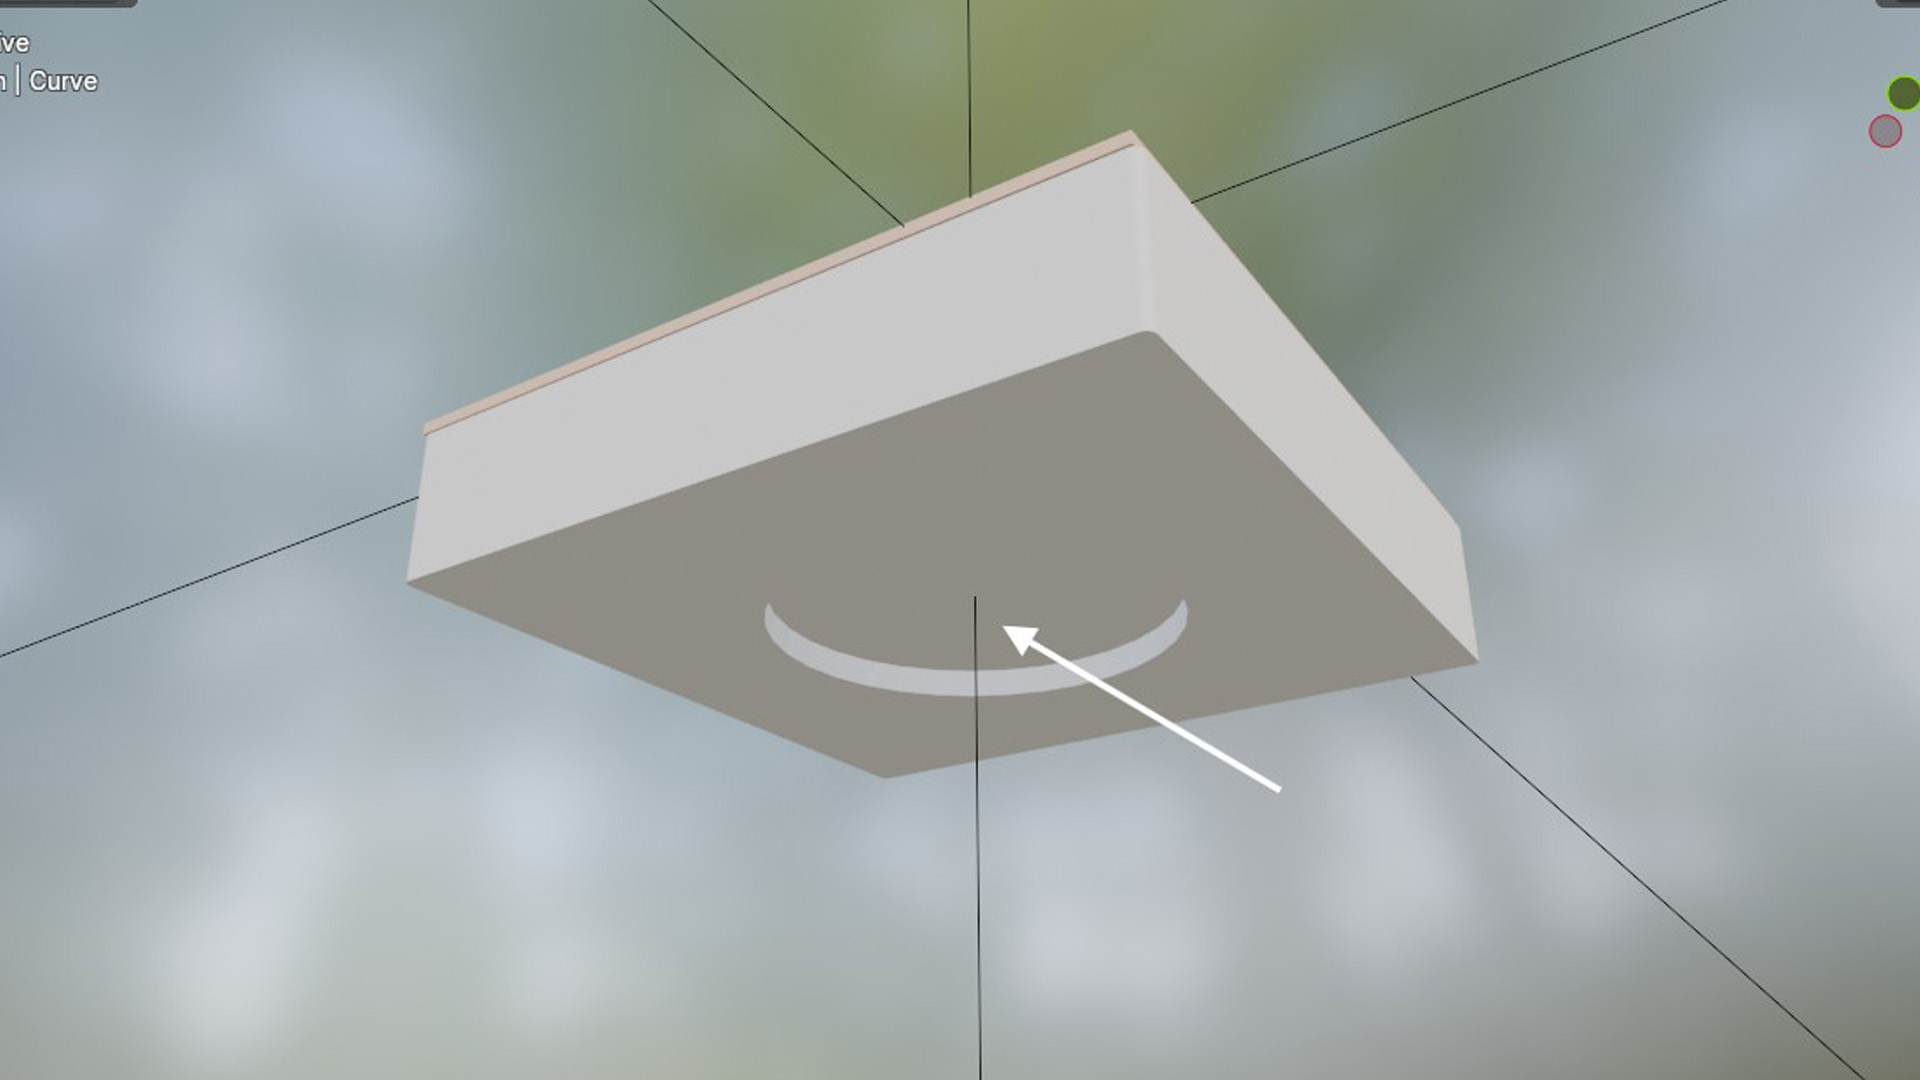
Bottom indent for NFC tag
Before I proceed to 3D print the model, it was important that I check the 3D model suitability for 3D printing. I imported the STL into Bambu Studios and ran a quick slice test to simulate how it will look like printed. Unfortunately, the first testing did not look very promising. On the setting of a 0.4 nozzle, the smaller bracketed syllables on the Language Tiles was completely absent from the print. Therefore this fix this issue, I needed to solve a few things.
Using a finer nozzle, like a 0.2, will help print the finer details on the 3D print. Luckily for me, I know a long time friend that has his own 3D printer with that nozzle!
I also decided to expand the tile to be 5x5cm instead. This enlarges the details within it to allow the 3D printer a easier time to print the textures on it.
Similar to the rationale on the second point above, I increased the font weight and expanded the strokes of these words slightly so that the textures were easier to print.
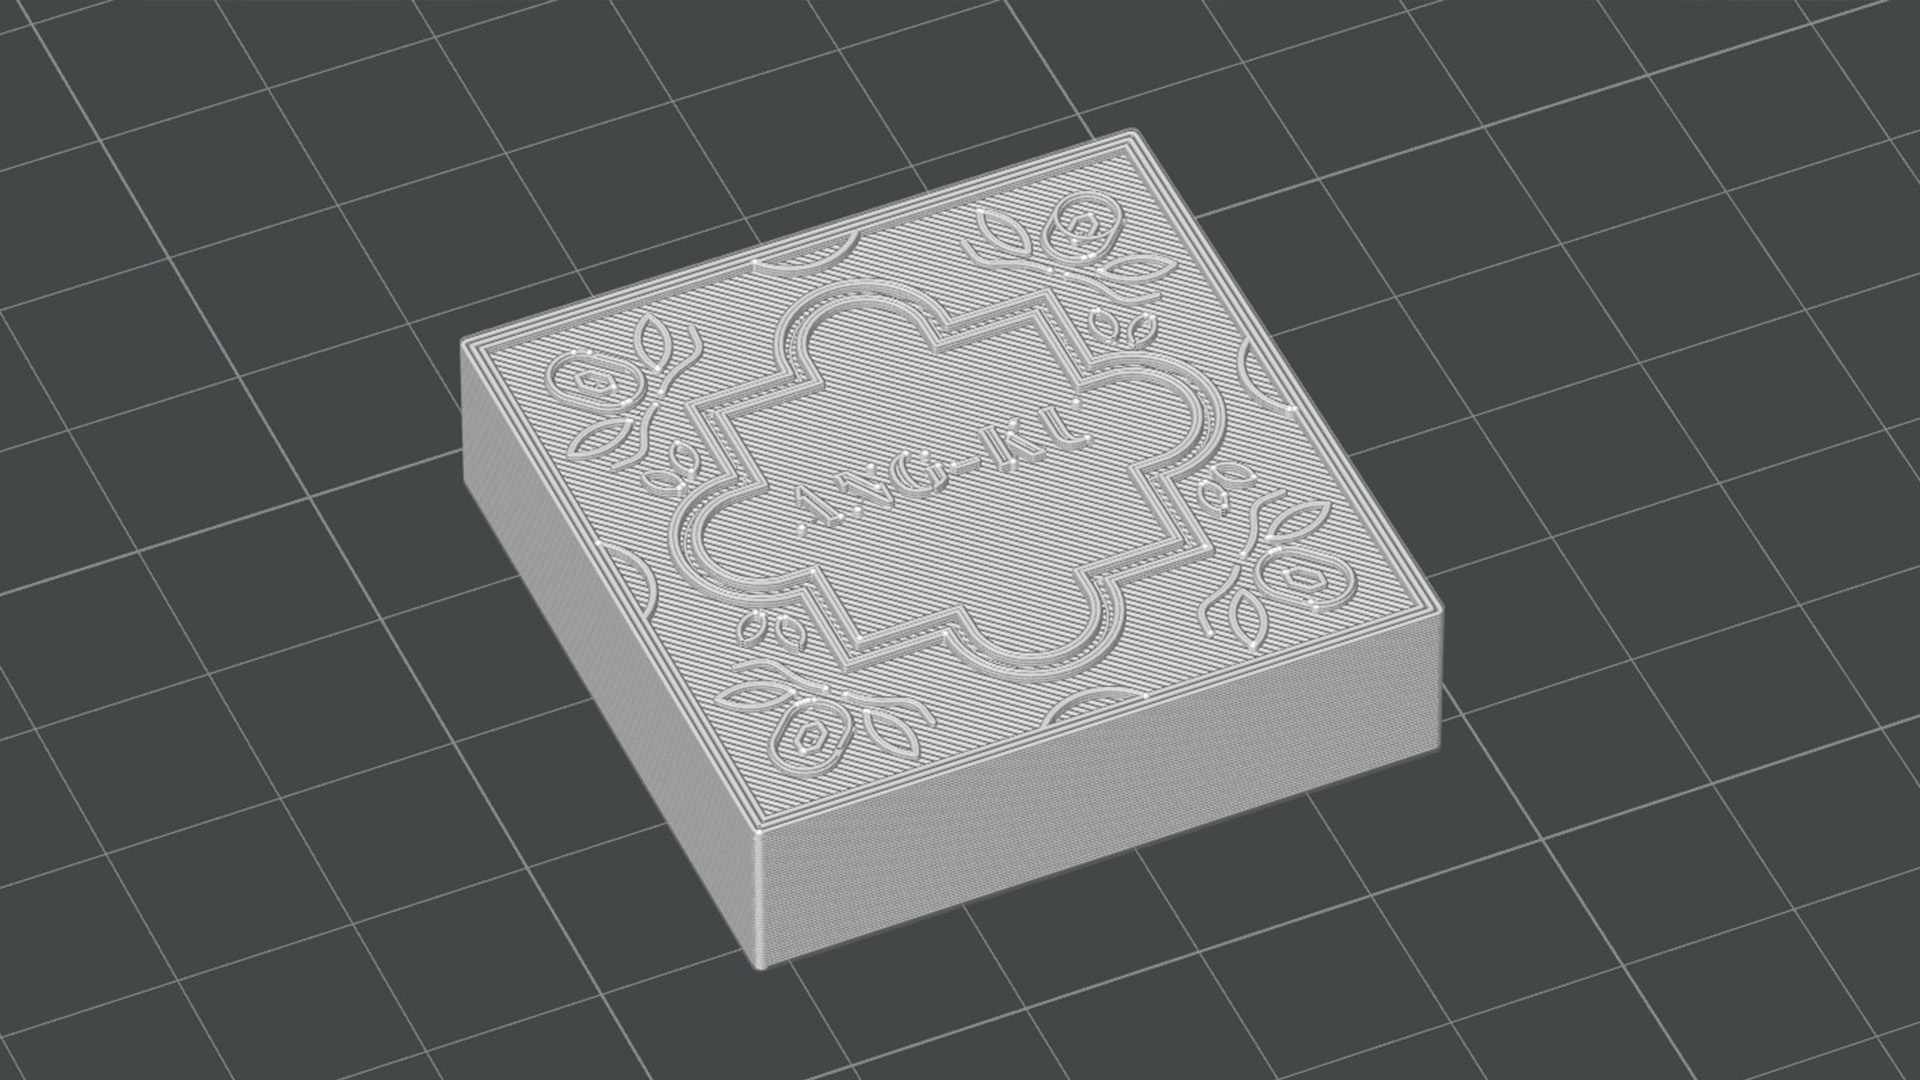
Intiial model slicing showed that the smaller words will not print
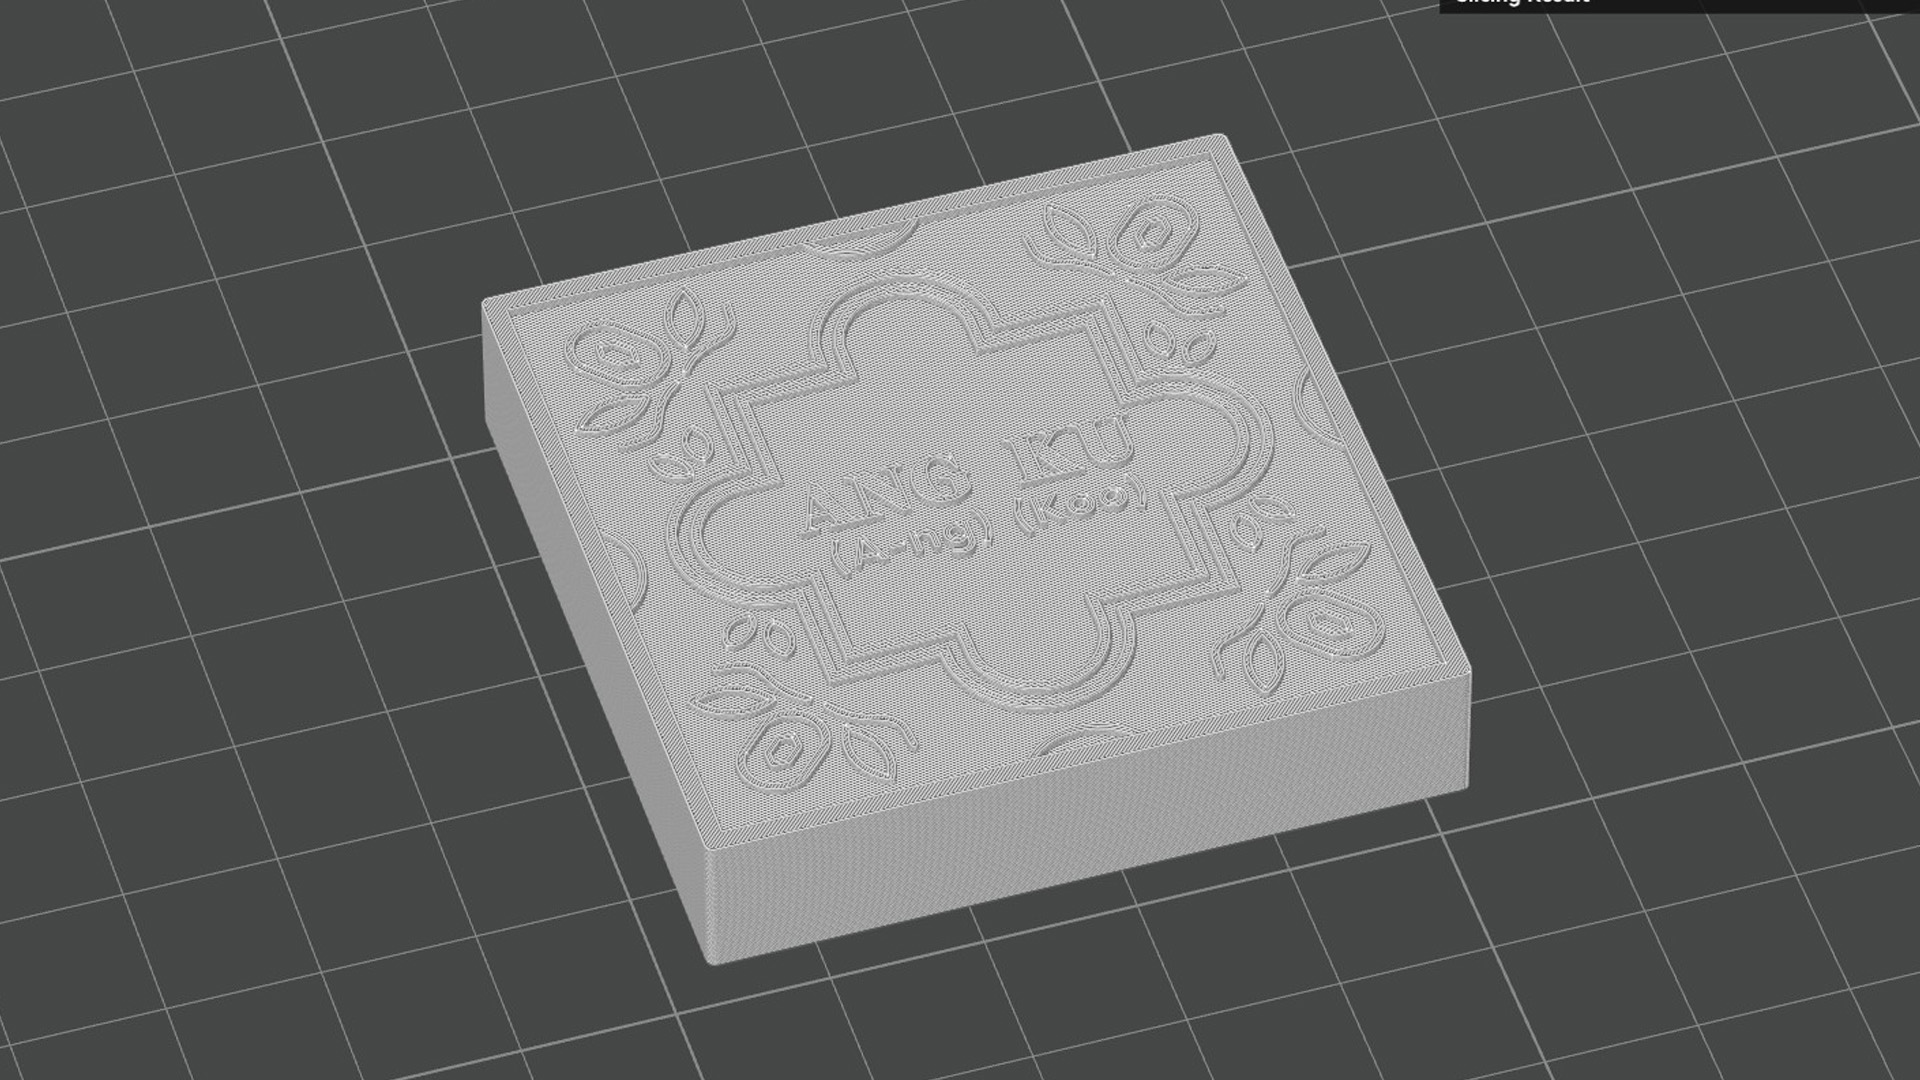
Adjusted the tile design with fixes and with 0.2 nozzle configuration
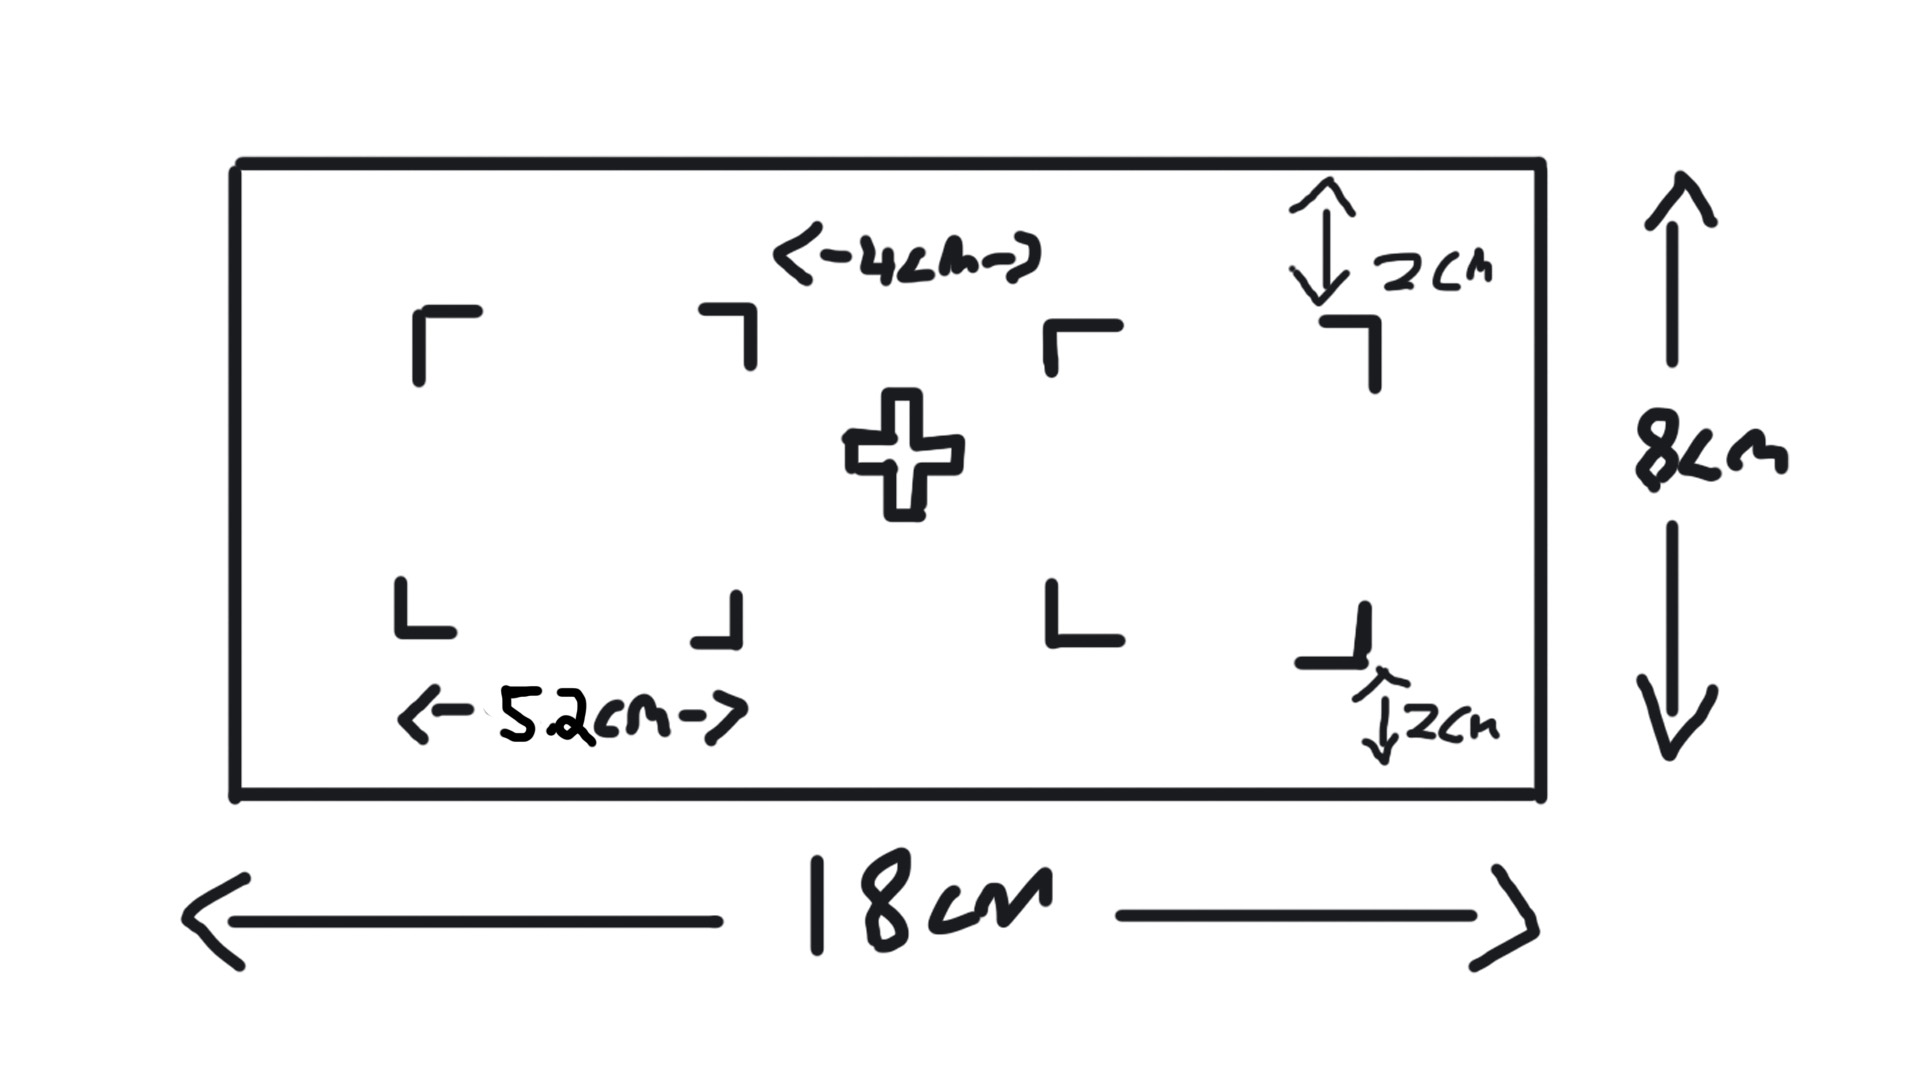
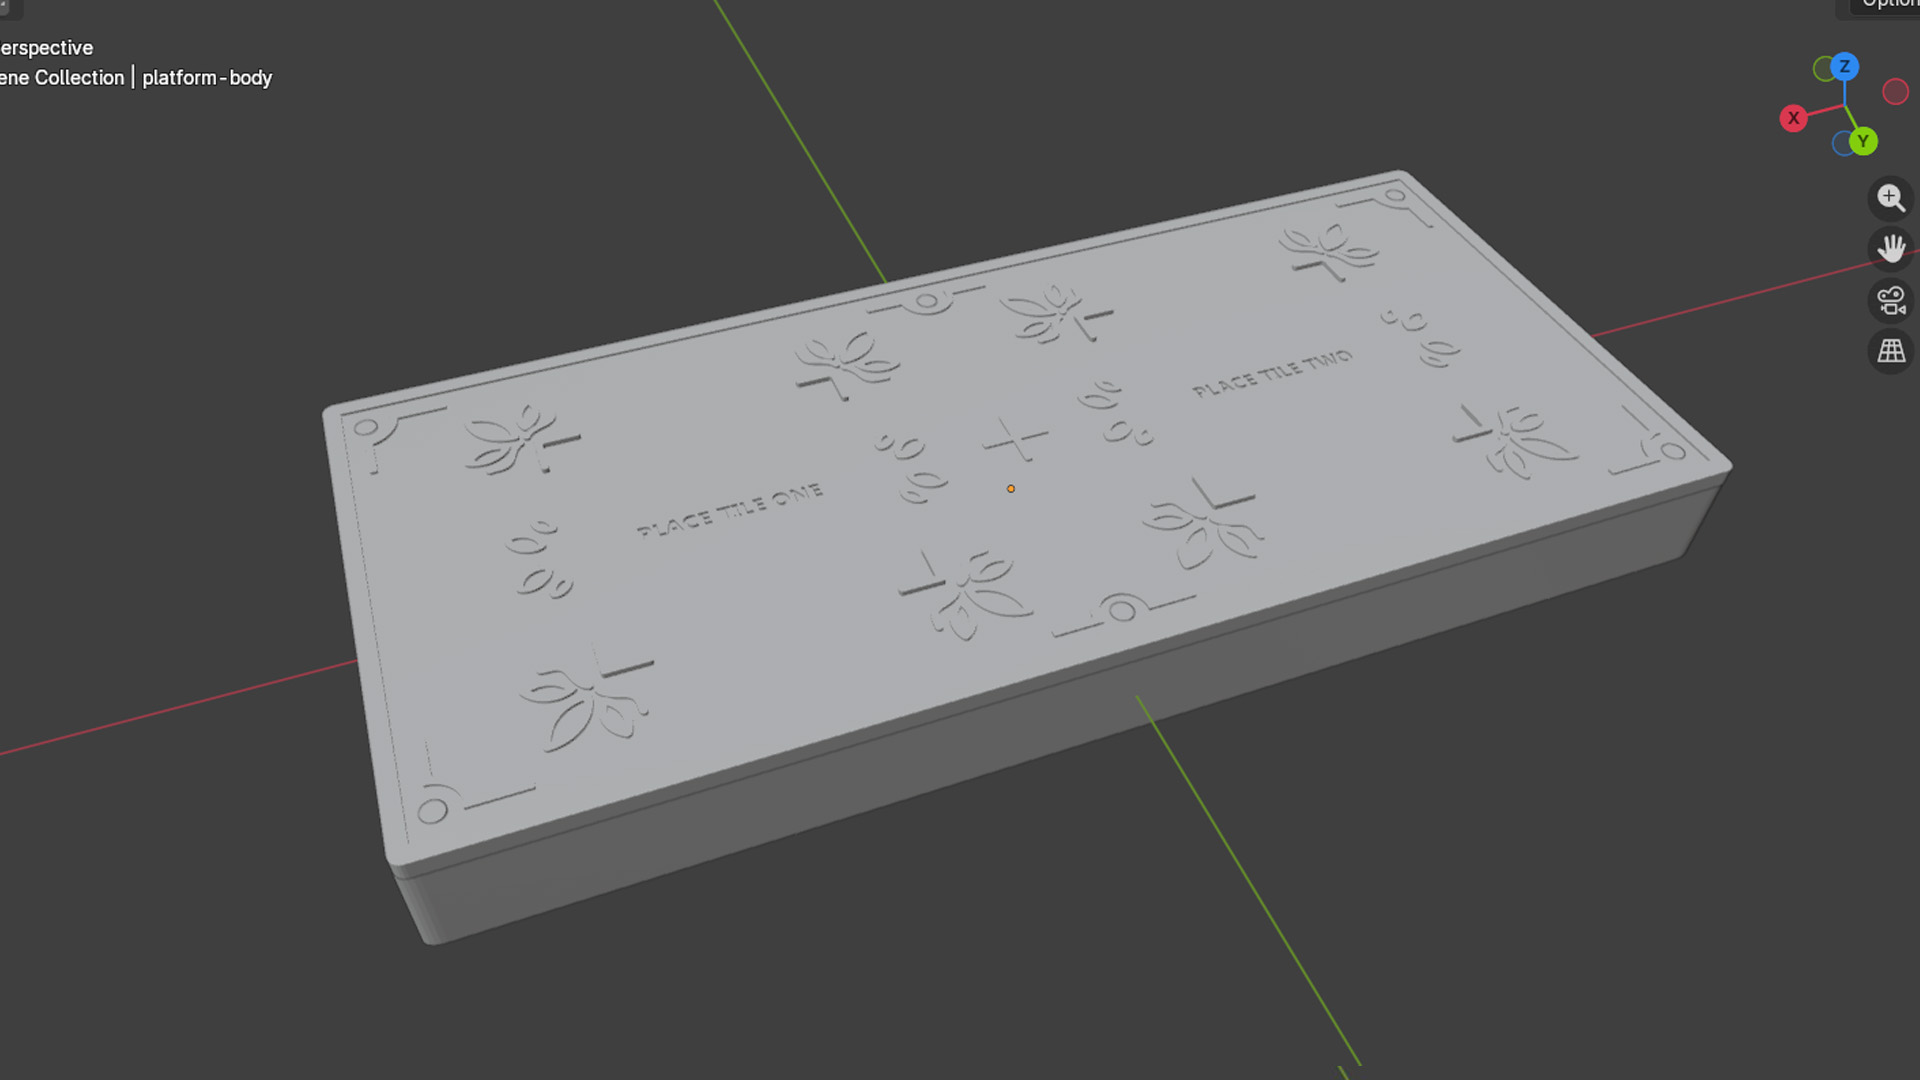
With the tile settled, the next step was the platform. Noting on the previous issue with the paper
prototypes (the NFC readers being too close to each other), I increased the space between the readers
to 4cm, which is a tried and tested distance where both sensors will not interfere each other's
readings. I also incorporated similar floral and geometric elements within the design. Of course, I
had to give some allowances on the square slots that the tiles fit in (about 0.2mm) so they can fit in
without any issue.
I also included small corner protrusions around the edges of where the tile should sit so as to "catch" the tile in place once placed.
Rough layout planning of the platform
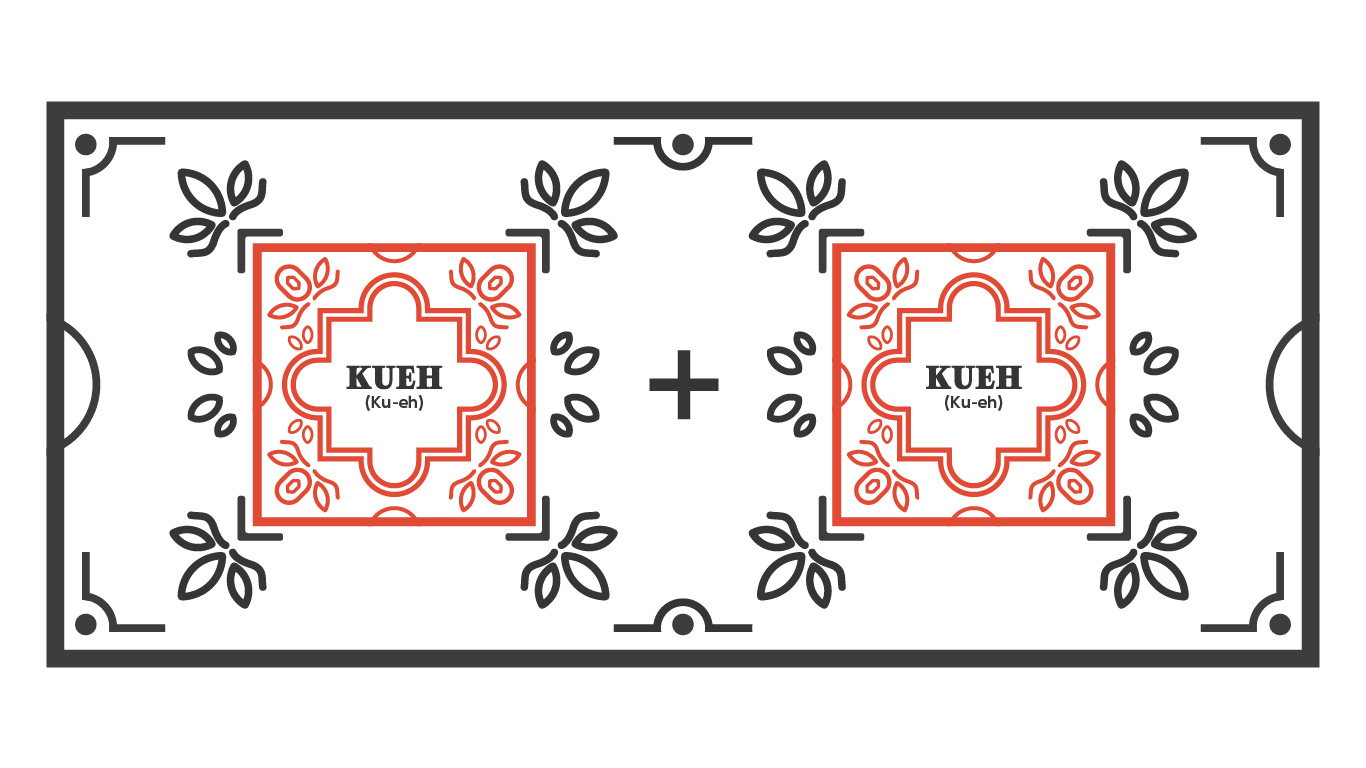
Designed the platform with floral and geometric elements
I wanted it to be easier to slot in the NFC readers into the platform. Thus, I decided to separate the
body and the cover, so I can lift the cover to place the NFC reader in and then cover it again. The
cover design is about 3mm thick and contains the design I did above. For the body, I did a rough
sketch to figure out how it looks like, and 3D modelled the indents that houses the NFC readers with
reference to the dimensions of the NFC readers (ensuring there is allowances for it to fit in well).
Lastly to connect the two parts, I extruded small rods located at the edges of the platform
body and 6 holes on the cover so that they can be pieced together.
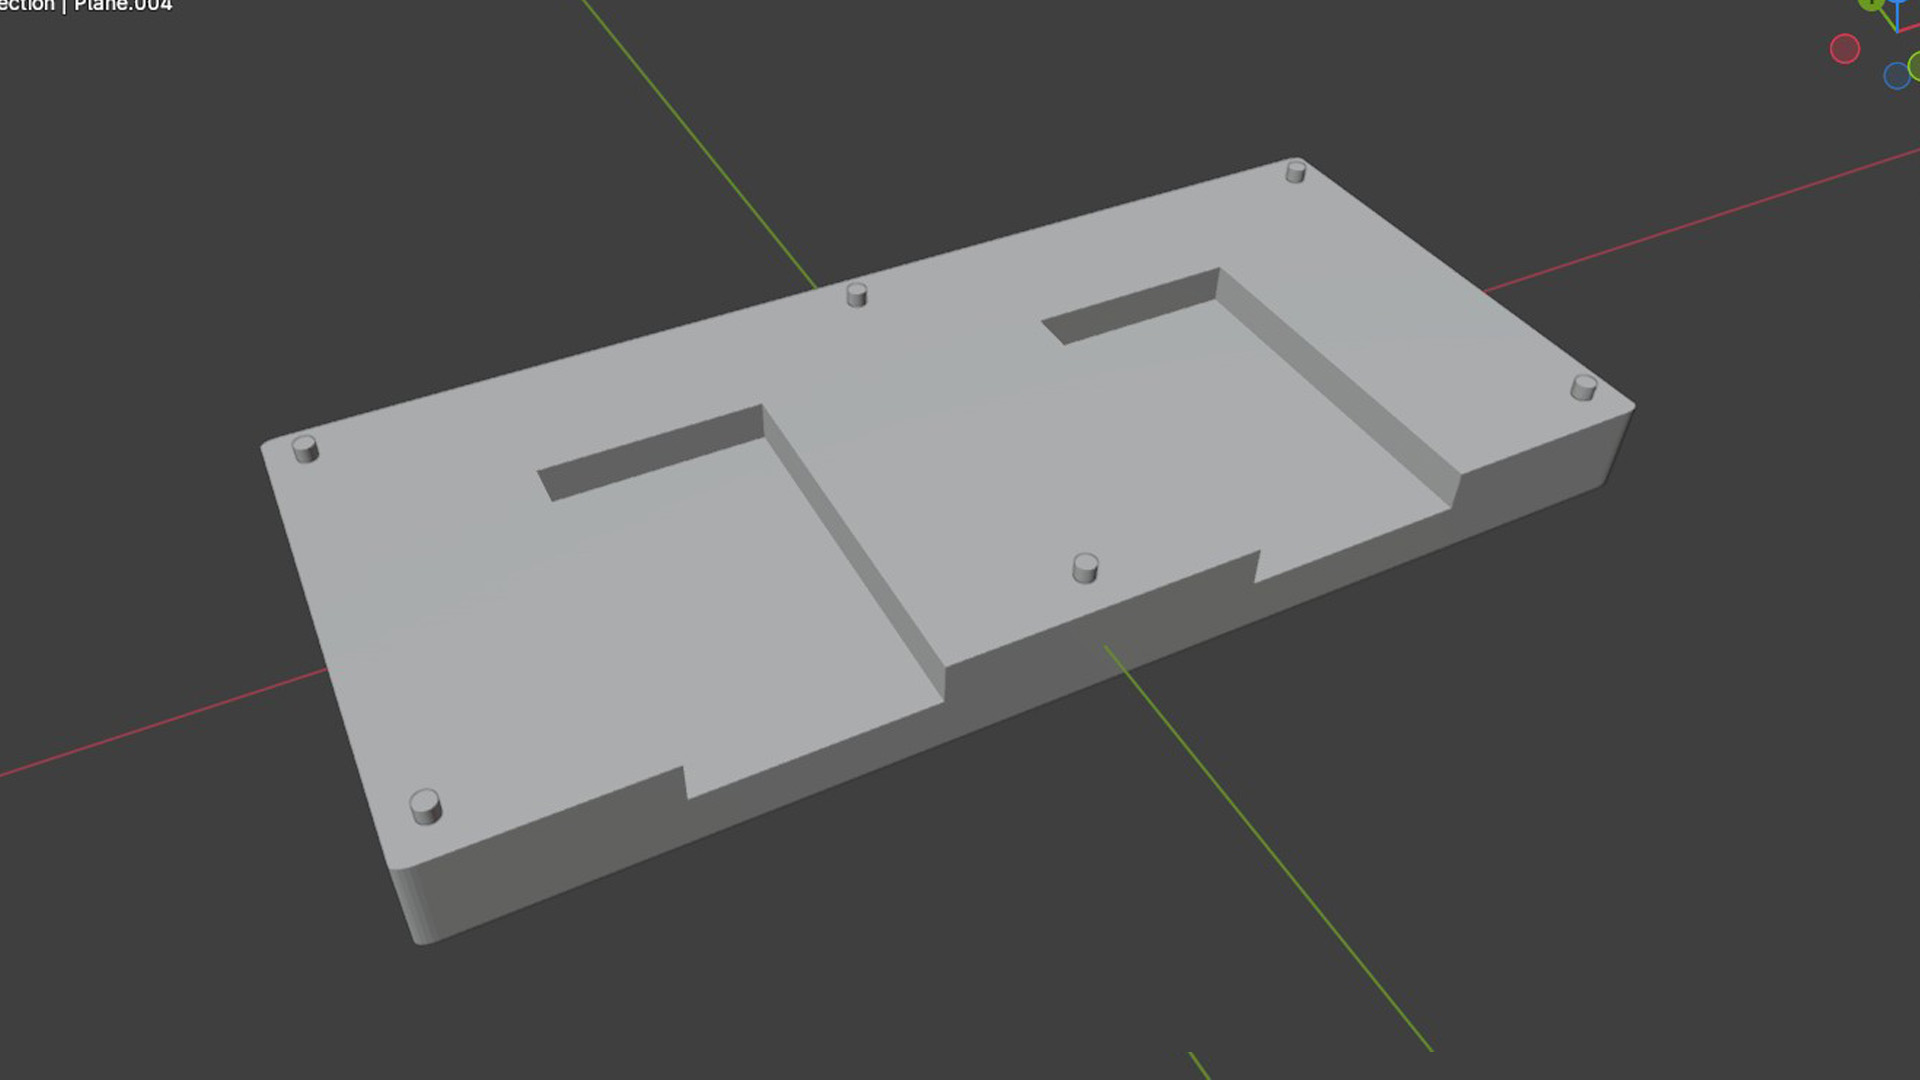
The Platform Body with indents for NFC readers
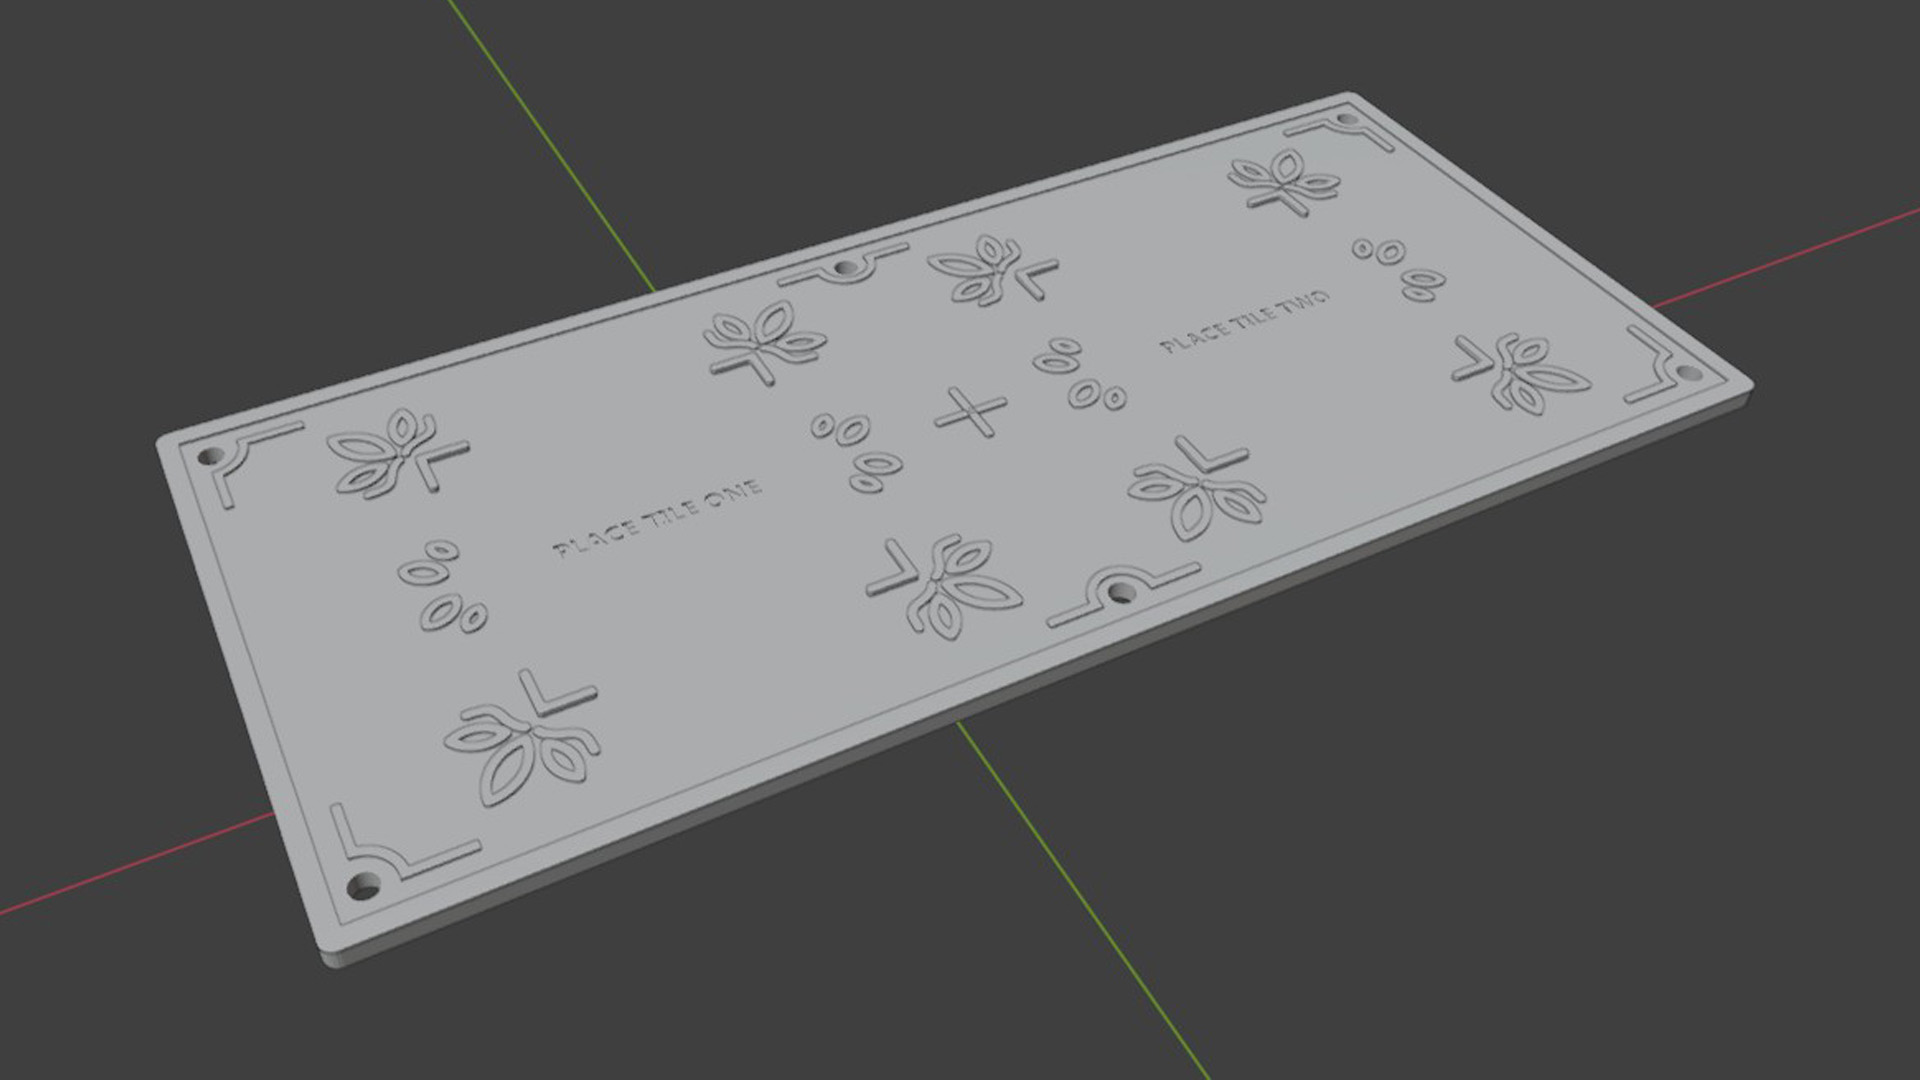
The cover with holes at the edges to fit onto the body
The cover fitted onto the body with the NFC reader slots at the back
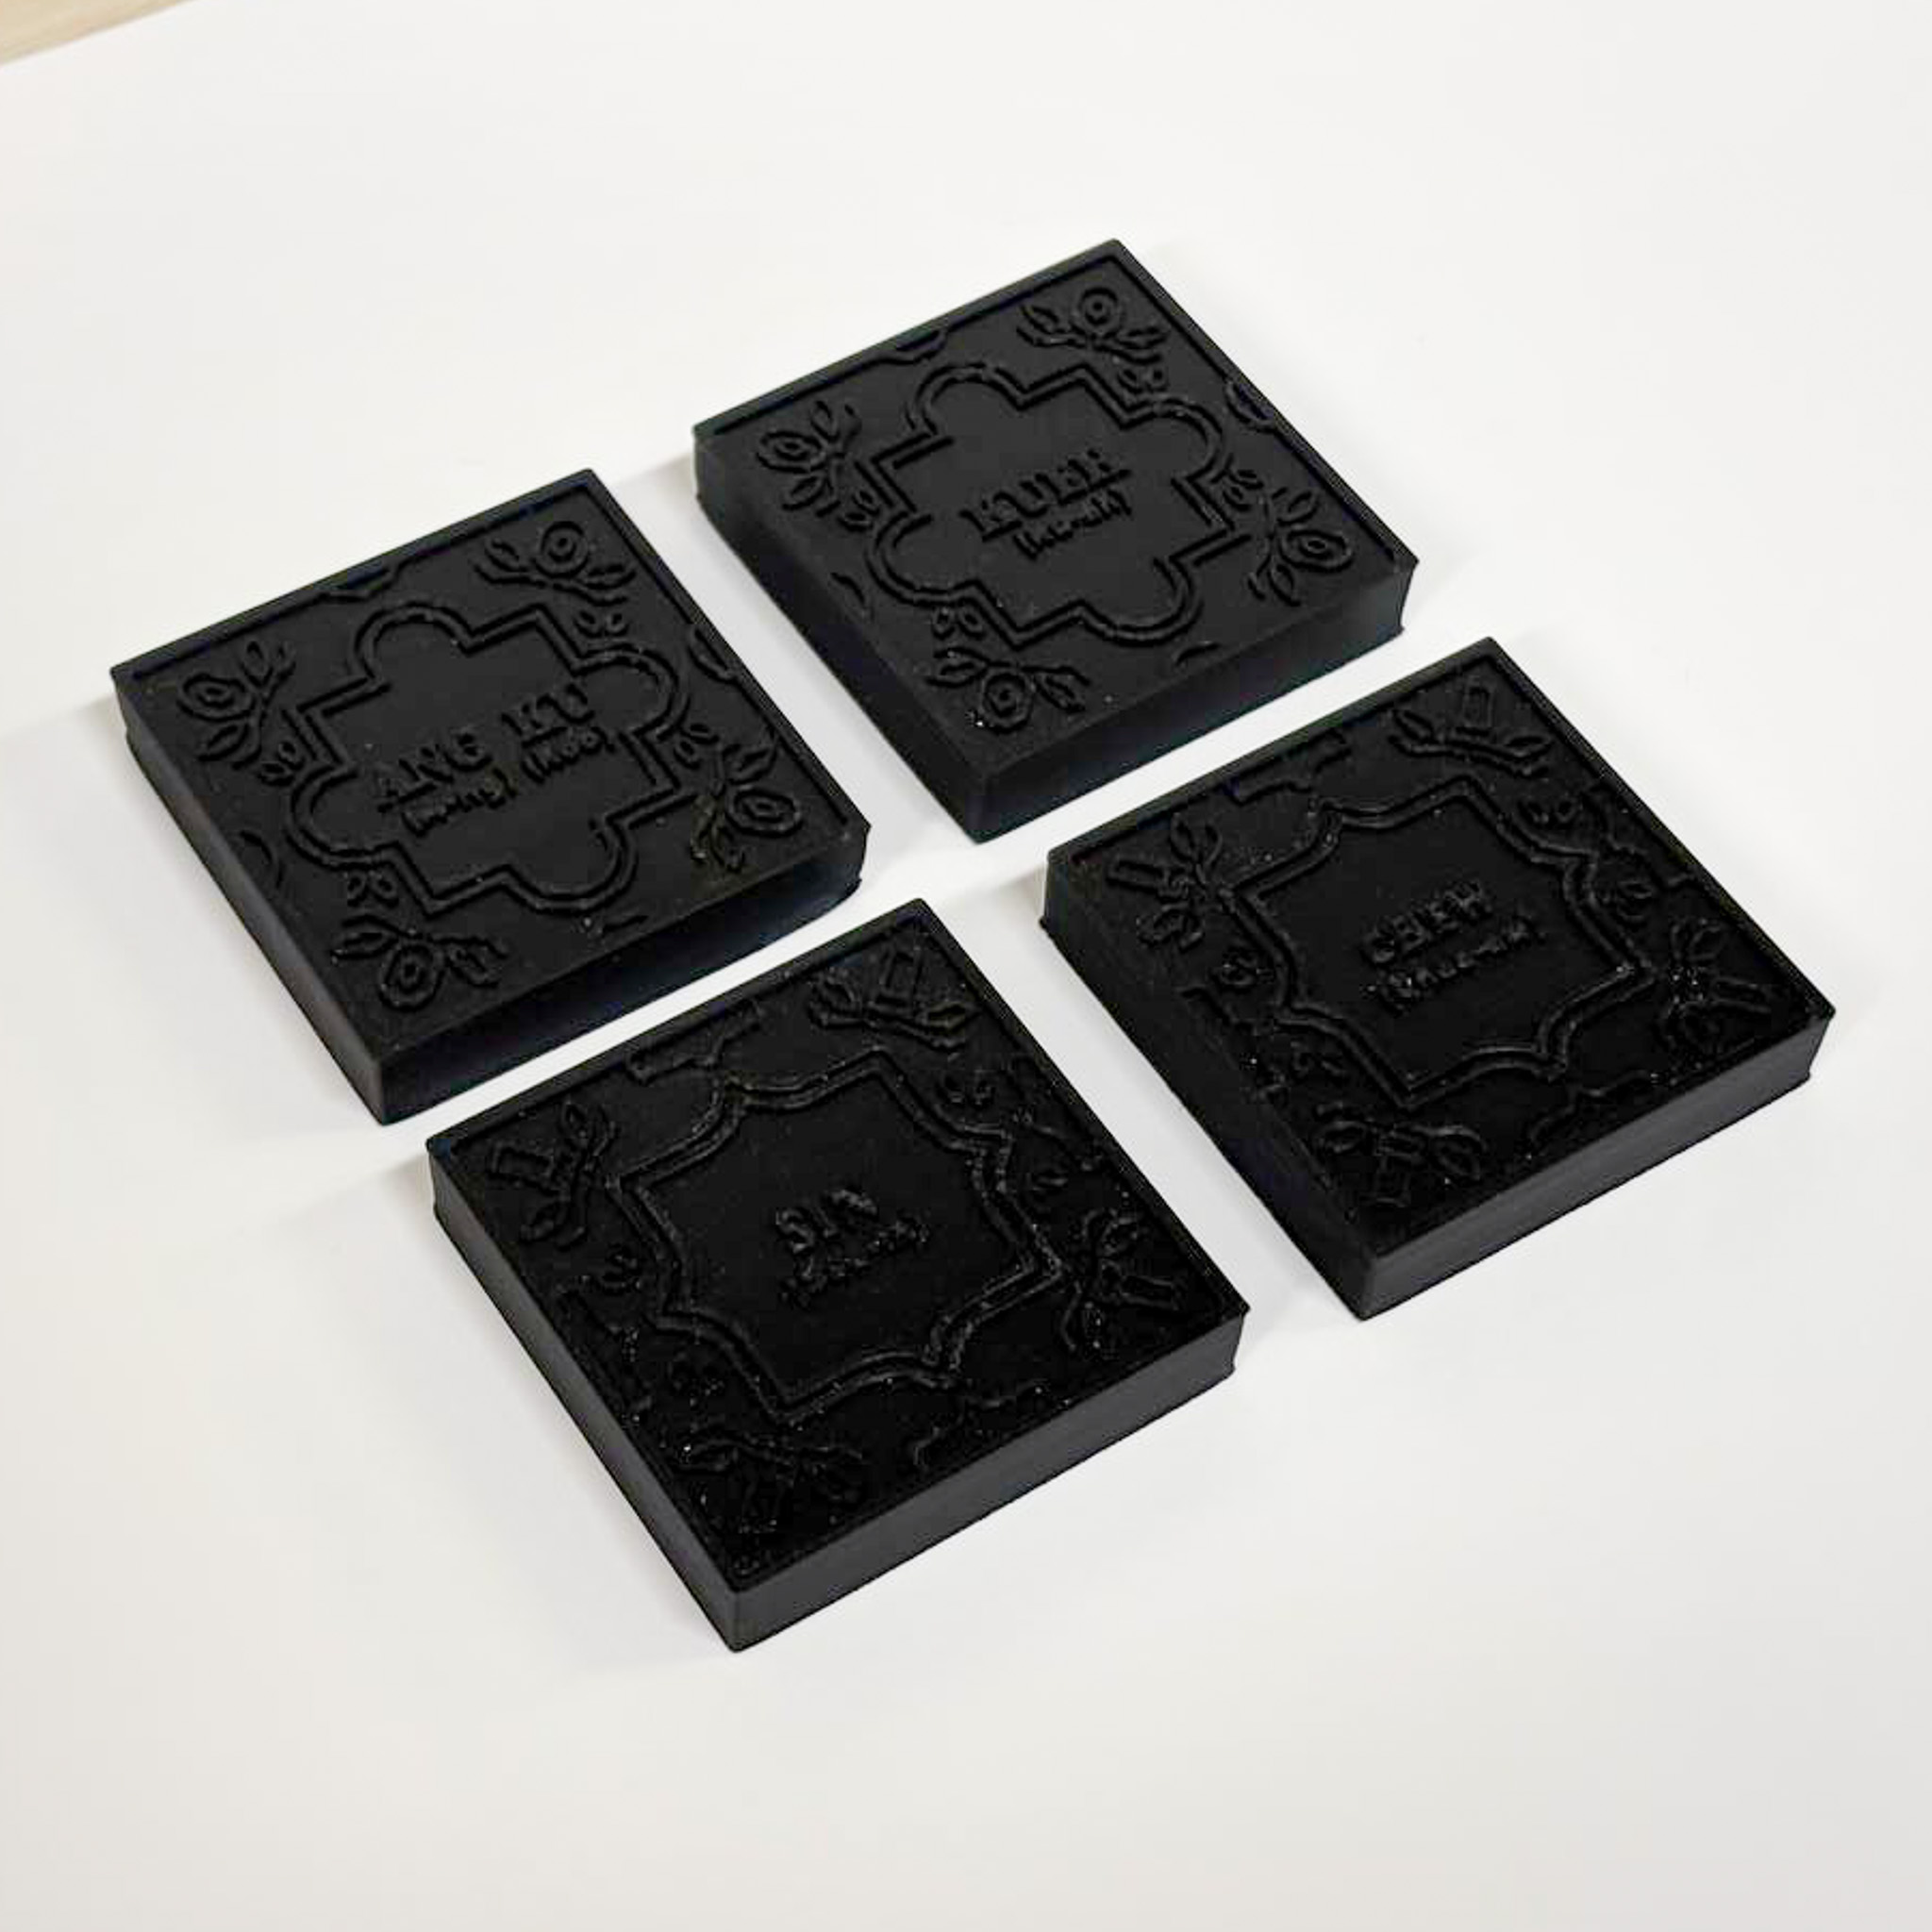
The printed set of tiles (too dark!)
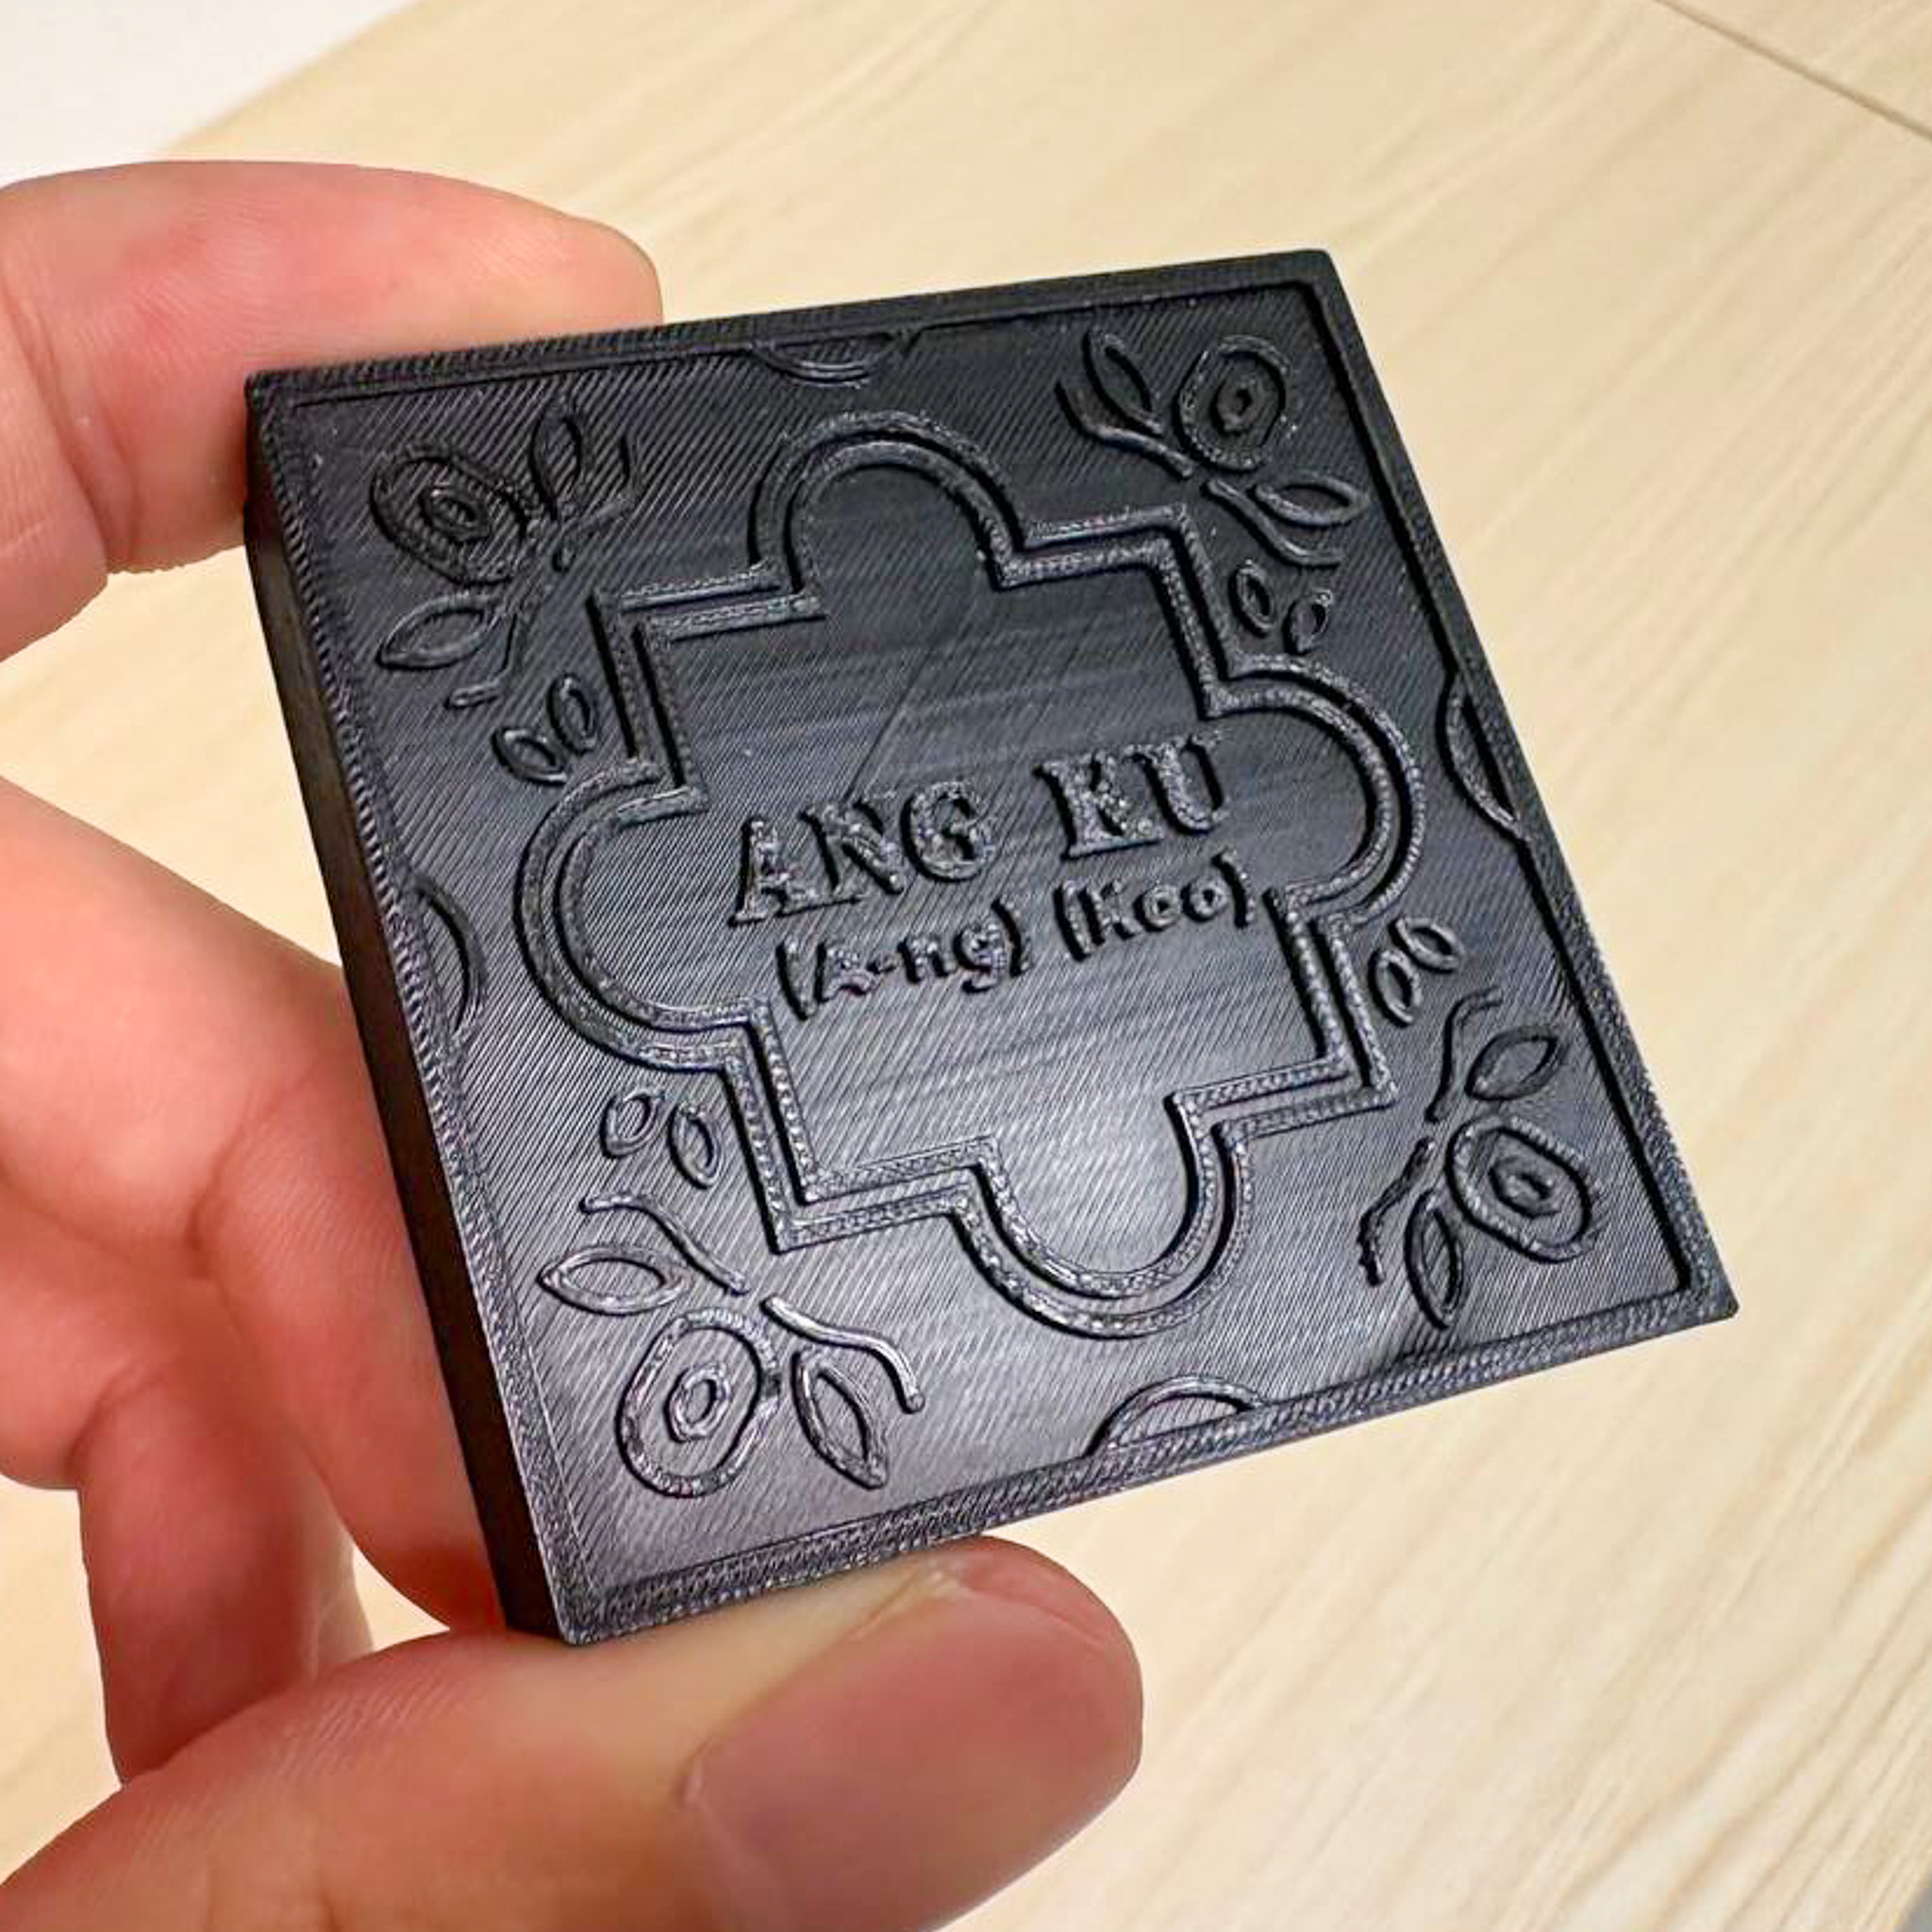
The Ang-Ku tile - text was readable
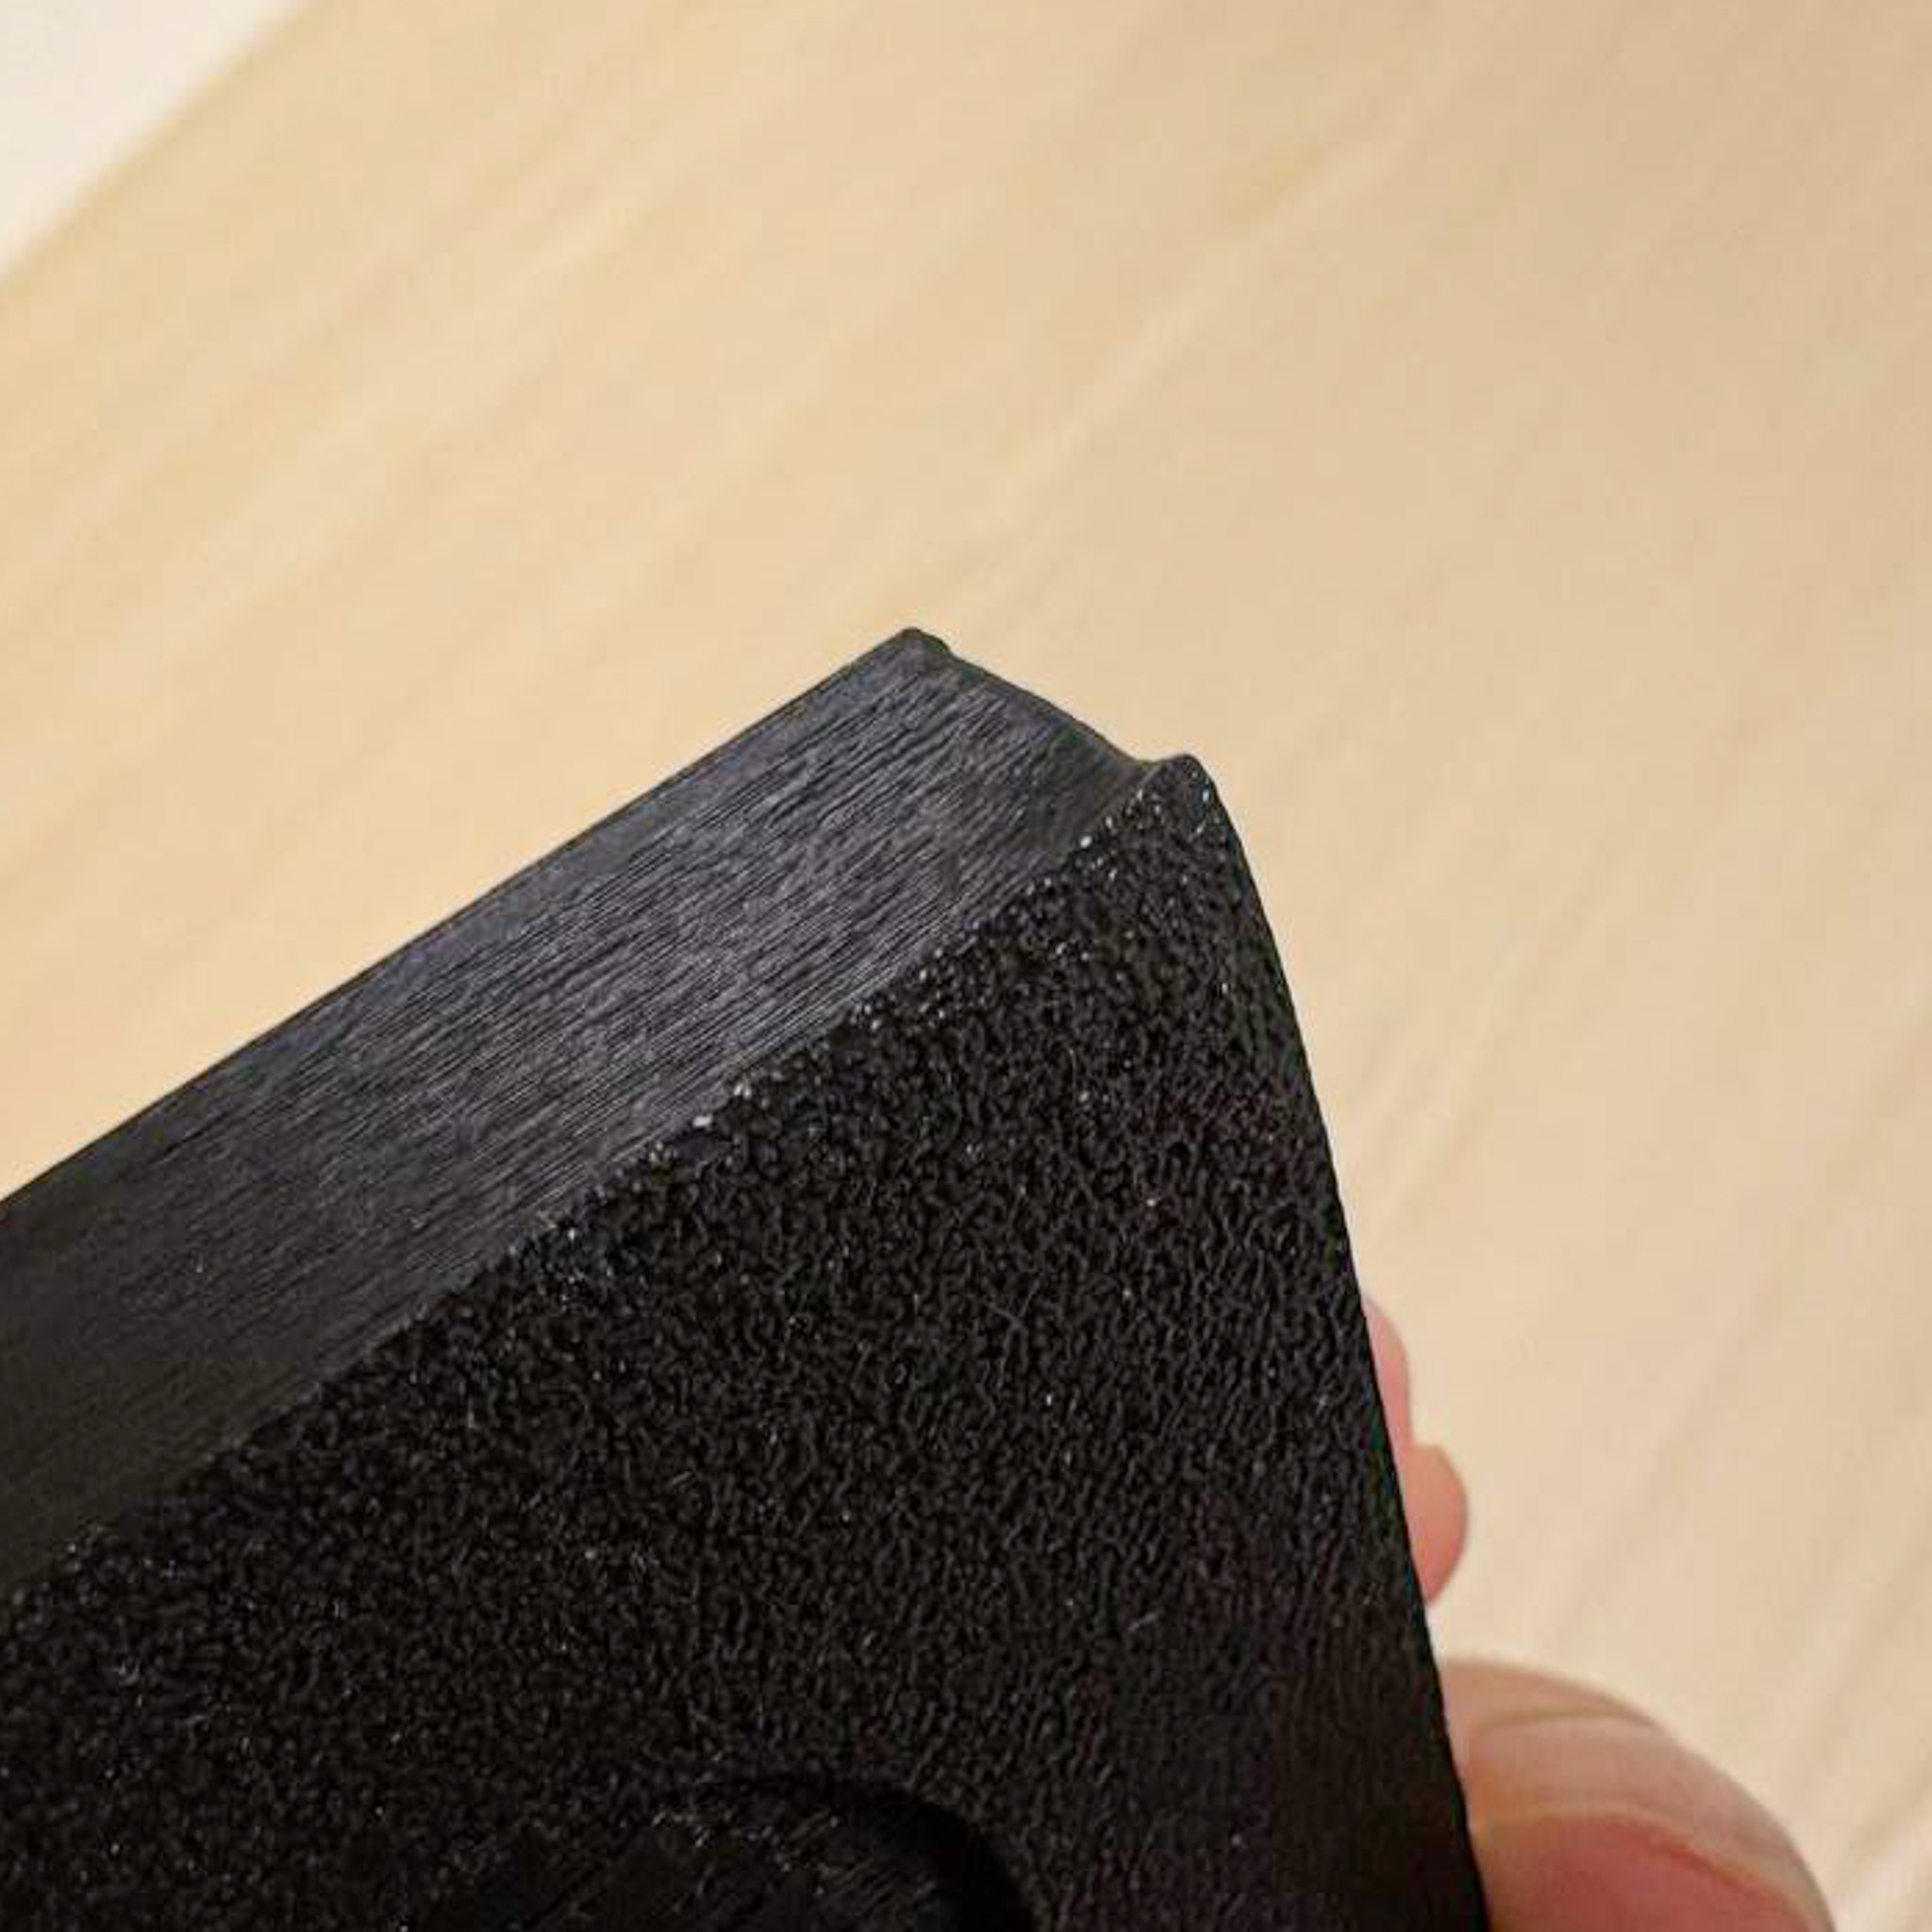
Some warping at the corners
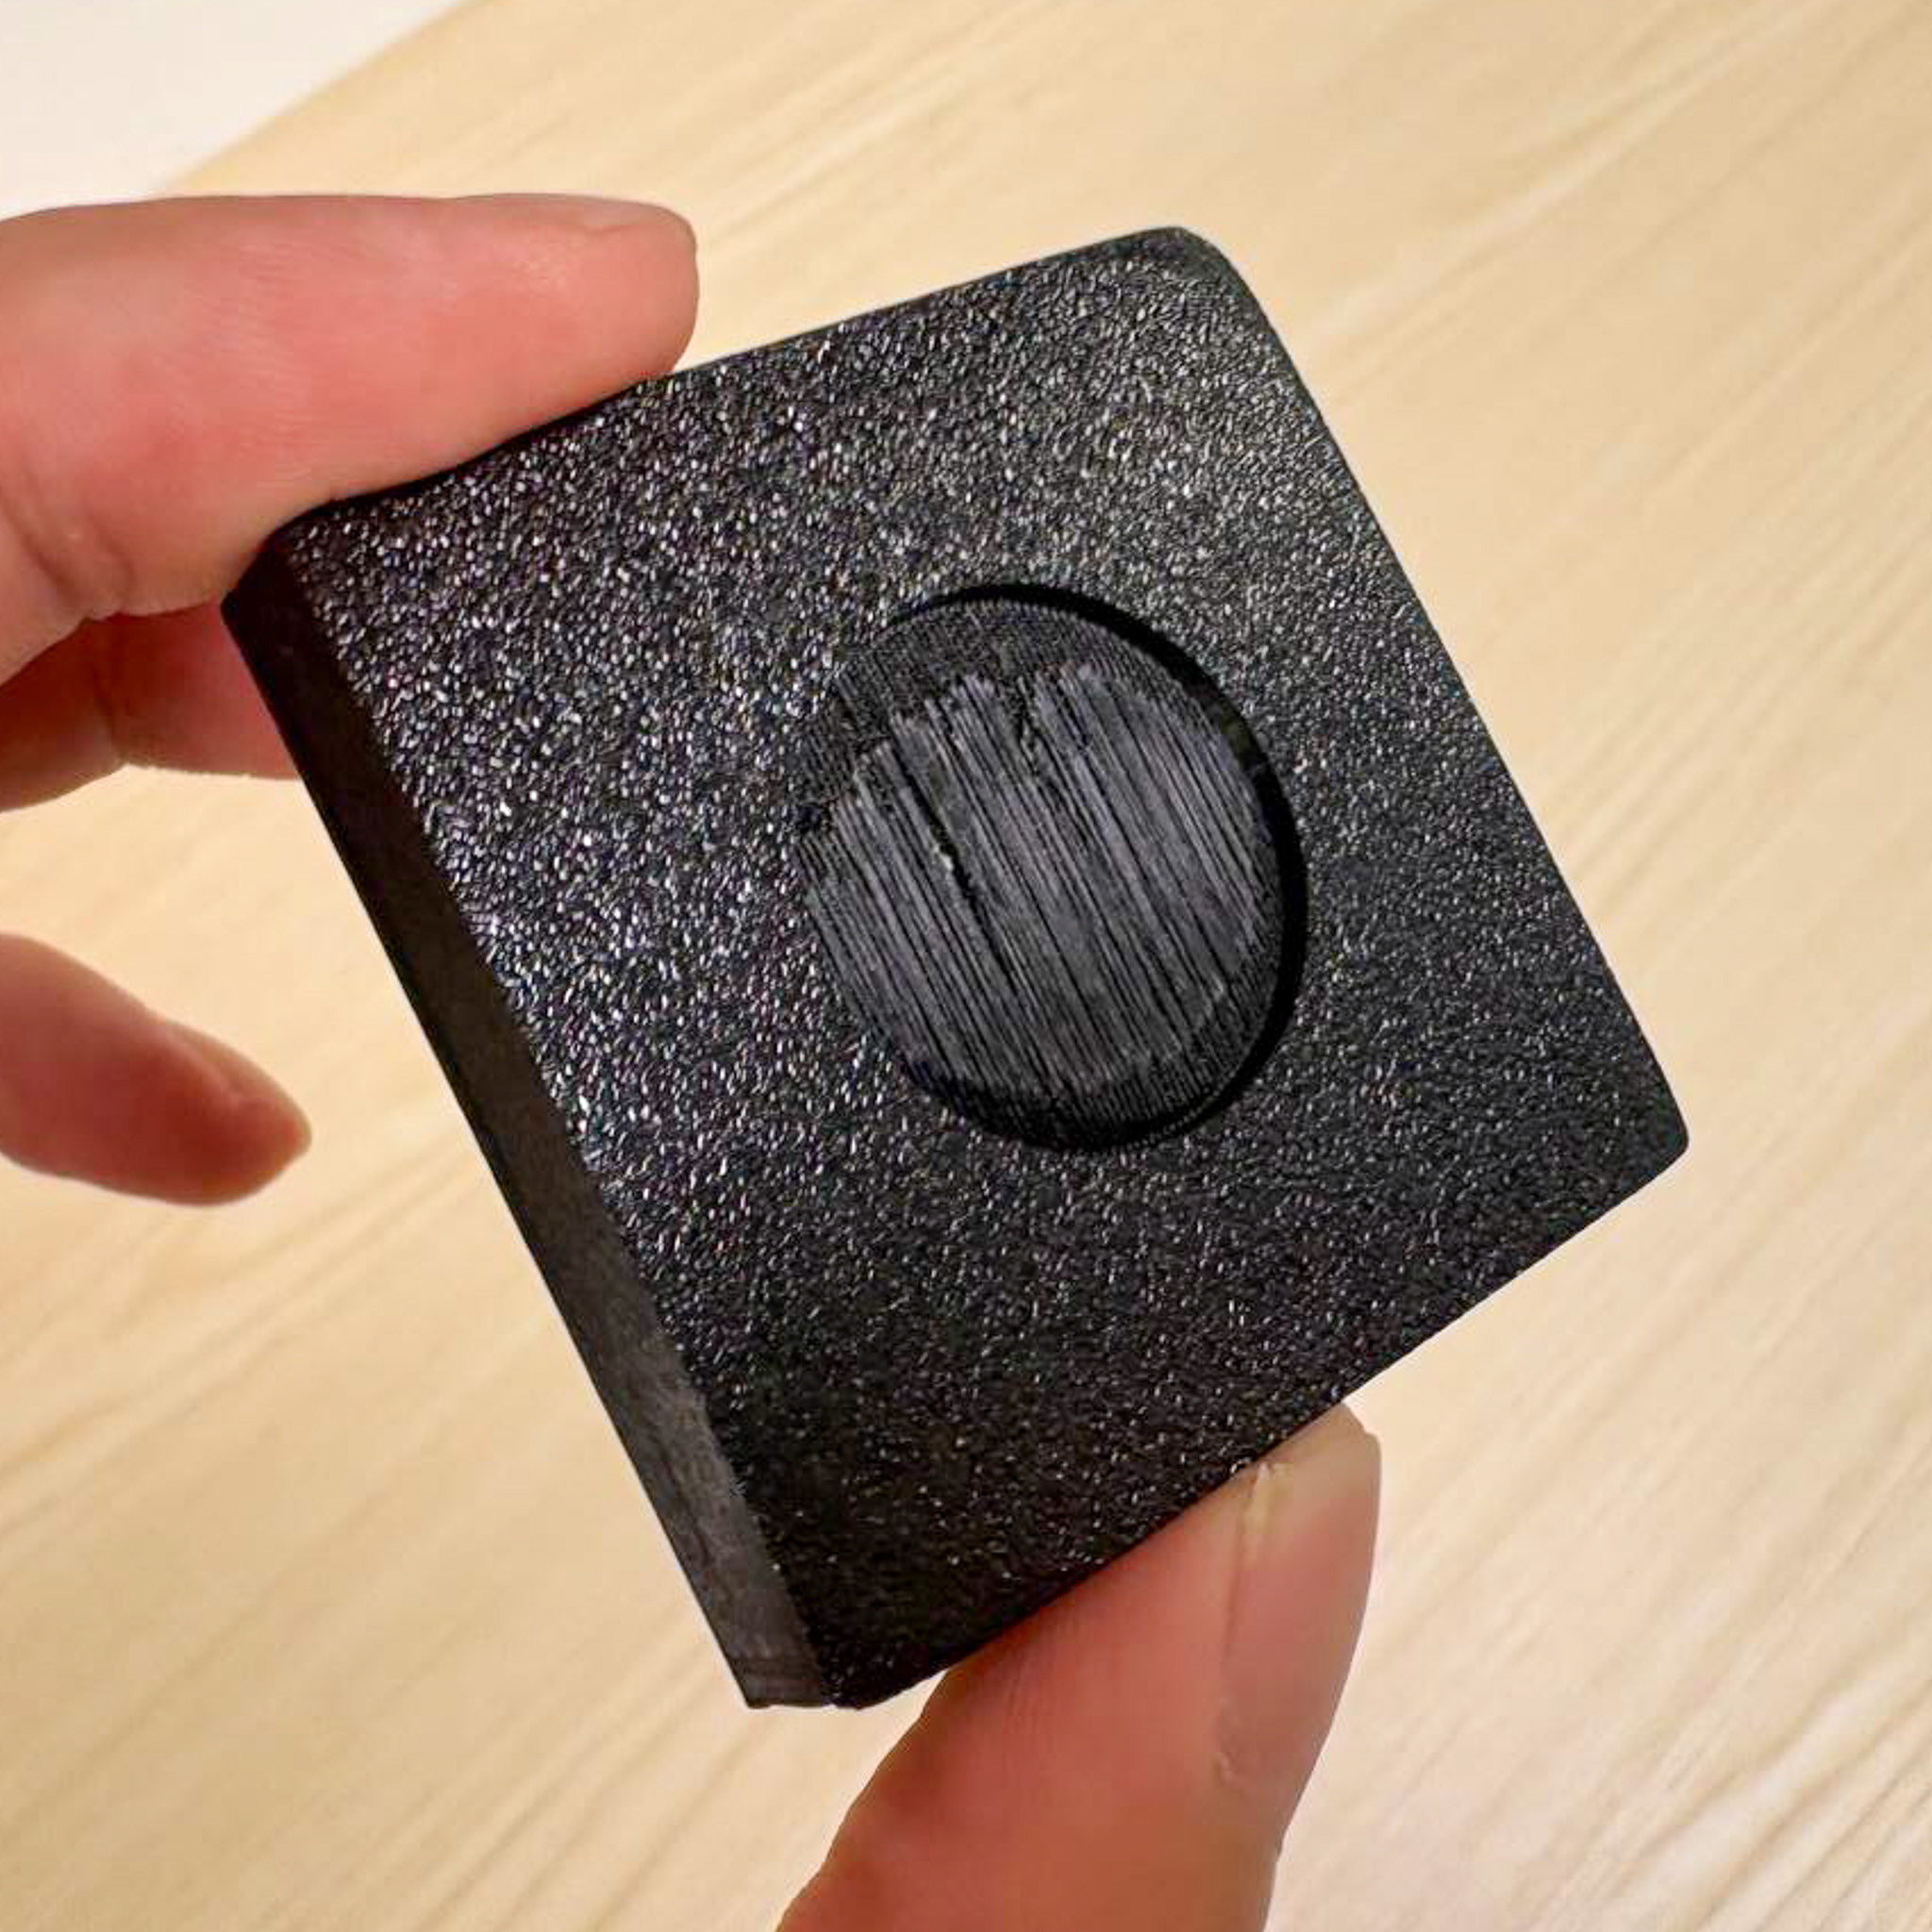
NFC Indents at the bottom for NFC tag
This week I sent the STL files for my modelled language tiles to my friend for 3D printing. I got it back fairly quickly (thanks to my friend) and initially I was quite happy with the results, but I realized that there were much room for improvement. Below are some of my initial evaluations of the print.
As I wanted to 3D print a quick test print, I used the color black but I realized that it actually affects the readability to a considerable extent. Moving forward, I should color the body white and give the raised body a brighter accent color, like red.
Colors aside, I feel that the size and legibility of the words are fine. This was my initial consideration when I did my slicing earlier. All the printed words were not cut off.
The corners of the "Ang-Ku" tile warped quite abit due to the way the prints cooled in the 3D printer after it was printed. This can be solved by printing each tile separately or printing at a lesser volume.
This test print run was really informative for me. The slicing issues and missing words taught me that I should have kept in mind the production constraints of 3D printers during my designing and modelling process, keeping in mind that I should not keep the texture designs too thin. On a positive note, I still liked how they turned out for the first test print. I had a good gauge of how the texture looks like in real life and it actually looks promising visually at the moment! Just need more finesse.