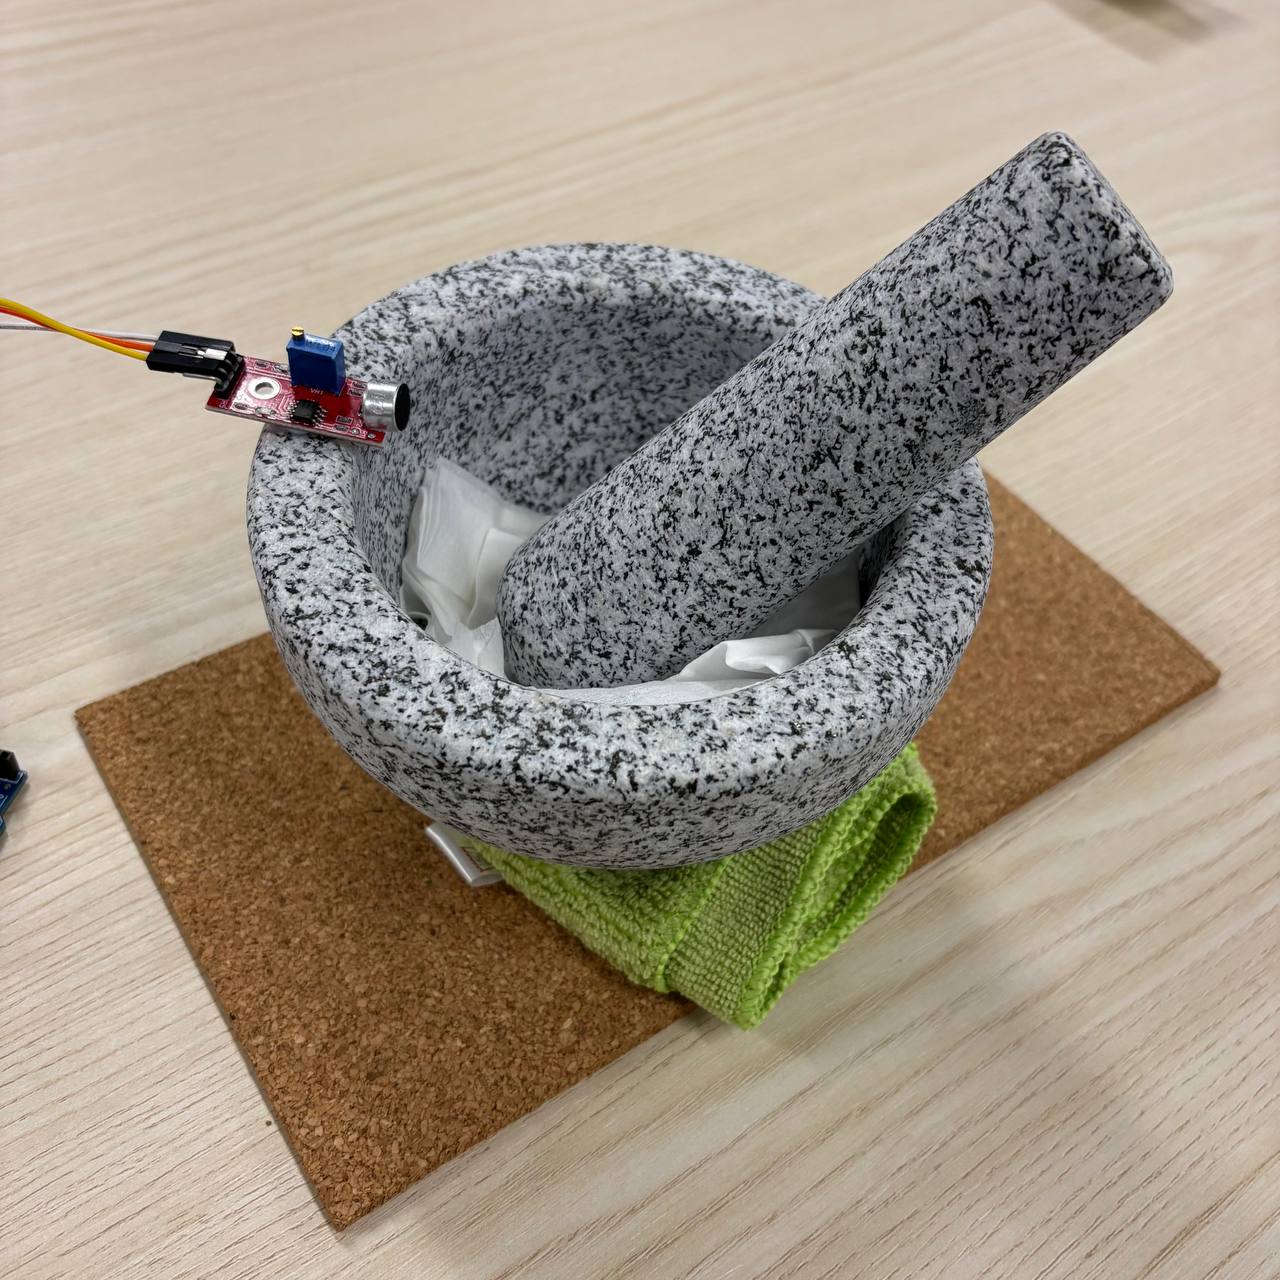
In total, I bought 2 sets of things: (1) the Batu Lesong and some felt cloth to continue on my prototype one, and (2) a monitor screen. For (1), I bought a traditional granite Batu Lesong from a hardwore shop in Little India and some felt cloth which I plan to place within the granite bowl so as to reduce the sound emit from the knocking. For (2), I bought a monitor off carousel as I wanted to have a larger screen to present my visuals on during my interface interactions. With everything ready, its time to continue on from prototype one.

Granite Batu Lesong with felt cloth inside
-
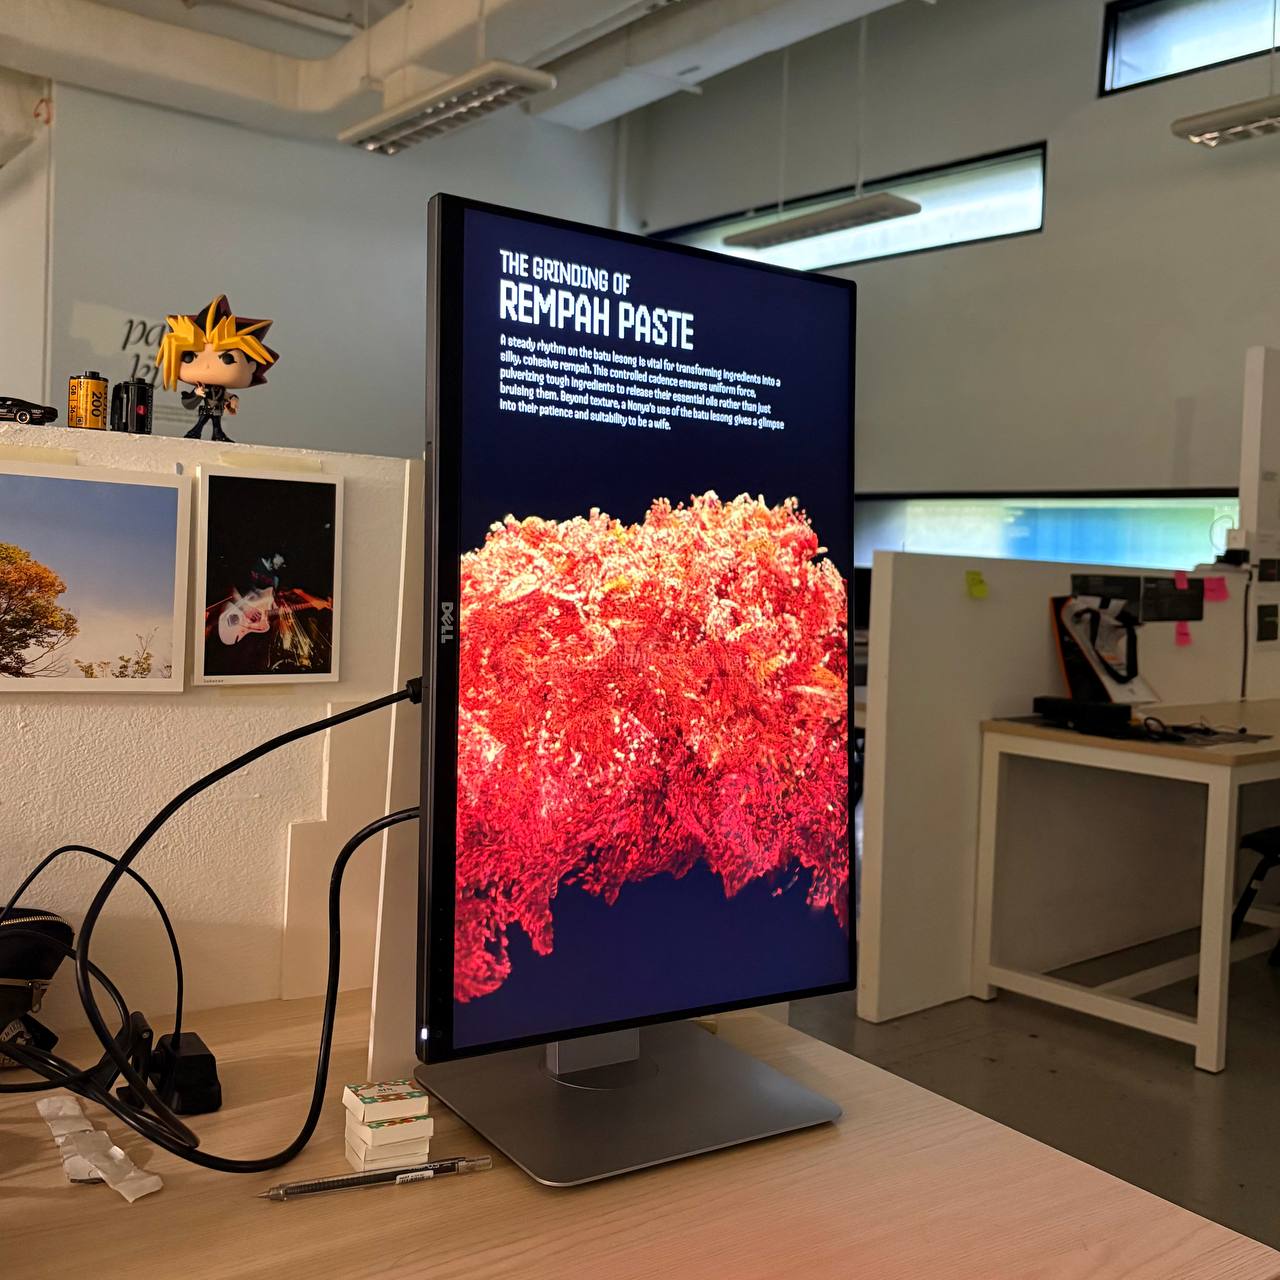
New monitor with sneak peak into new visual
To begin transforming the Batu Lesong into a tangible interface, I needed a sensor embedded onto it.
For this, I chosen the Arduino microphone sensor, where I plan to use the audio data from the knocking
to be transmitted to TouchDesigner through Arduino. I did a very rough set up (before I used the felt
cloth, I used tissue paper instead, placed the Batu Lesong on top of cloth) to mitigate the noise from
the knocking so as to not disturb my peers. I then mounted the microphone sensor at the top of the
Batu Lesong, and plugged it into Arduino and coded it record sound data.
Unfortunately, my
initial
test showed that the microphone sensor might not be very effective as
the knocking produced very negligible data changes (+-10) thus making
it hard to be utilized.
The rough noise-mitigation set up
-
A video of me knocking with microphone sensor
-
Negligible data changes
I wanted to give the microphone sensor method another shot, but this time I will be using my iPhone as a sensor through the app ZigSim. ZigSim is a app where it allows the use of the sensors present within our phones to record data. For example, I can use my phone's microphone to record the audio level data and have it directly be linked into TouchDesigner by using a OSC IN DAT in TD, which is exactly what I have done. As a result of this change, the received audio data from my phone works very well, giving observable changes in data which makes it easier to manipulate and utilize. I believe the reason is because iPhone's microphone is better and picks up more sensitive data.
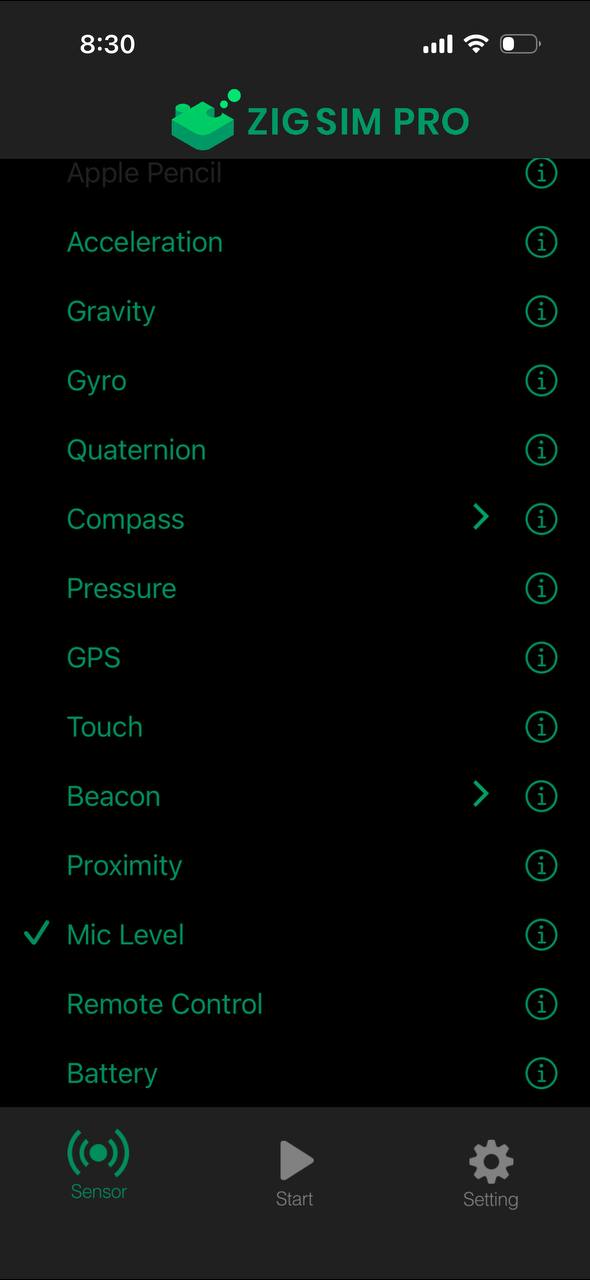
The available sensors in ZigSim
-
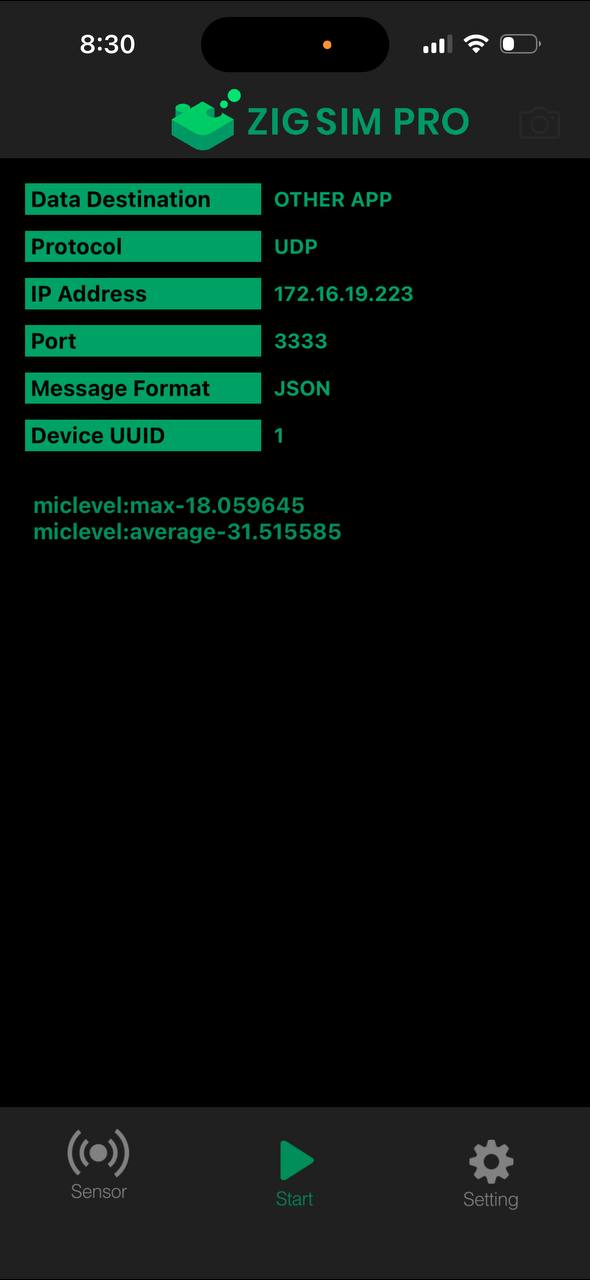
Page showing Mic sensor's audio data
-
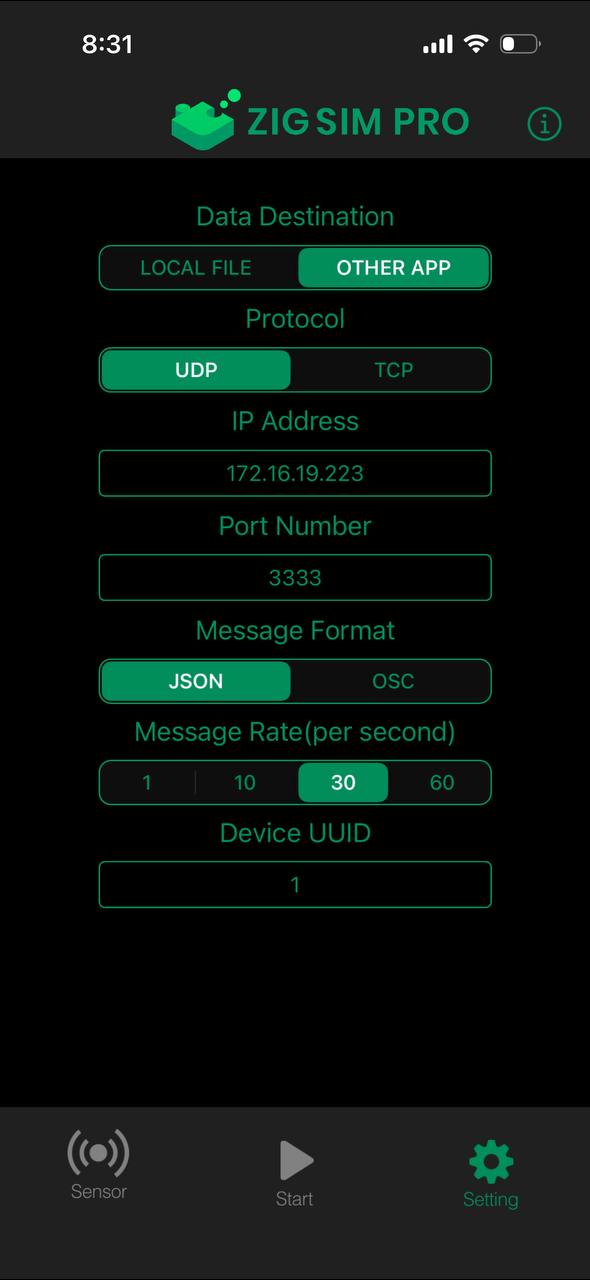
Settings page where I can configure message rate

Receiving audio data from ZigSim, giving observable data changes when Batu Lesong knocking sound is detected
-
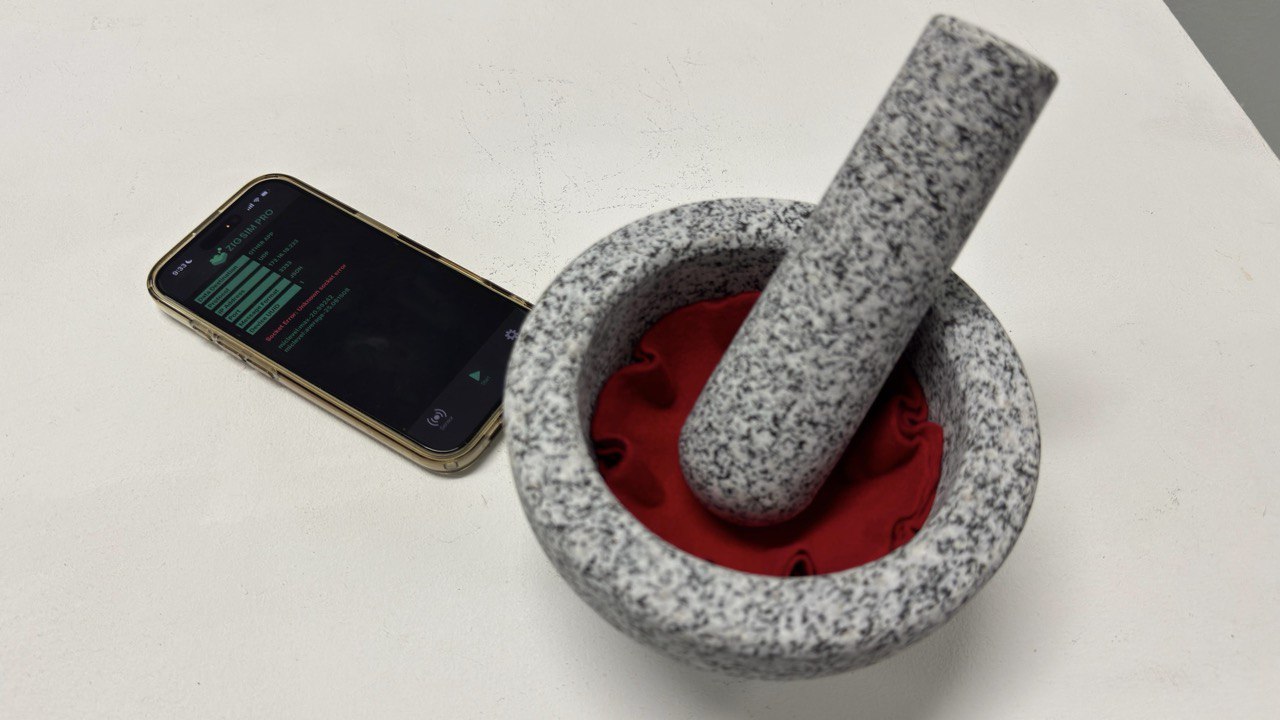
Placed my iPhone microphone at the base of Batu Lesong
Following the previous week's evaluations, I decided to work on redesigning the visuals using particles instancing. To start off, I wanted to have a reference image of rempah paste to base my visuals on. However, as stock images did not have the perspective I want, I instead AI generated the reference image with Gemini AI to get a top down, textured shot of the rempah paste. It looks really close to the real thing and will work effective enough for the next step. I imported the image in with moviefilein TOP in TouchDesigner and used the colors and exposure of it as the reference points for the formation of the particle instancing. I broke down the particle instancing process into three digestible steps for reading.
I extracted out the brightness and color data from the image. The brightness data helps establish depth in the particles as brighter areas will be instanced at a higher vertex while darker areas will be lower. As for the color, it's just to color the visual similarly to the image
I added some random POPs to randomize the position of each point just to make it more dynamic. I also added a noise POP which similarly to the previous iteration, introduces dynamic transformation and distortions which is crucial to the visual transformation from coarse to smooth.
I connected it to a Copy POP and made it so that a organic shape is copied at the points according to the brightness data, thereby creating the final visual.
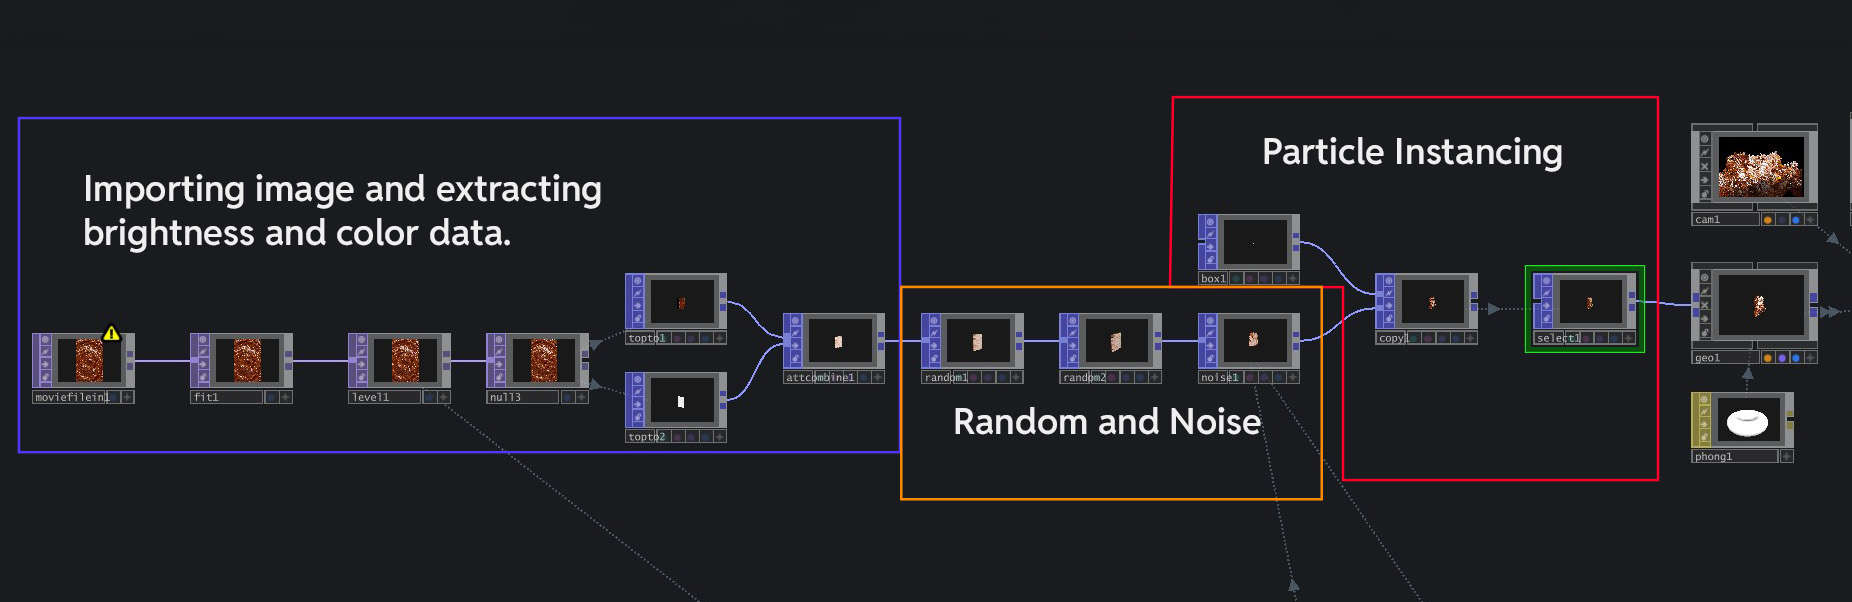
The TouchDesigner node network for this new visual
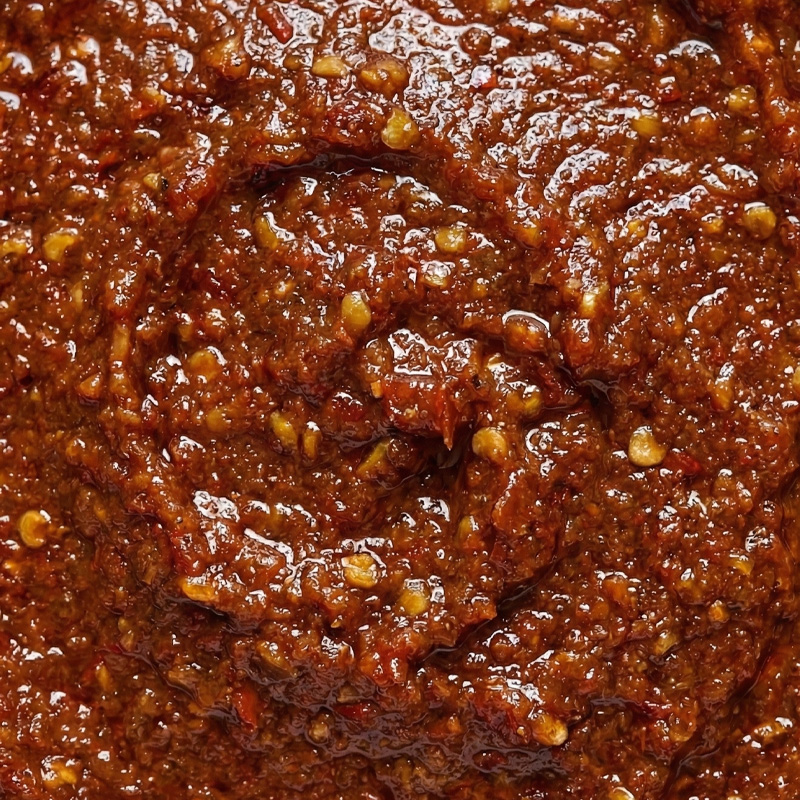
AI Image of Rempah

"Coarse" state of digital rempah
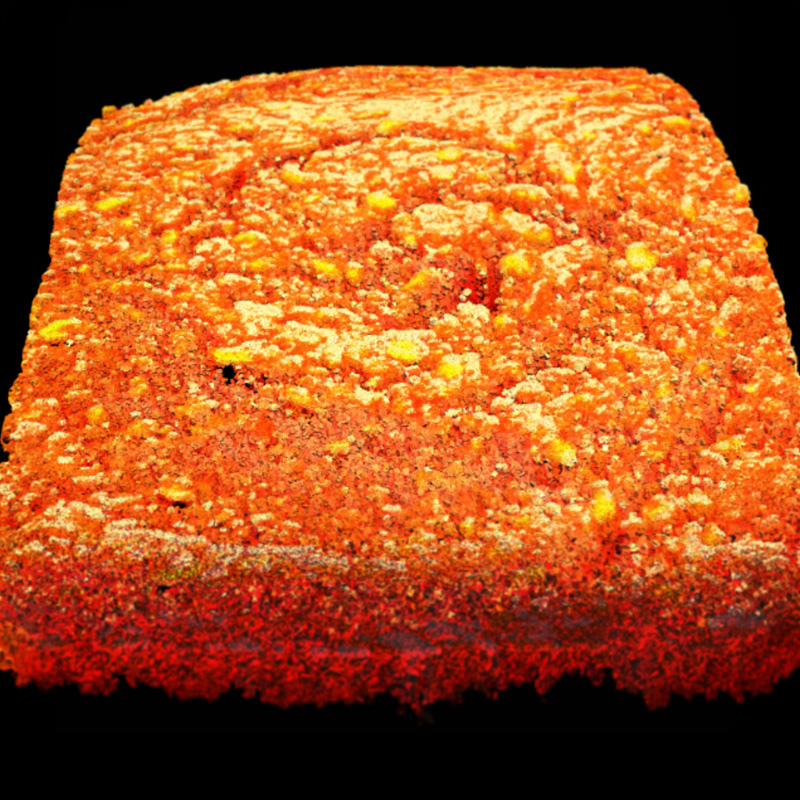
"Smooth" state of digital rempah
Recalling that the interface is about Embodied Learning, I wanted to enhance the learning effectiveness of this experience by adding a mini challenge where users have to follow a consistent rhythm that is not too fast or too erratic in order to smoothen out the digital rempah. Failure in establishing a consistent, medium paced rhythm will cause the digital rempah to remain in its "coarse" state. Therefore, I needed to code a rhythm counter that tracks user's knocking pace. For this portion, I had some technical difficulties in coding this aspect, thus I had the help of Miss Joanne Ho to lend me a helping hand (Thanks Jo). Similar to above, I broke it down to digestible steps for reading.
To start, I added a Serial DAT to receive data from ZigSim's microphone and converted it into CHOP data for me to manipulate. I attached a Trigger CHOP to this data so that each knock from the Batu Lesong will be registered as one input.
This is the main meat of the counter code. The Count CHOP receives input from the earlier Trigger CHOP and determines how many knock is needed to complete the cycle. The secondary Trigger CHOP below refreshes the Count if users knock too fast, thus prompting a restart.
The Count CHOP's data is then connected to another Trigger CHOP (so many triggers lol) that set's off the whole network of animations, such as the visual transformation of the digital rempah and the notification pop ups.
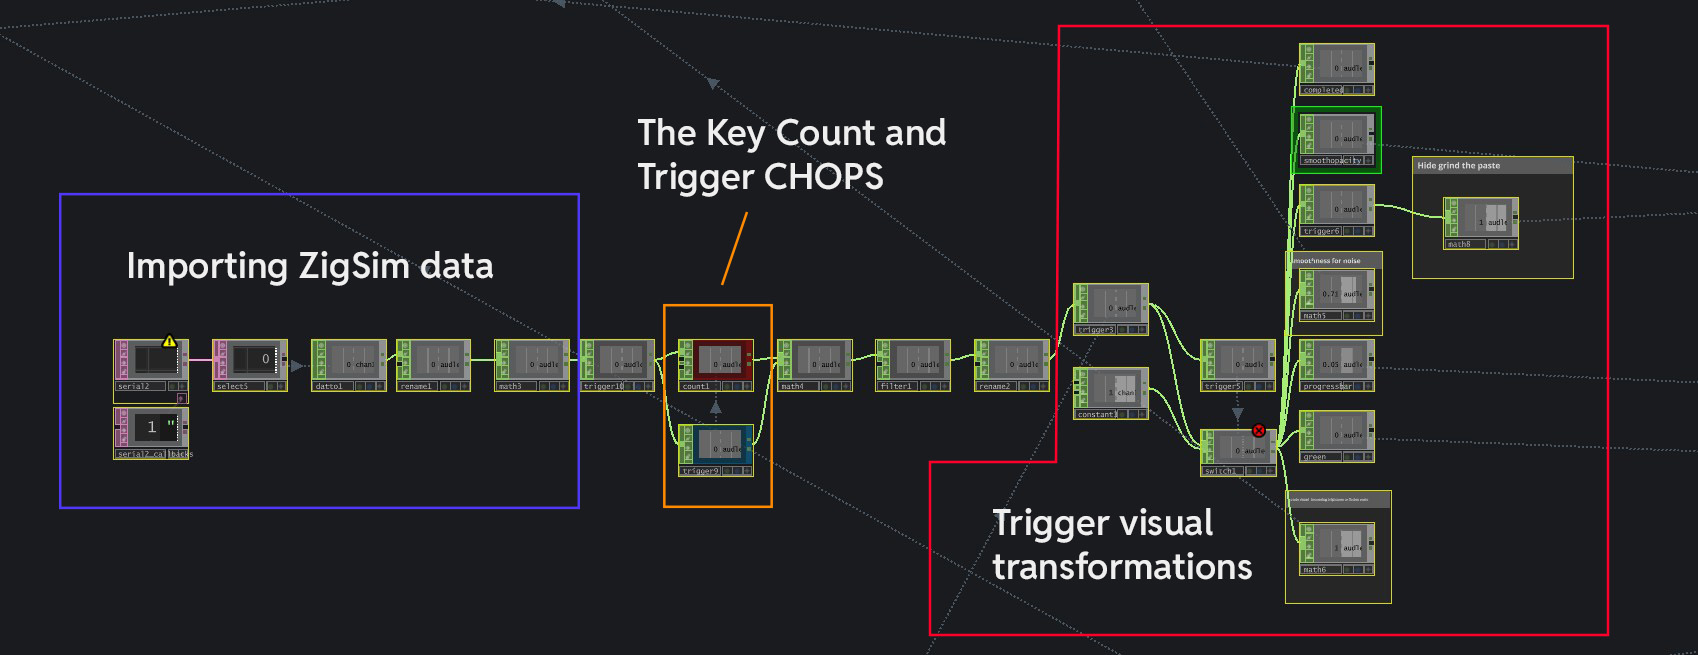
The series of nodes for this mini challenge
To further guide users within their experience with this Batu Lesong interaction, I added some pop-up notifications and a progress bar as a form of visual feedback. Below shows a clear breakdown of the items that I have added.
I added two notifications: (1) too fast pop-up that notifies when a user is knocking too quickly, and (2) a completion pop up to let people know that they completed the challenge. The former is to guide user's on their pacing while the latter is to let them know when to stop.
A progress bar is added as well to indicate user's current rempah grinding progress. The bar progresses as users keep to a consistent rhythm and regresses when user's go off pace.
I also added a instruction pop-up with a screen that tells users to "Grind the paste with a consistent rhythm" at the home screen. This is to inform users on how to approach the interaction.
I added these User Interface visuals by creating rectangles and texts with Text TOP and Rectangle TOP. After sizing them, I added a Level TOP that allows me to control the opacity of these components. To activate them, I just created some Trigger TOPs that reacts when user input is detected, thus increasing the opacity of these components and making them "Pop-up".
-
The Current Outcome
I presented this new iteration of my prototype two to Andreas and obtained some feedback. To summarize, the prototype still had some issues at its current state, ranging from the usage of the granite Batu Lesong as the input interface, as well as the visual currently. I listed down the main feedbacks below.
Andreas brought up a good point on the noise concern with regards to the use of a granite Batu Lesong in a museum space. The Batu Lesong's generates quite a audible knocking sound, which can be heard within a entire room. Thus, the use of felt cloth is not enough and I will need to fully replace the Batu Lesong to another physical body.
A major usability issue lies in my use of ZigSim's microphone sensor. As ZigSim was placed near the speaker where I had ambient music playing (the music for the experience), it also picked up the sounds from there and affected the overall functionality of the interface. Thus, I need to look into other sensors, such as vibration sensor.
Unfortunately, the visuals and its transformations still lacked a interesting twist to it despite the visual overhaul, making the overall experience not visually rewarding enough. So I have to find ways to shake it up even more.
Overall looking at this progress, It does not seem great (lol) mainly due to functional difficulties and visual hiccups. I will look to source for a wooden version of Batu Lesong as wood seems to be able to absorb sound much better than granite. Additionally, I will be swapping out ZigSim's microphone sensor with a vibration sensor (likely piezo disc) so that i am using vibrations from the Batu Lesong as input instead of sound as using sound data can result in inaccuracies due to ambient noises.