FORMATIVE FEEDBACK
Formative Feedback for RPO and Graduation Project
This week we had seperate presentations, one for RPO (tuesday) where we discuss what we learnt from our feedback, and another for Graduation Project, where we set up our table with our current experiments and had Andreas give us some feedback.
For my RPO feedback, Andreas shared with me some important notes for me to look into and amend.
Within my Introduction and writing, I did not define key terms such as Meaning Making and Audience
Engagmement clearly enough. I also did not support it with visualizing examples, thus making it hard for
audiences to understand.
My introduction was focused on my summary of readings instead of my actual research. Thus, the format
was wrong as I need to talk about things such as what is my reseach gap and the significance of my
research.
I didn't define what "Unisensory" meant in my writing. I also did not write about the specifics of the
multisensory interface experiments I am making, such as what variables am I introducing and how do i
assess its effectiveness. I should also consider Research through Design as a supporting framework and
write about prototyping as a method.
There were some recurring issues from the peer review session last week. For example, the lack of definition and examples for key terms was one issue brought up again. The wrong introduction format was another. Moving forward, It's definitely something I want to fix first. I guess largely for me, these issues was due to me still unfamiliar with the format of writing RPOs. Have to revise and review some existing examples of RPO!
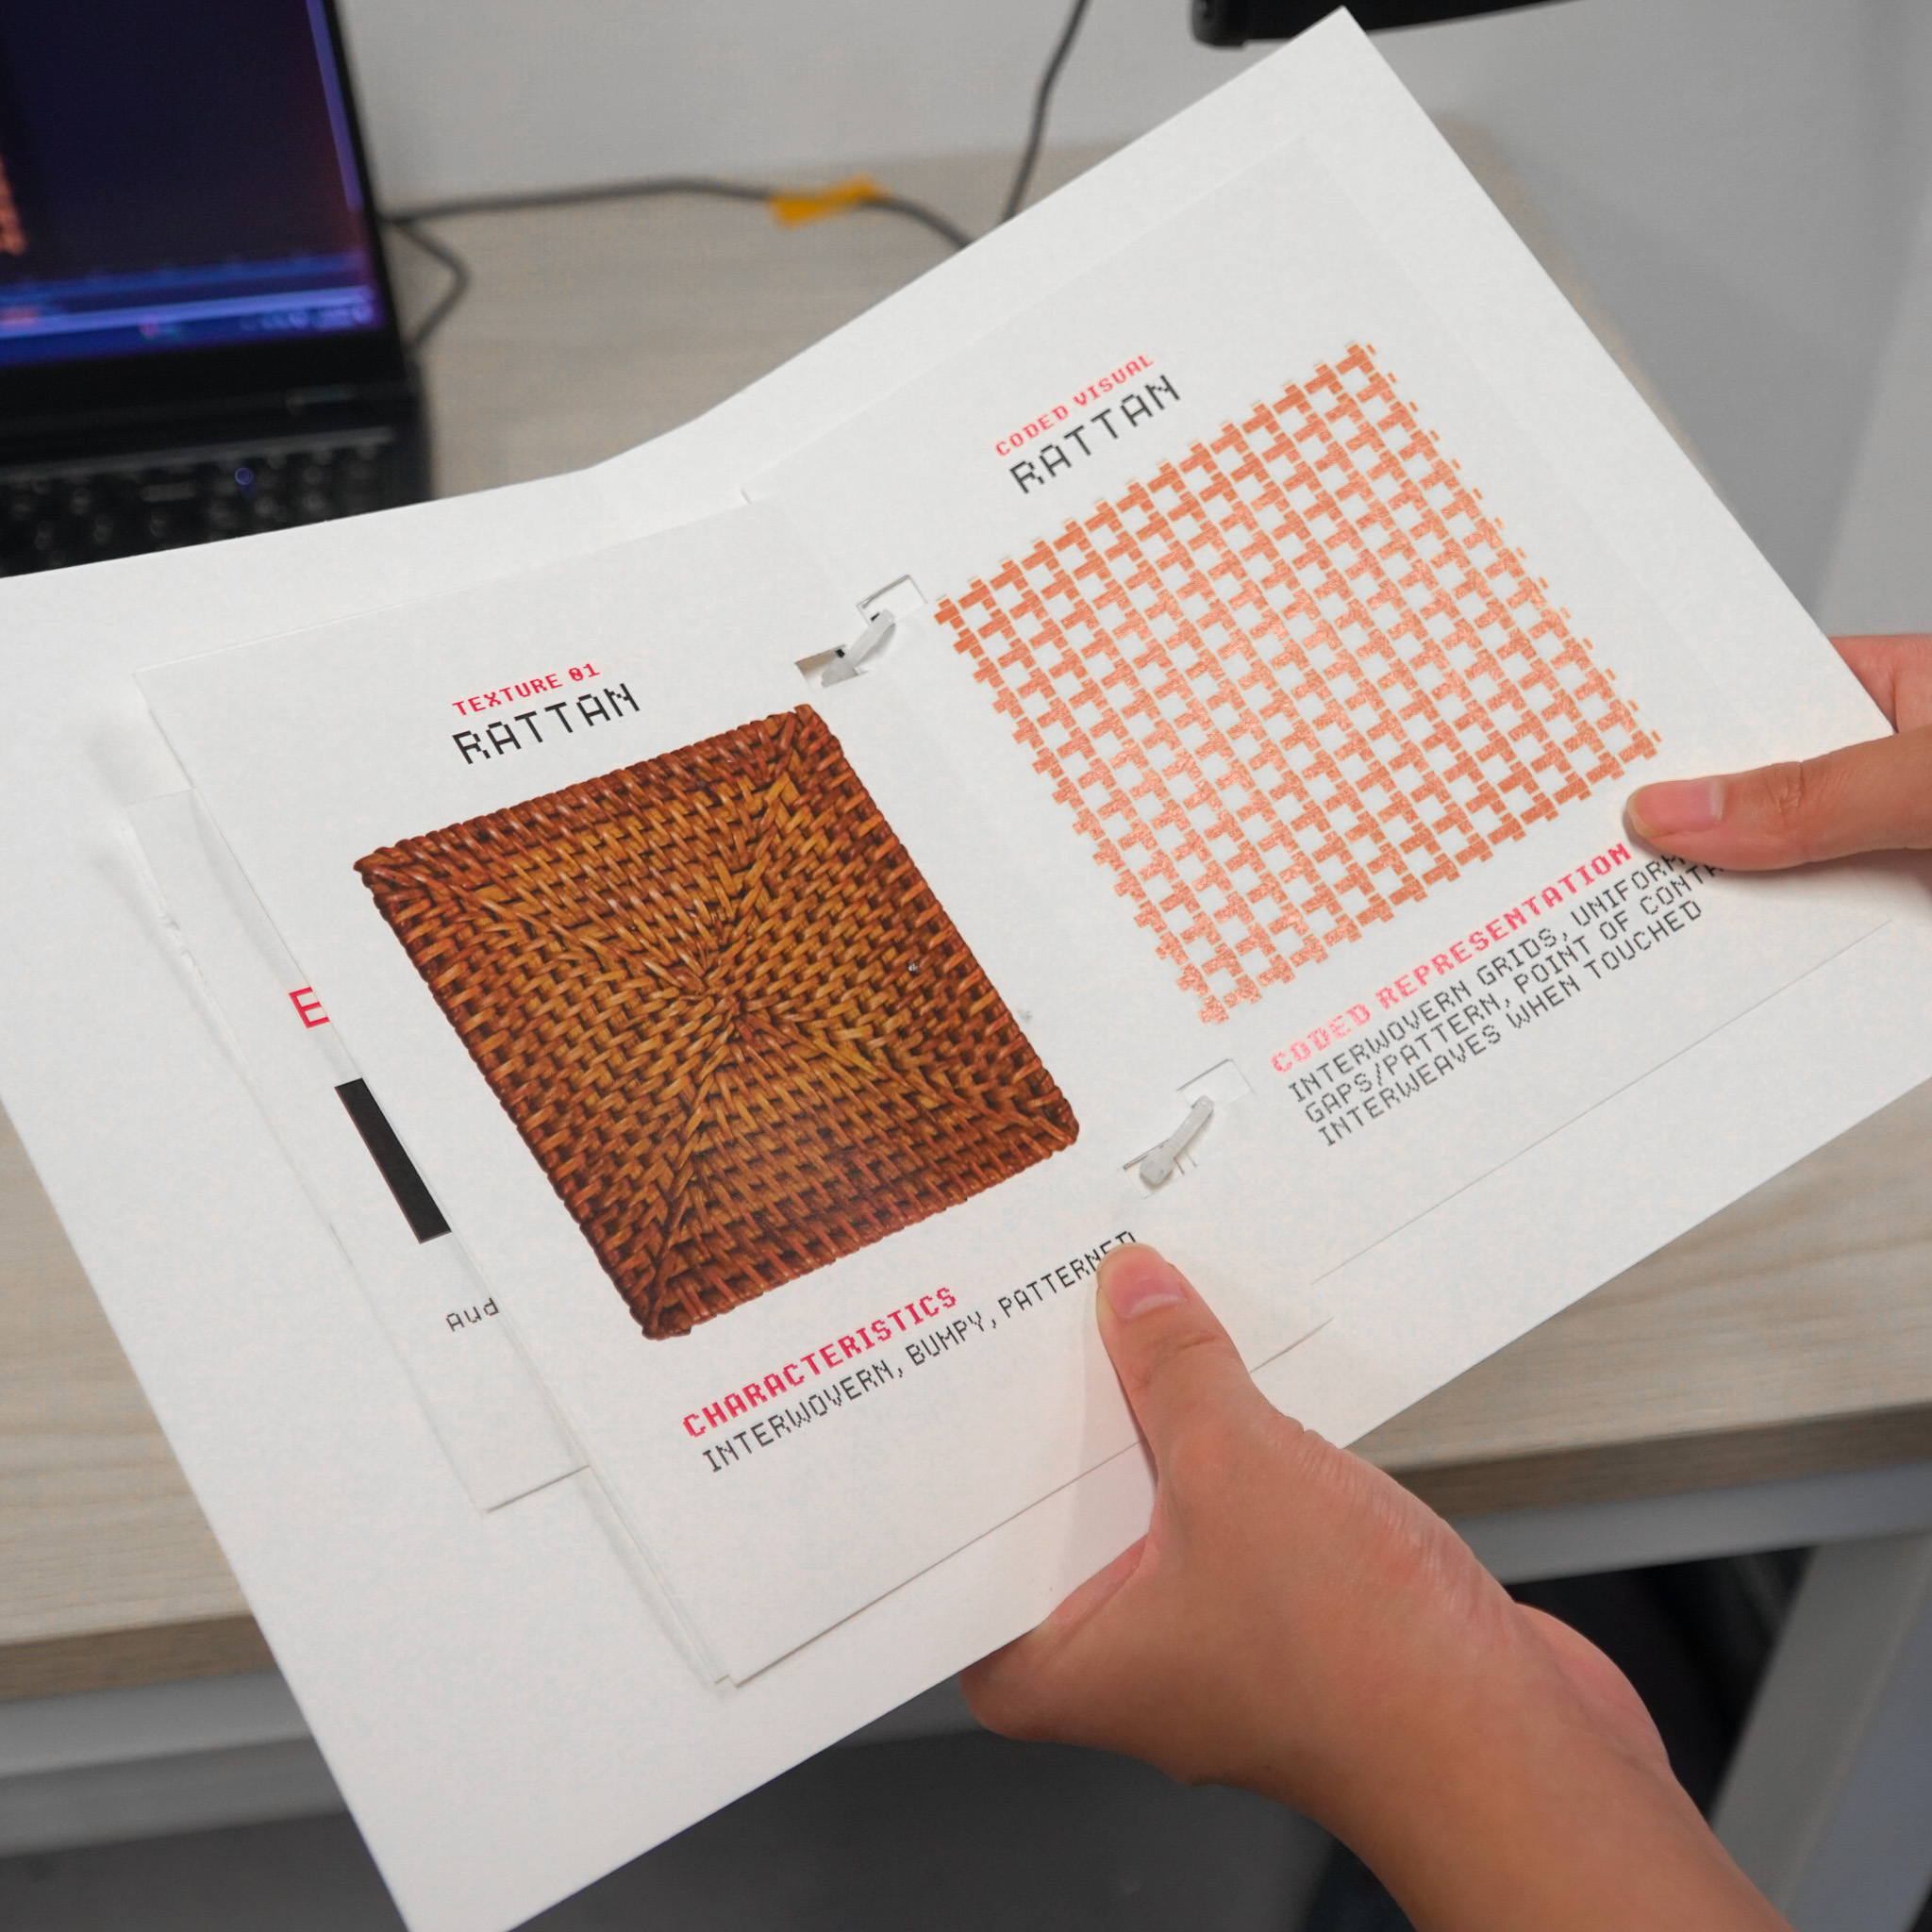
To explore the idea of translating the textures within images into a physical, interactive form. Looking into the question of: How can we touch the textures within a image?
A Touch-Audio interface. A physical square tile, with textures map according to its reference square image, that responds according to where you touch it (I.E touching grass activates grass sounds).
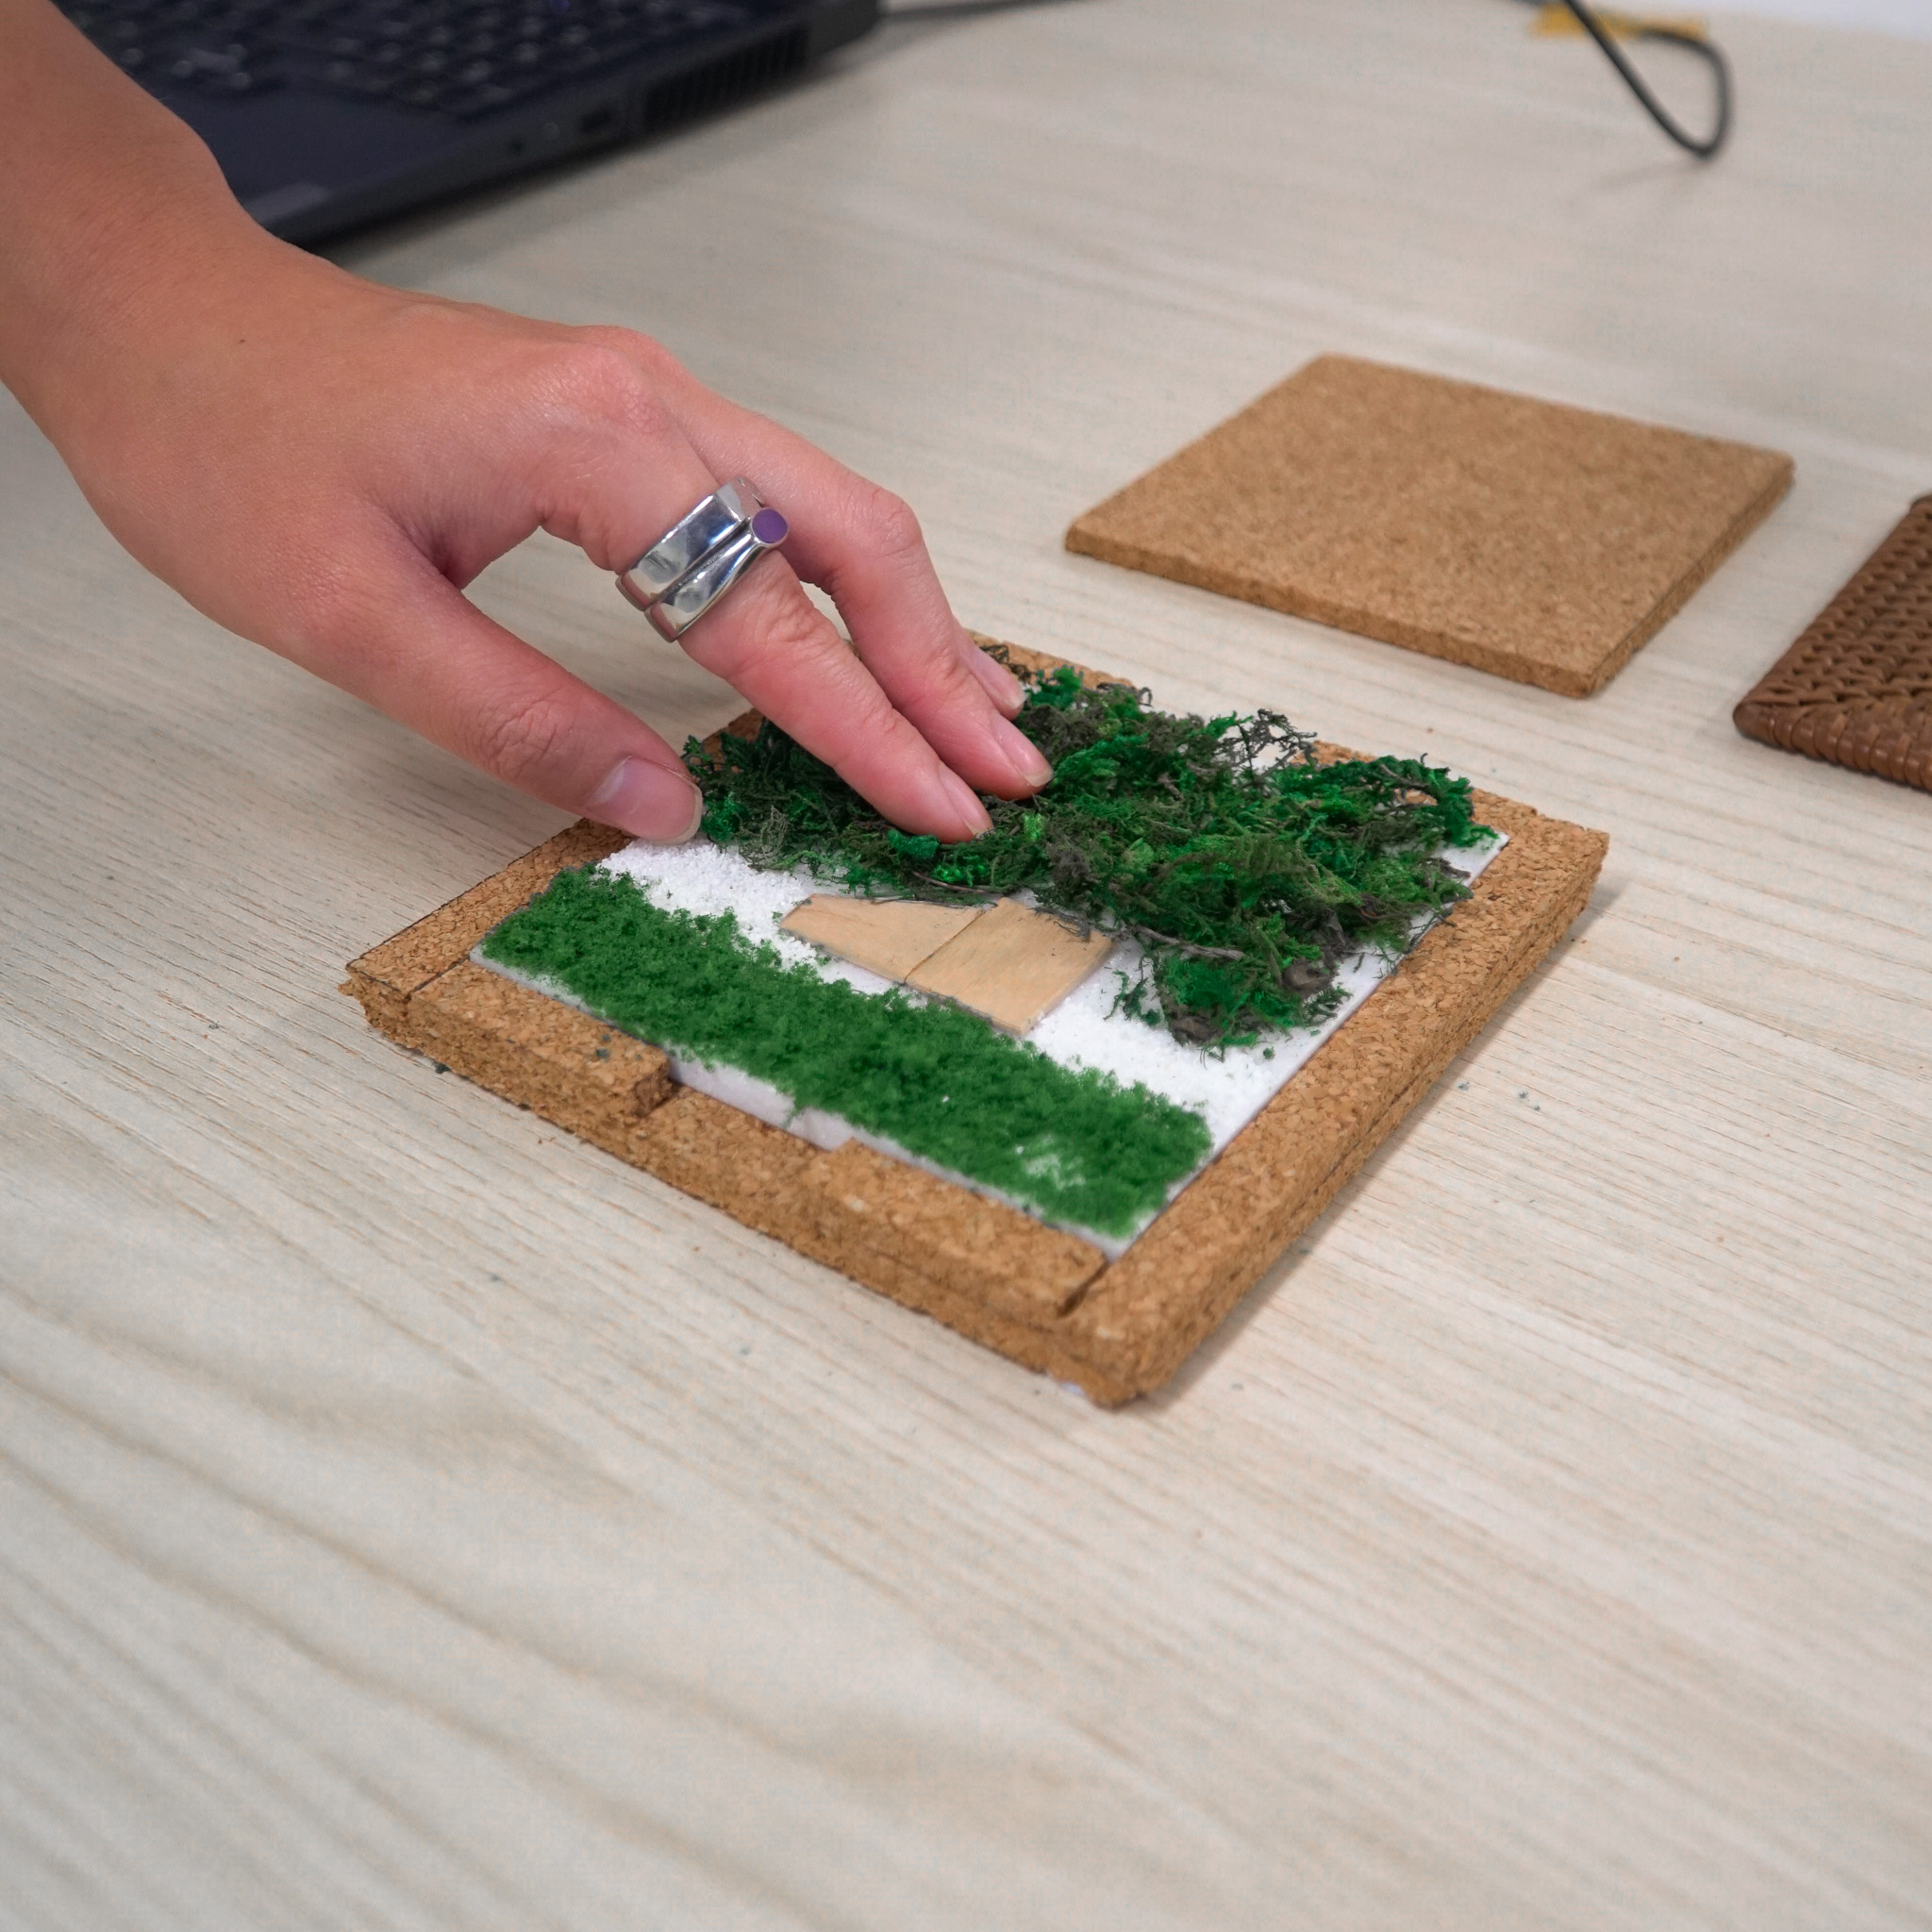
While talking a walk in a park, I photographed a scene of a wooden bench, sitting within a pile of sand thats surrounded by grass and leaves. The entire scenery felt serene and calming, filled with interesting textures. I wanted others to feel a similar feeling of what I felt, to be able to listen to the scenery and touch its environment, not just view it through a photograph.
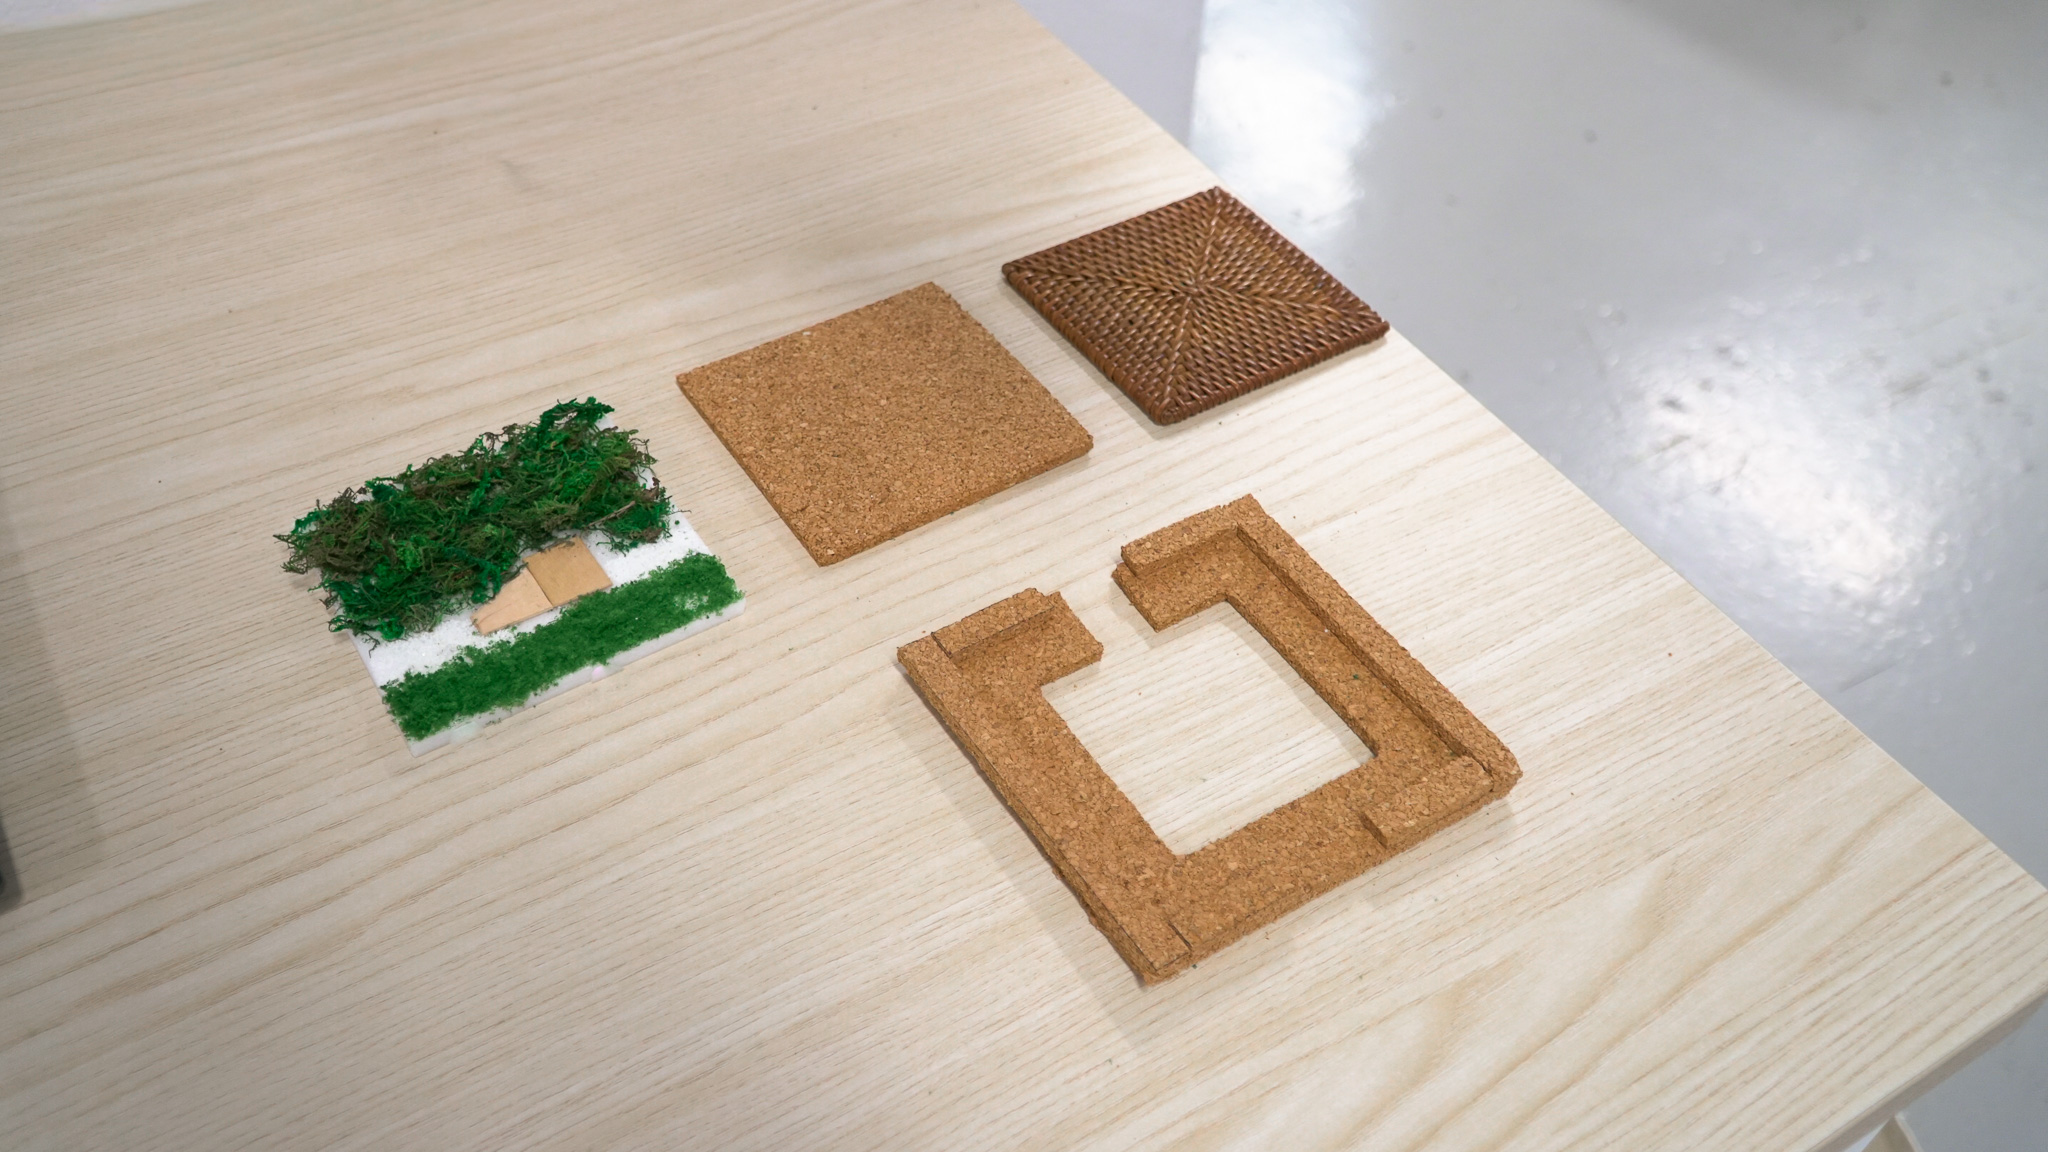
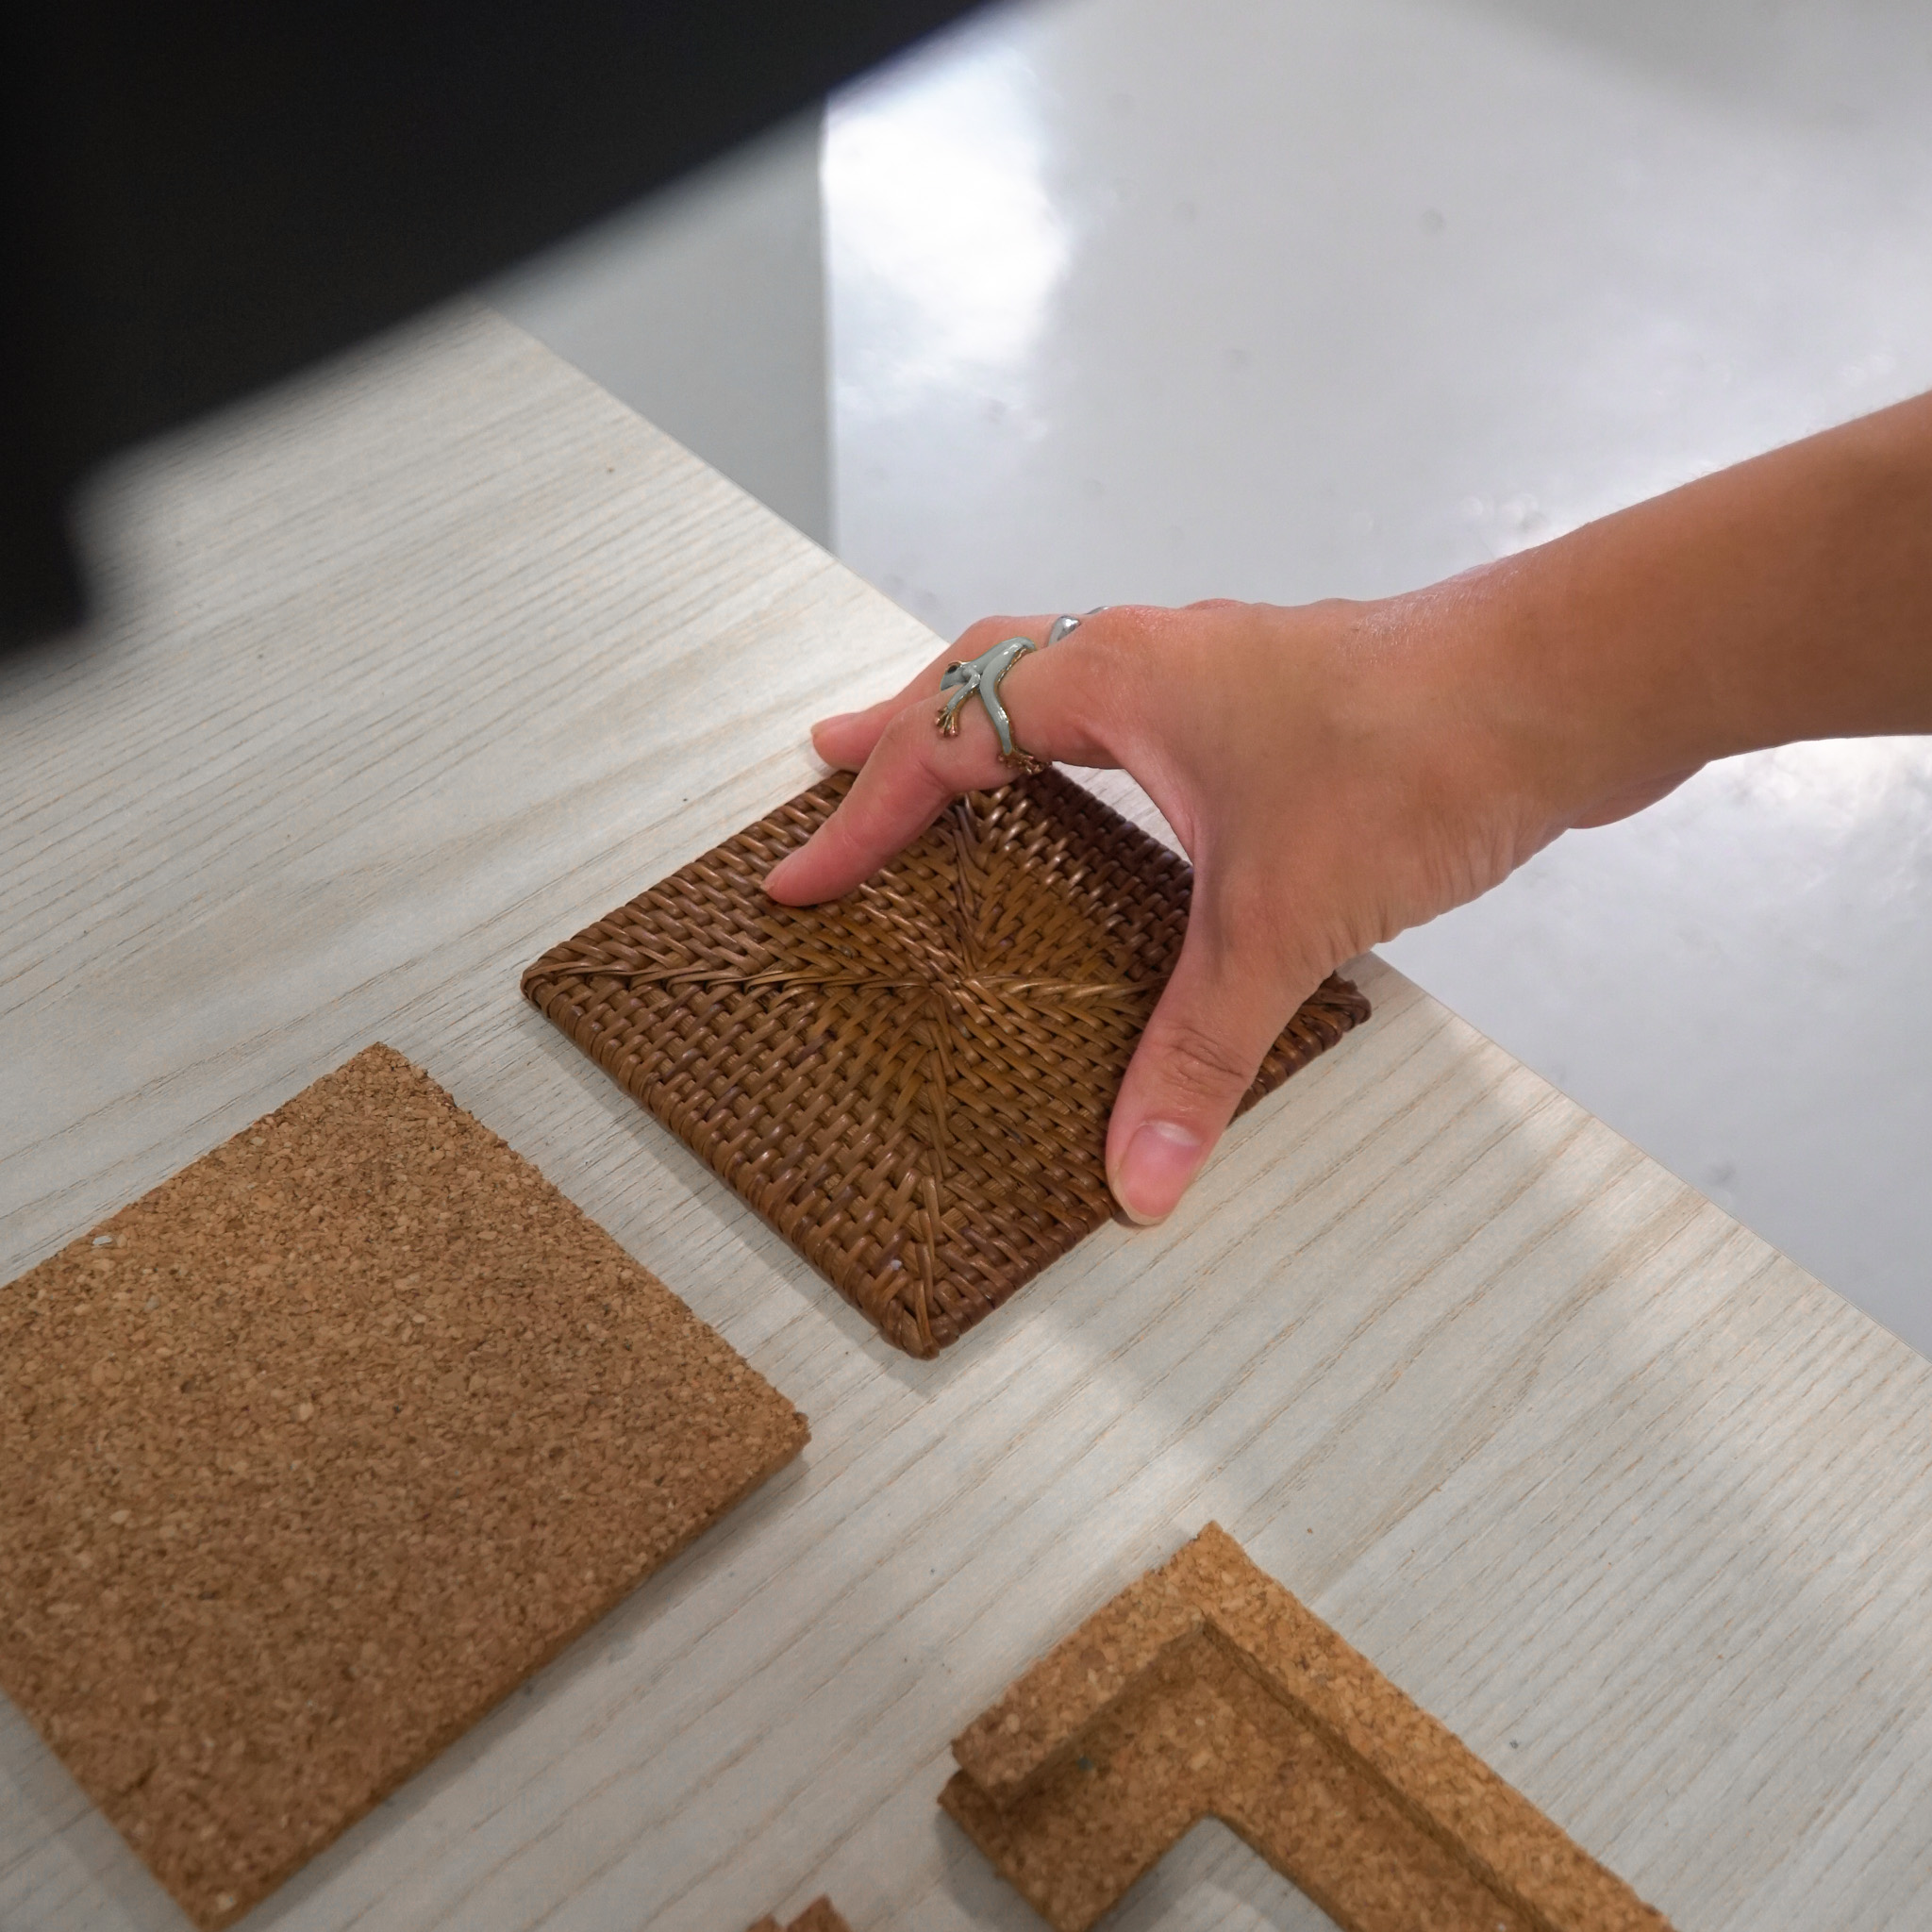
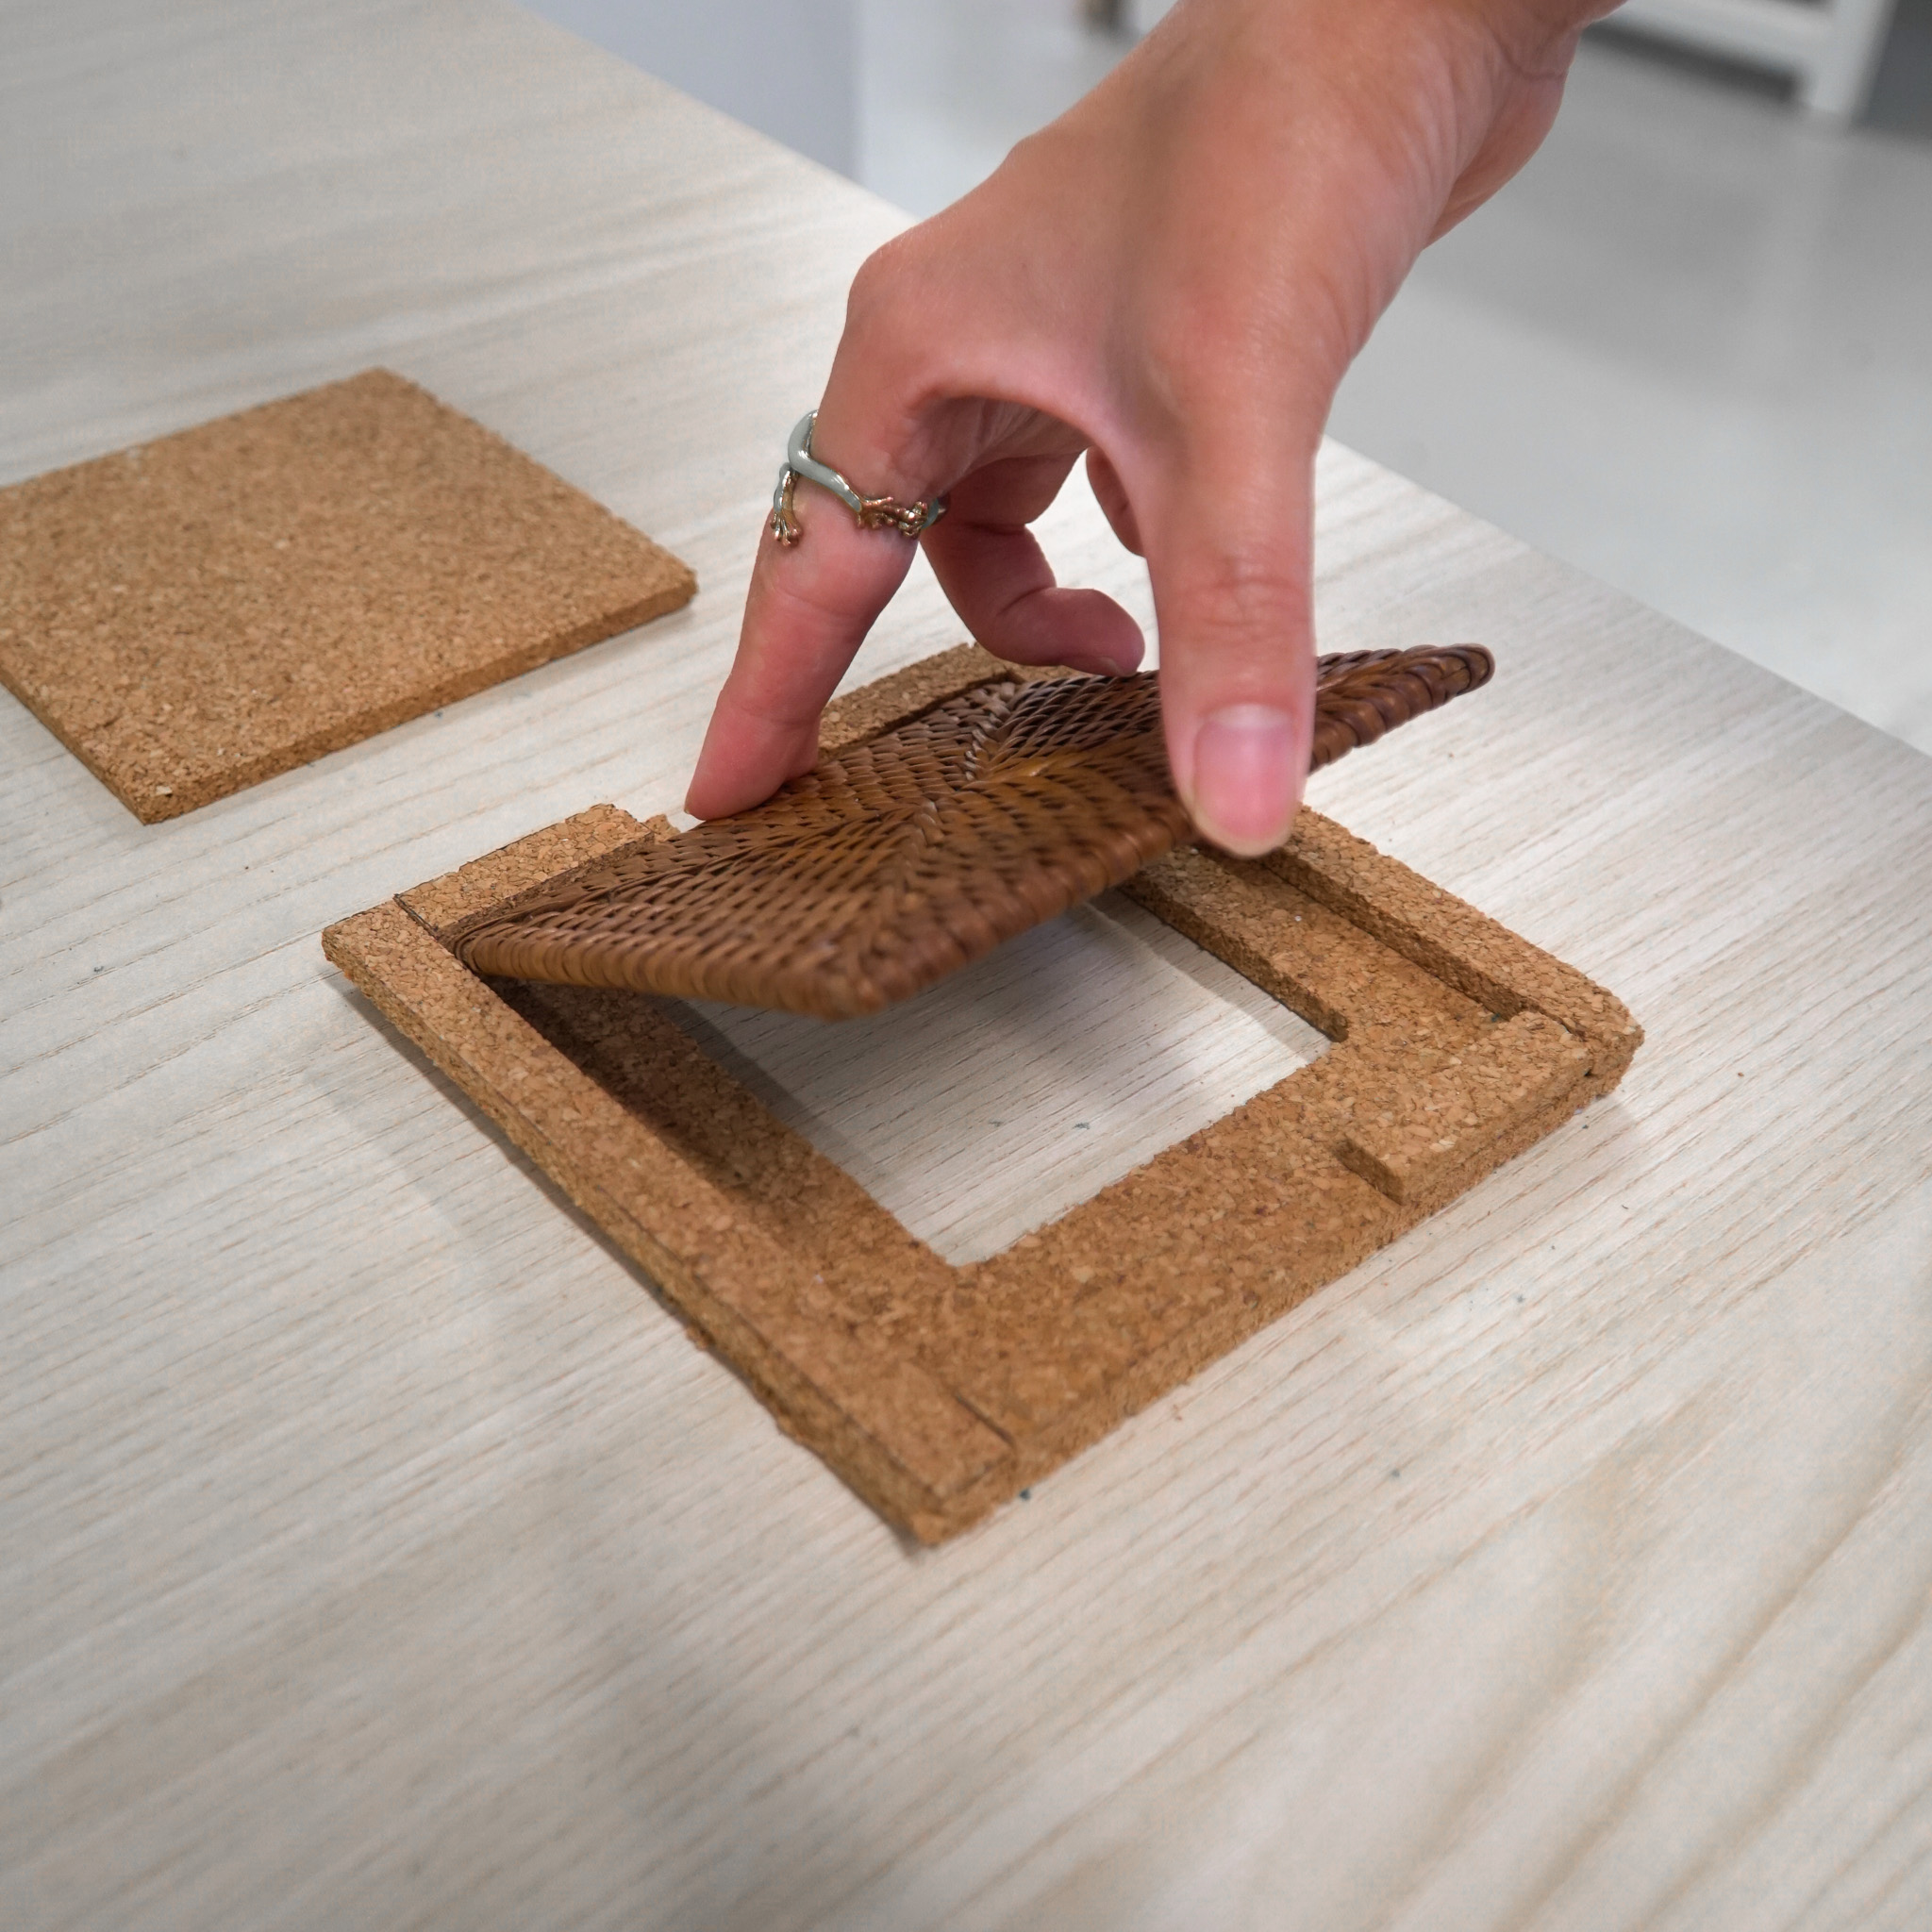
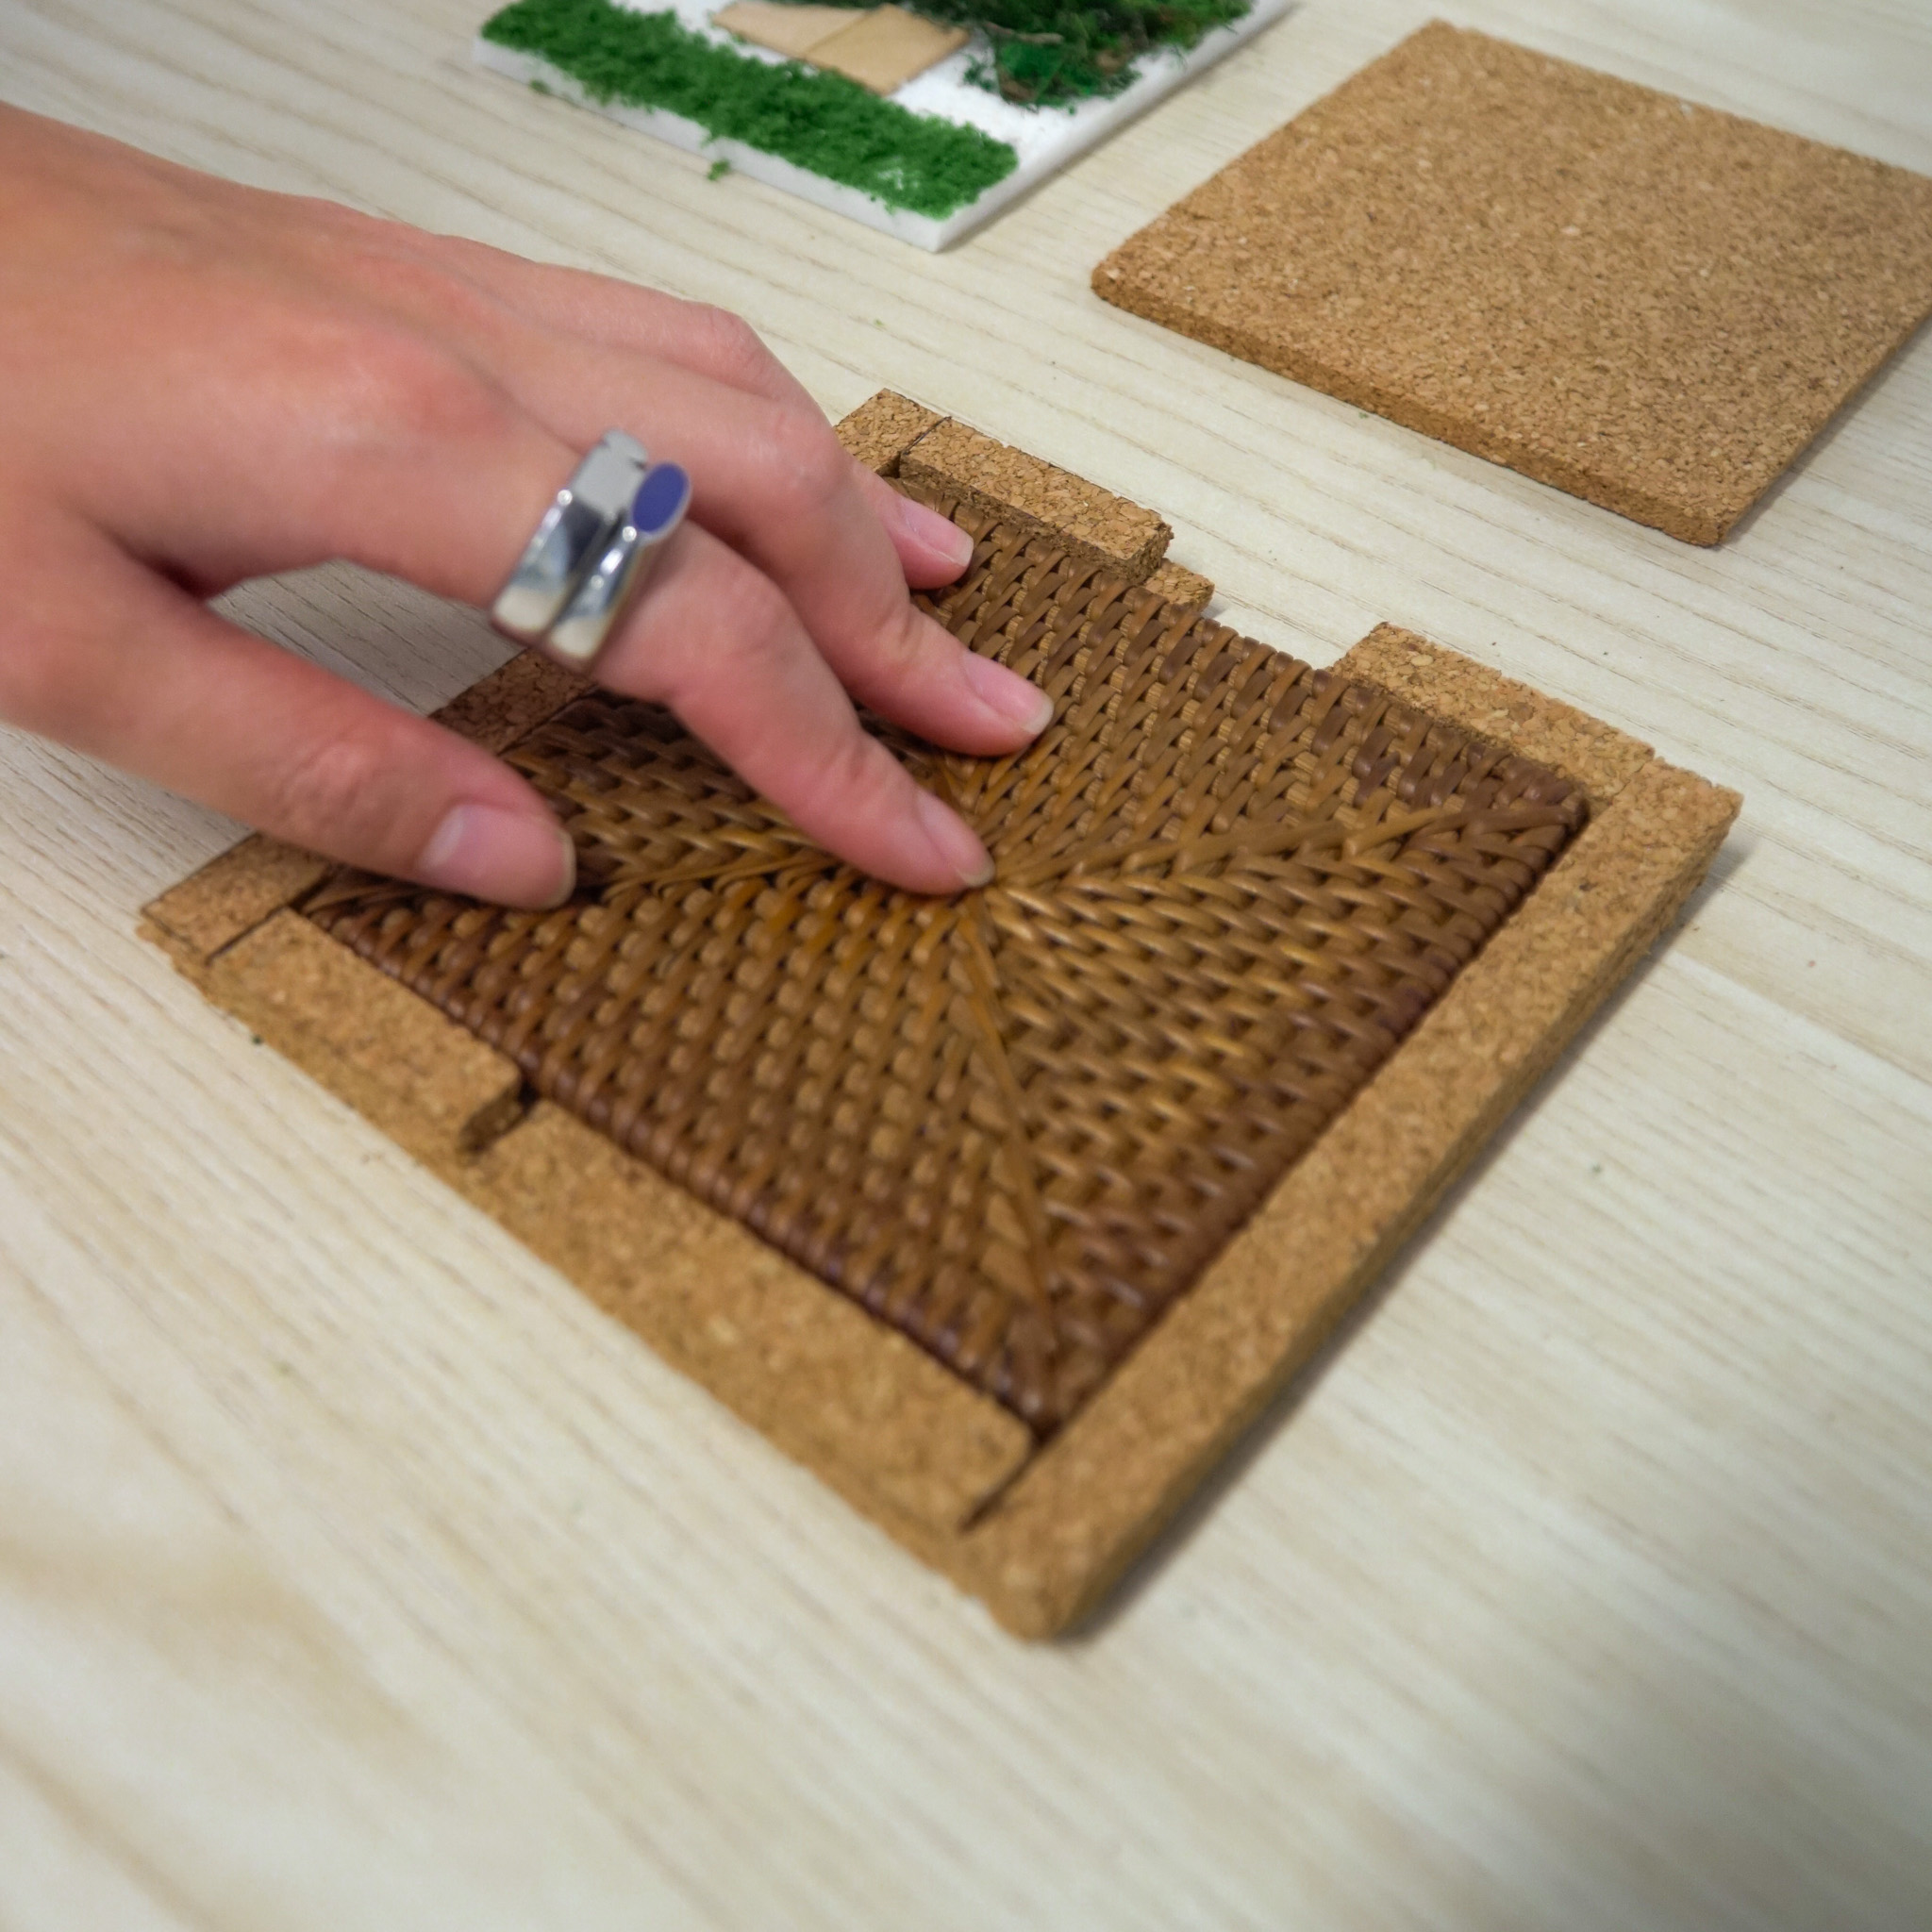
Experiment 4 - Image Texture Mapping
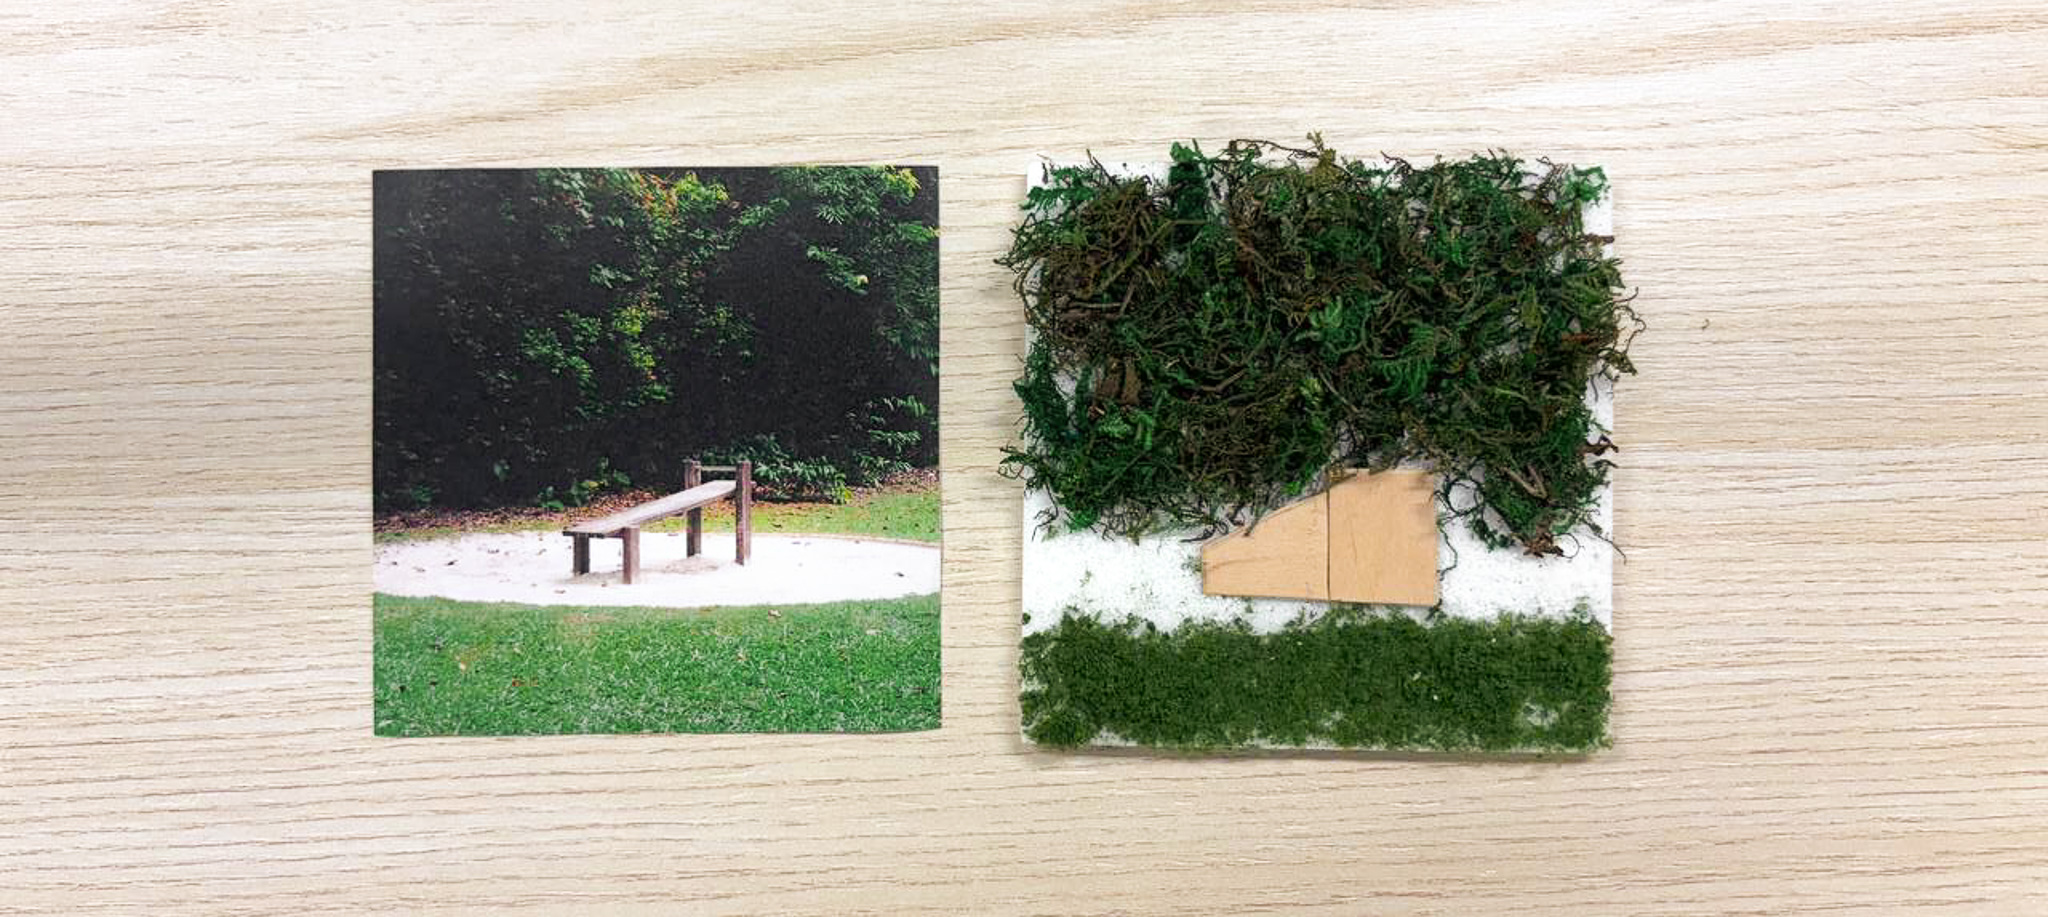
The original image and the physical outcome
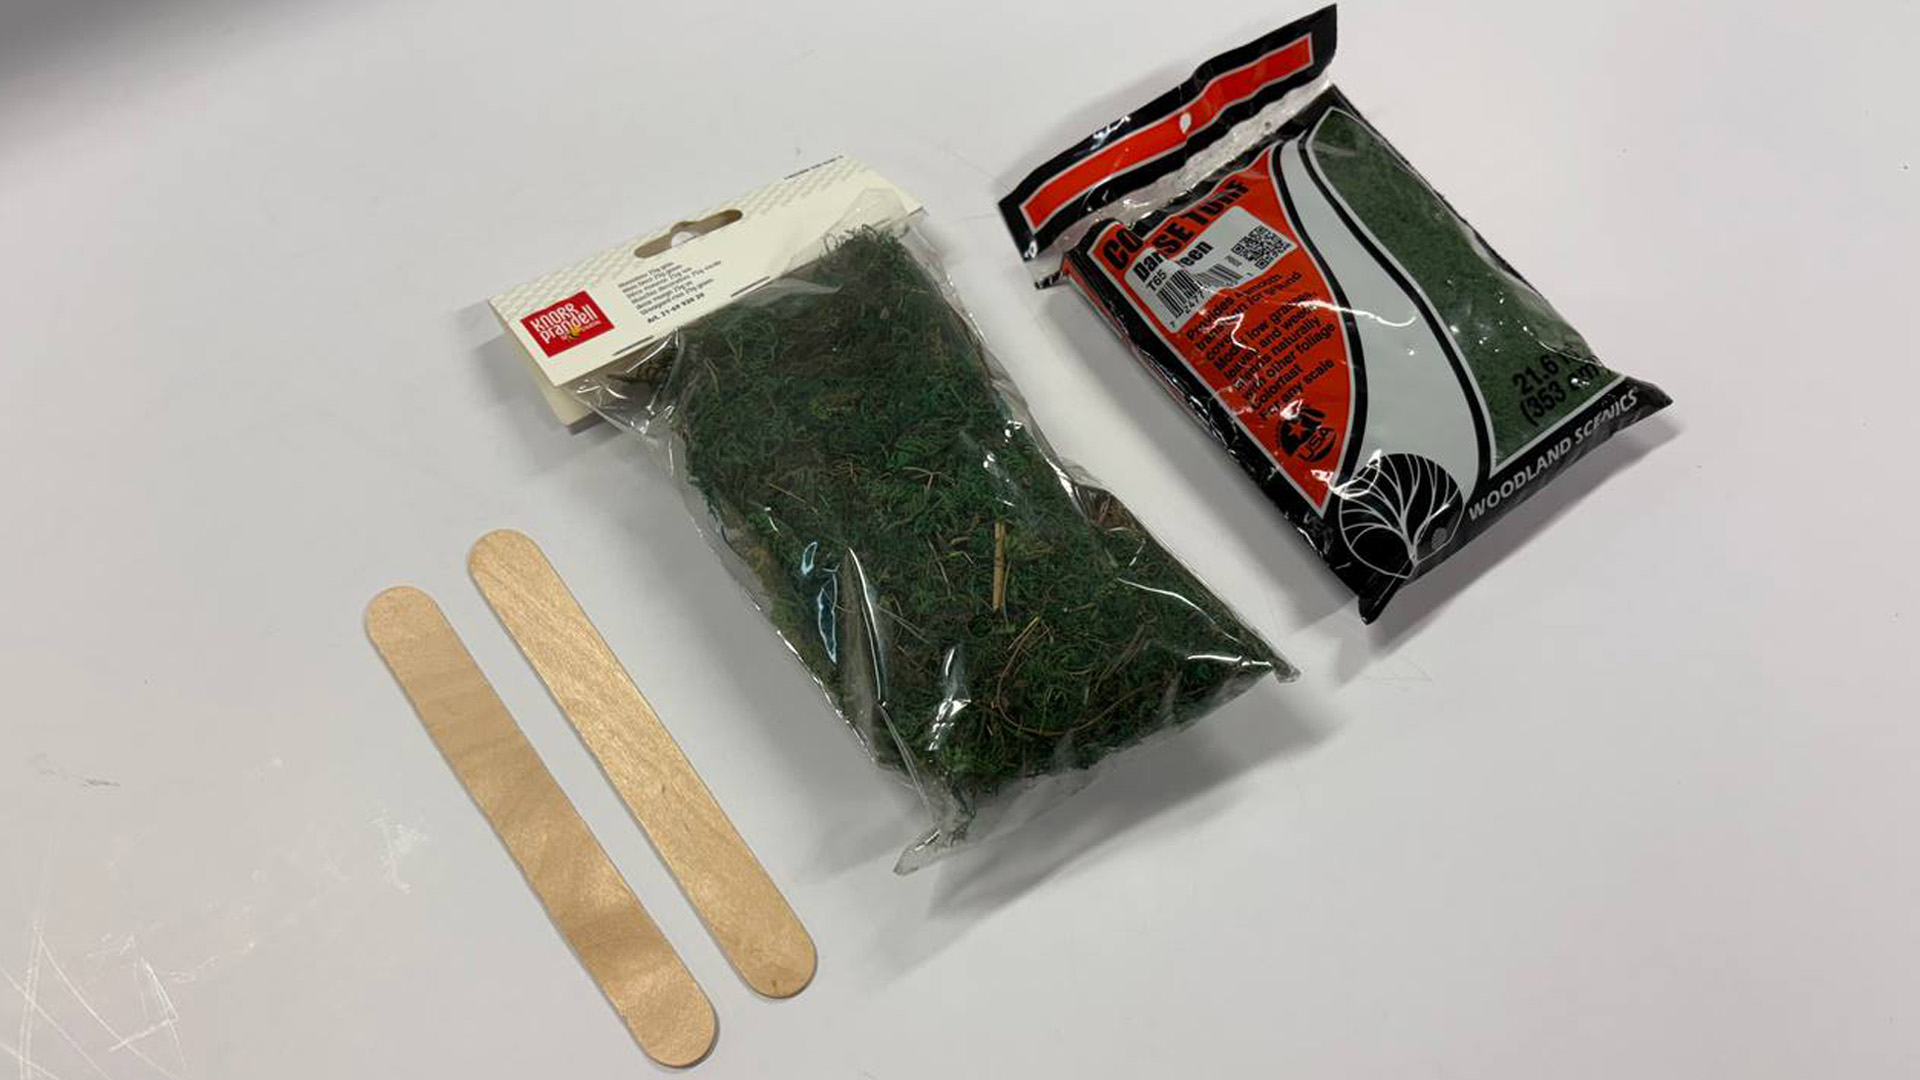
Ice cream stick, Moss texture, Grass texture
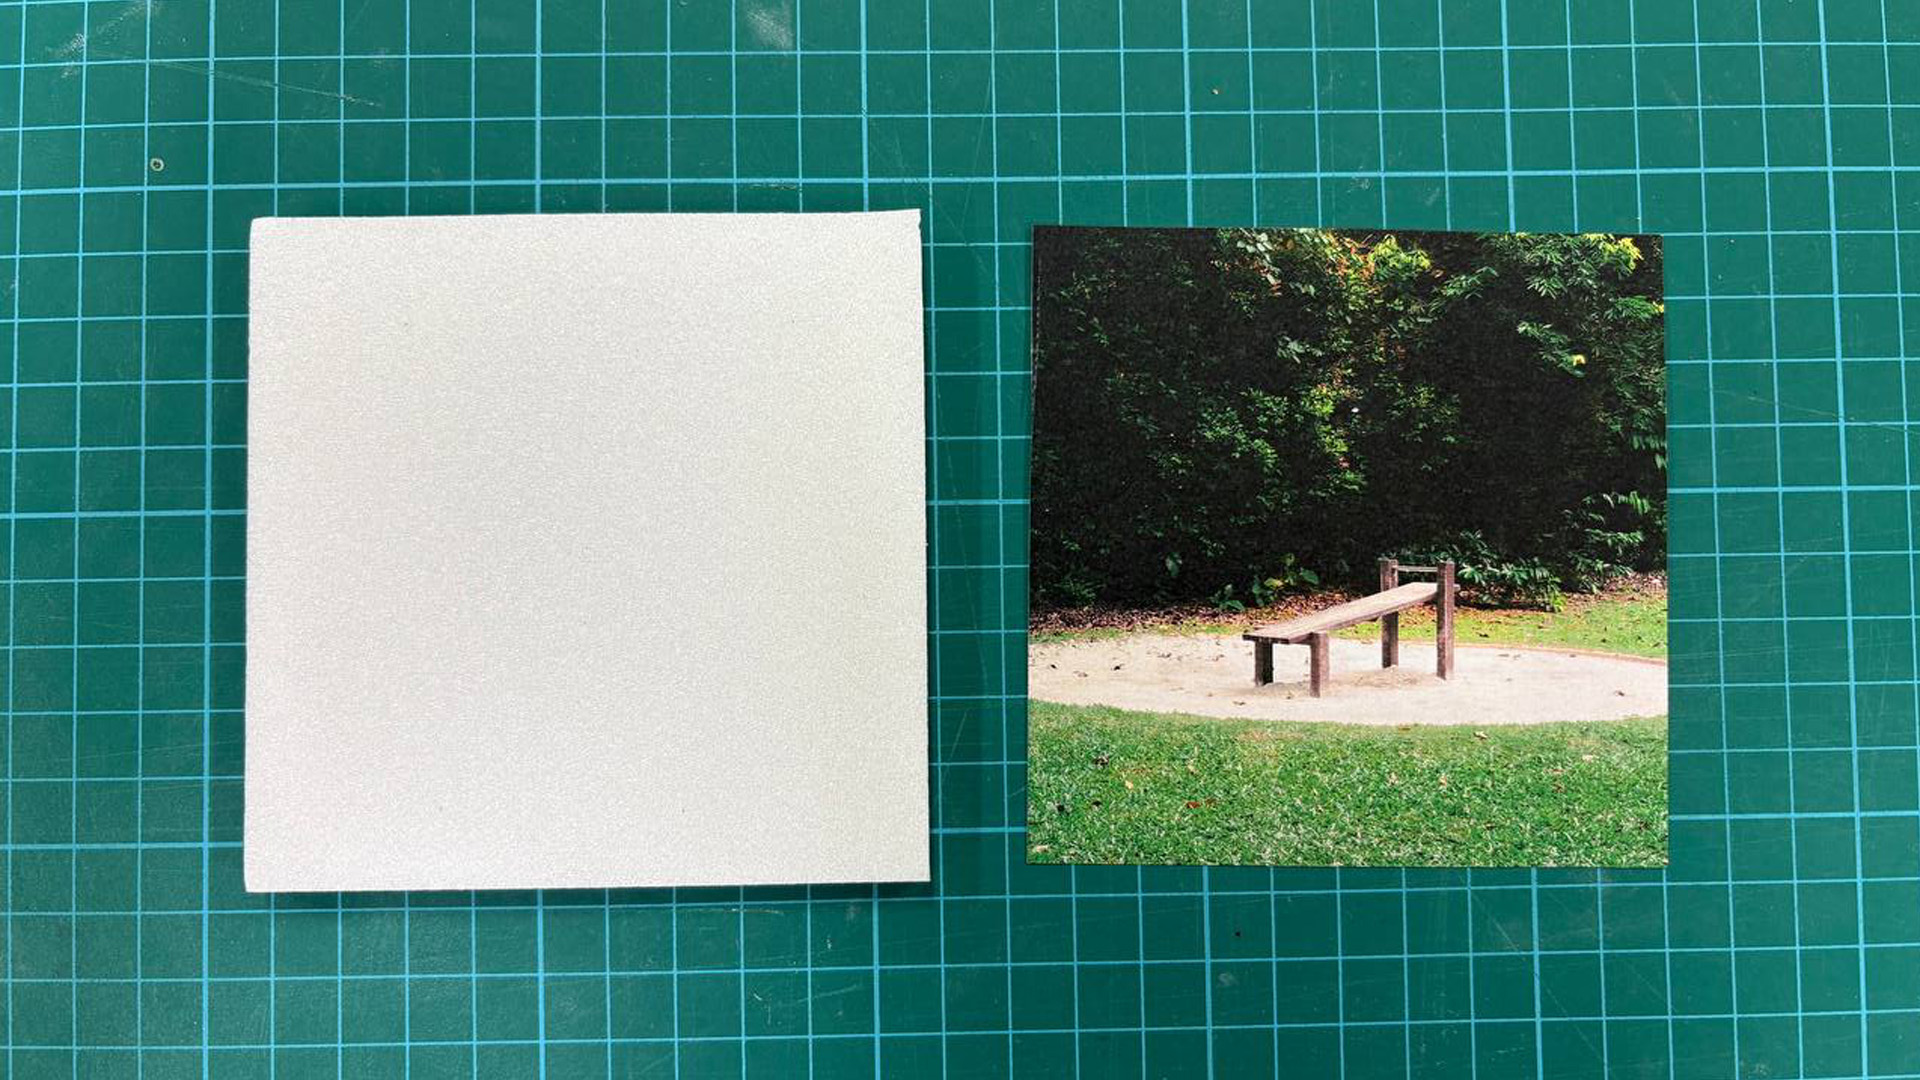
Left: Foam board. Right: Reference img taken by me
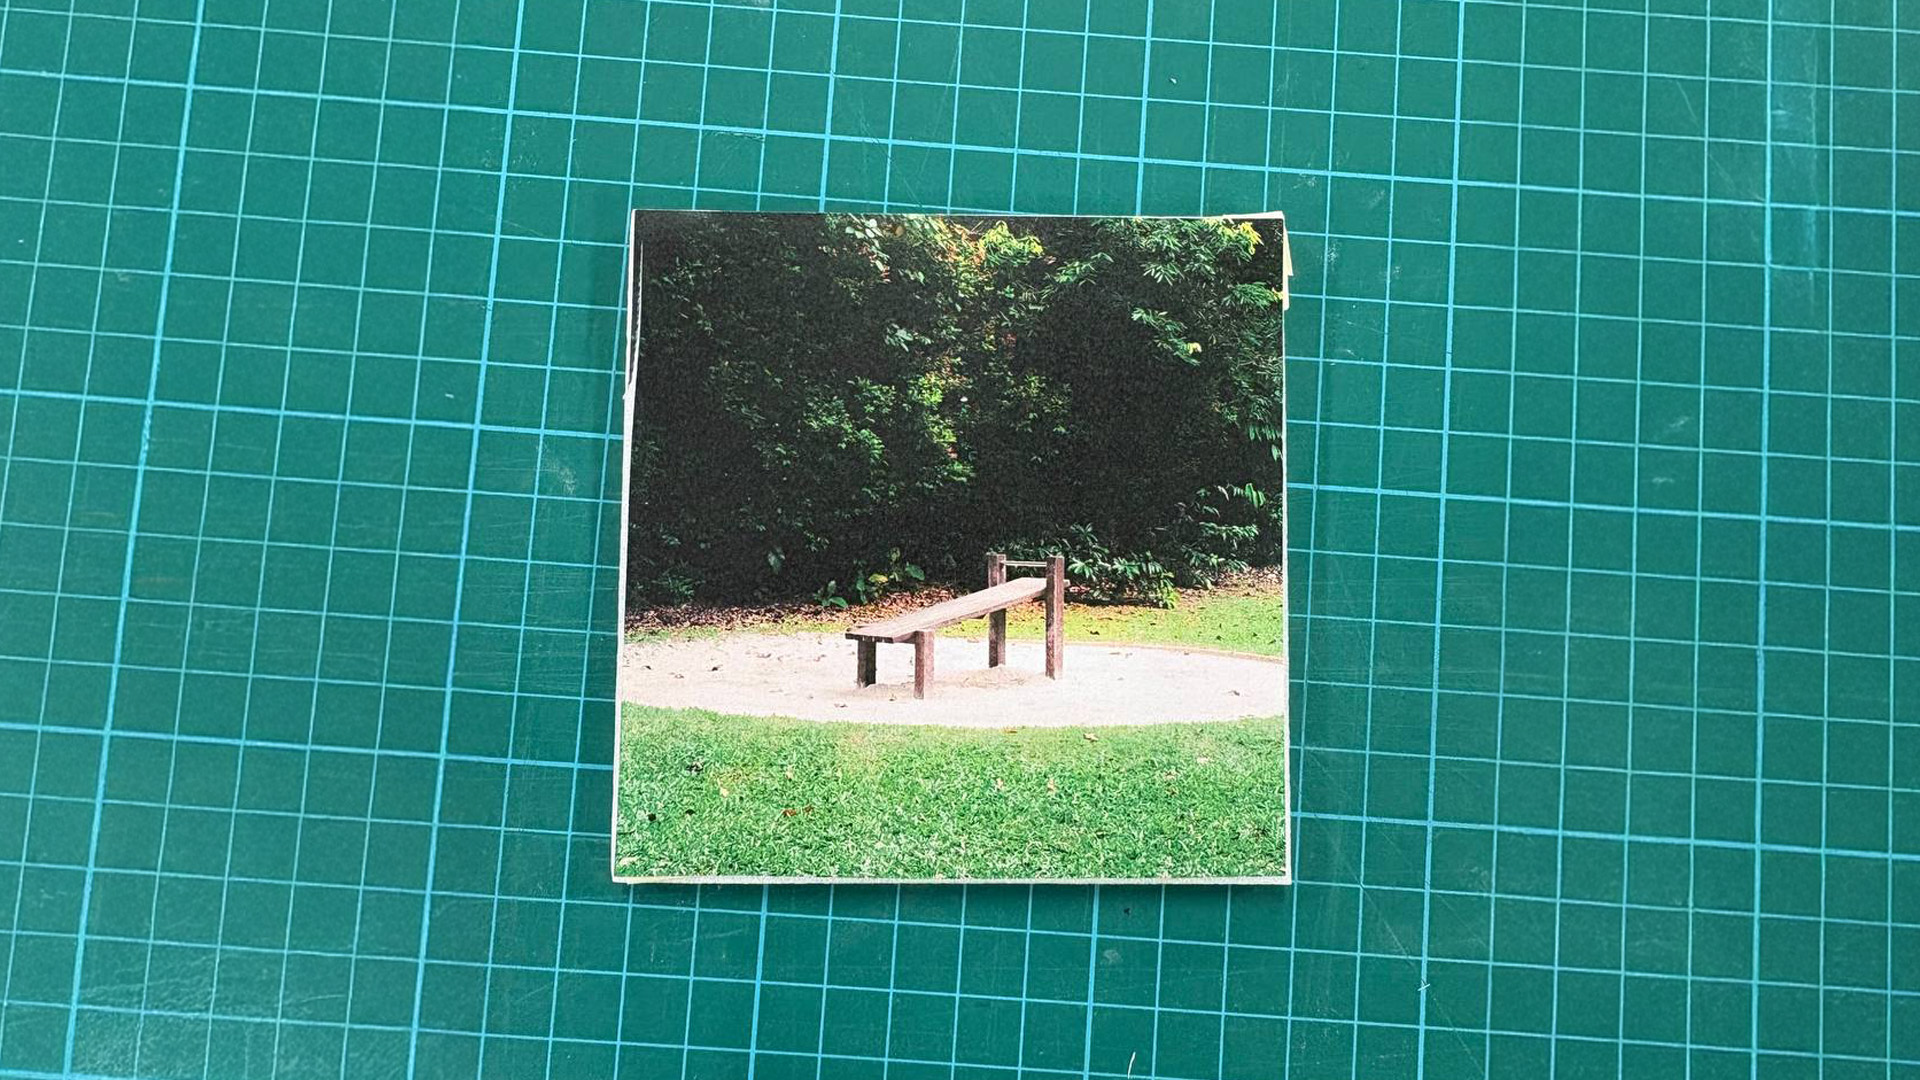
Overlaying reference image on top of foam board
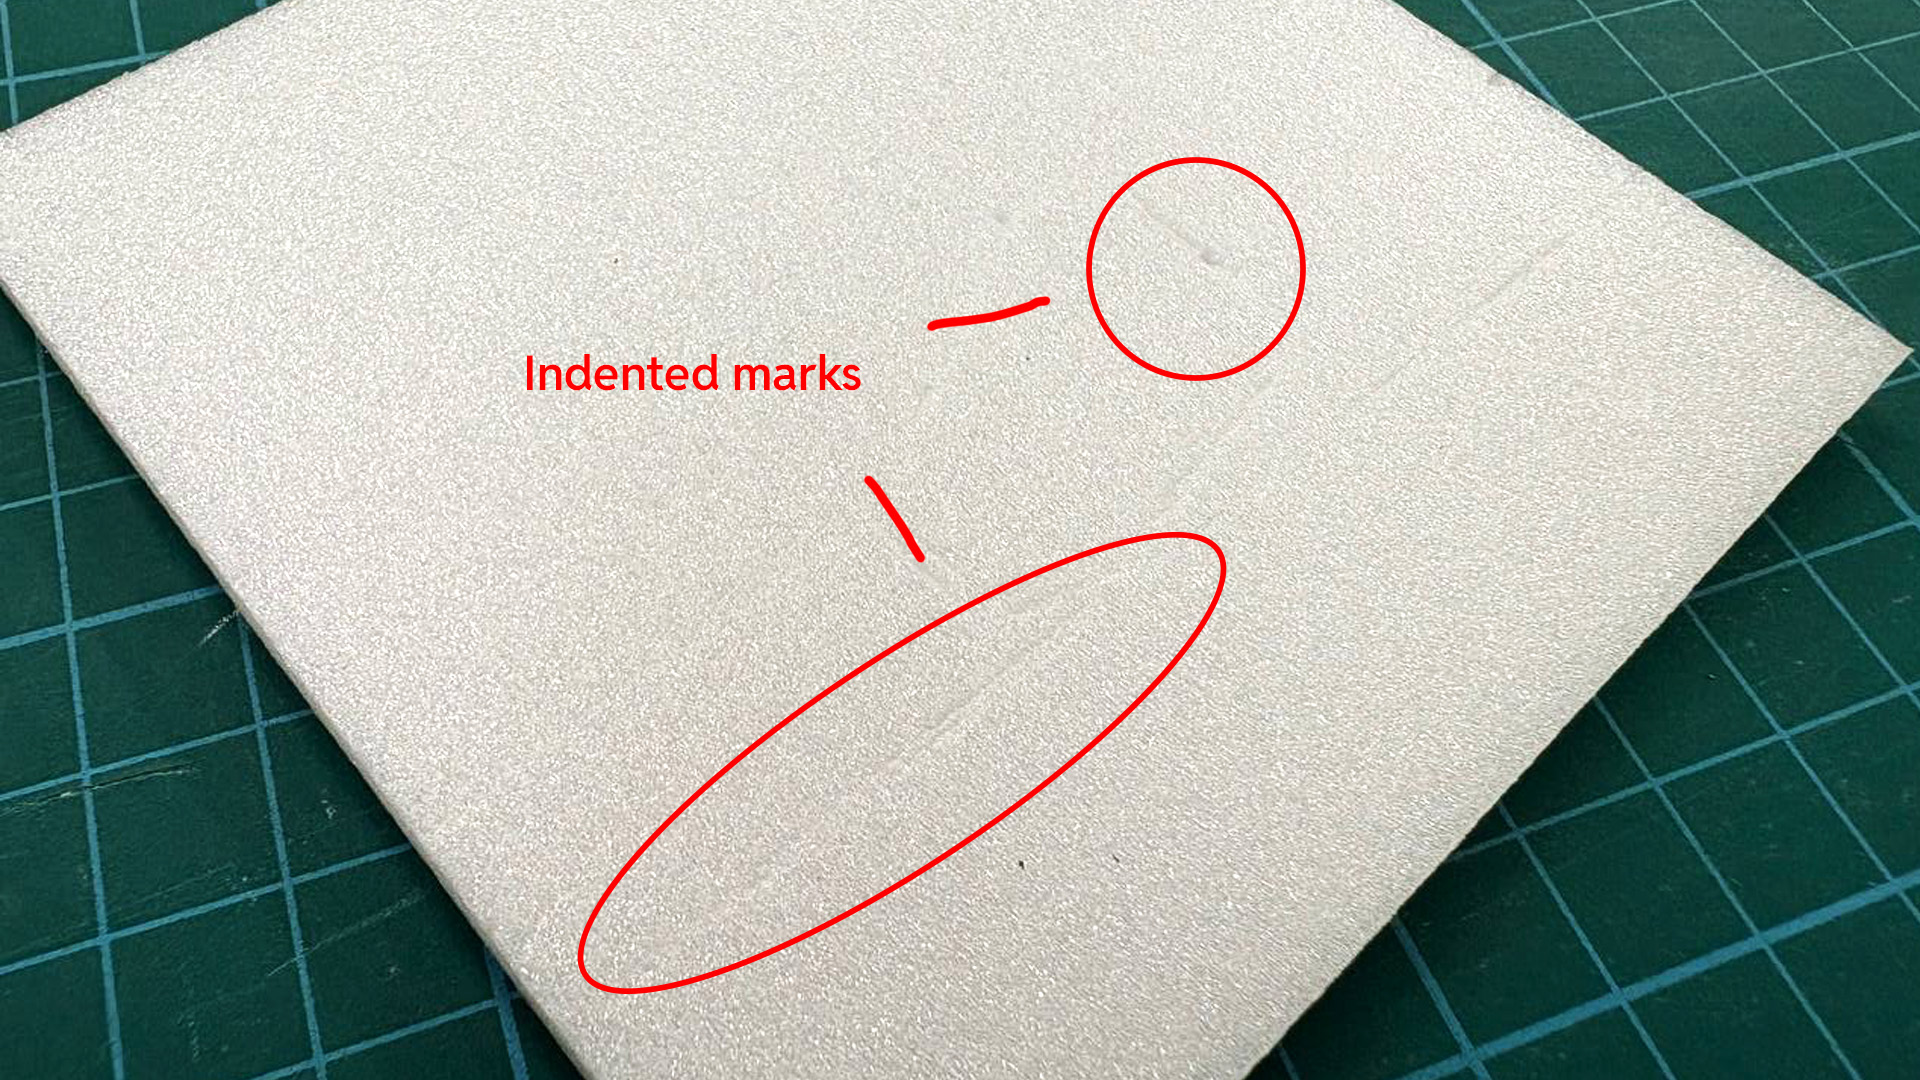
Used a inkless pen to trace/block out the texture locations, leaving a indent as a marking of placement.
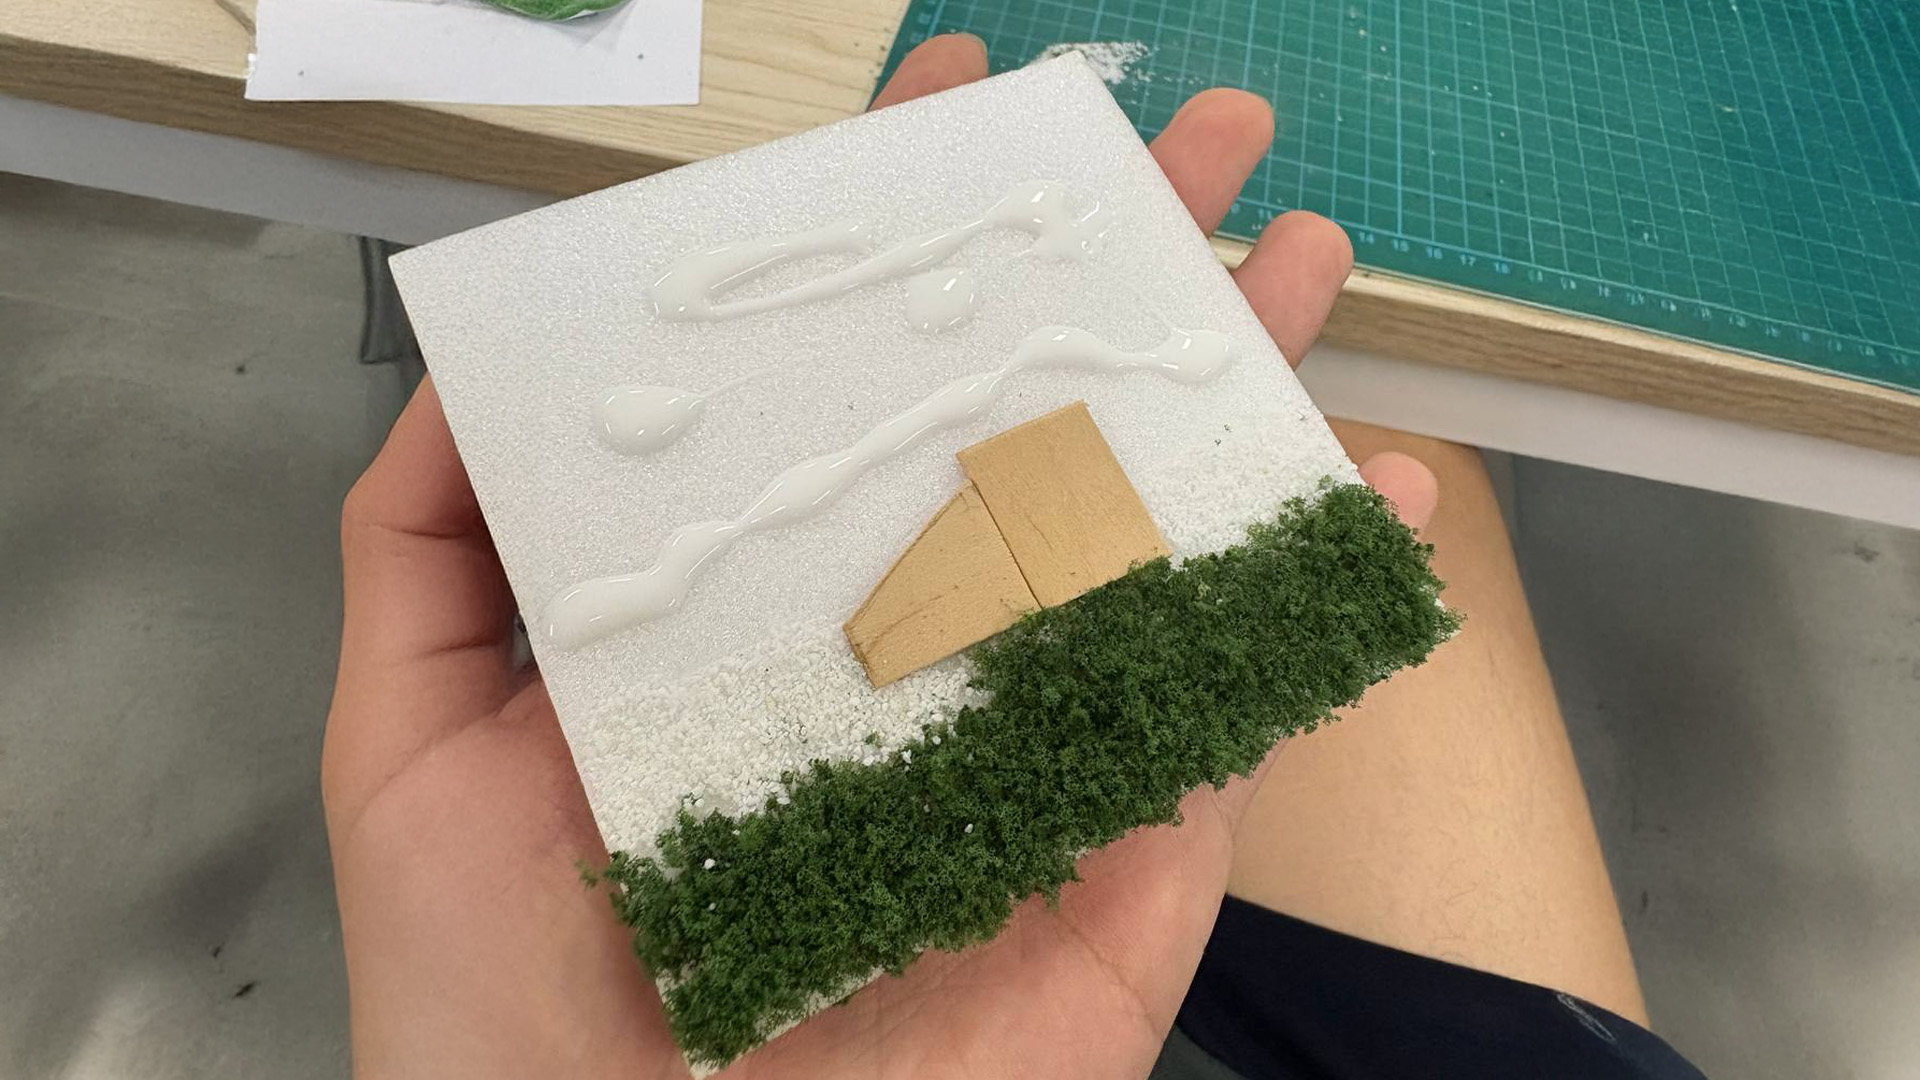
Glueing the textures on top
To start off, I bought some fake grass/greenery and ice cream stick to simulate the textures within the photo i took in the park. Due to budget constraints, I was working with cheaper materials (otherwise would have chosen a more suitable material for the leaf texture). I then cut out a square foam tile, overlayed it with reference image and used a inkless pen to leave a indent to mark the positioning of the textures on the foam tile below. Lastly, I glued the textures into place. I used ice cream sticks instead of wood due to accessibility (otherwise need a wood saw).
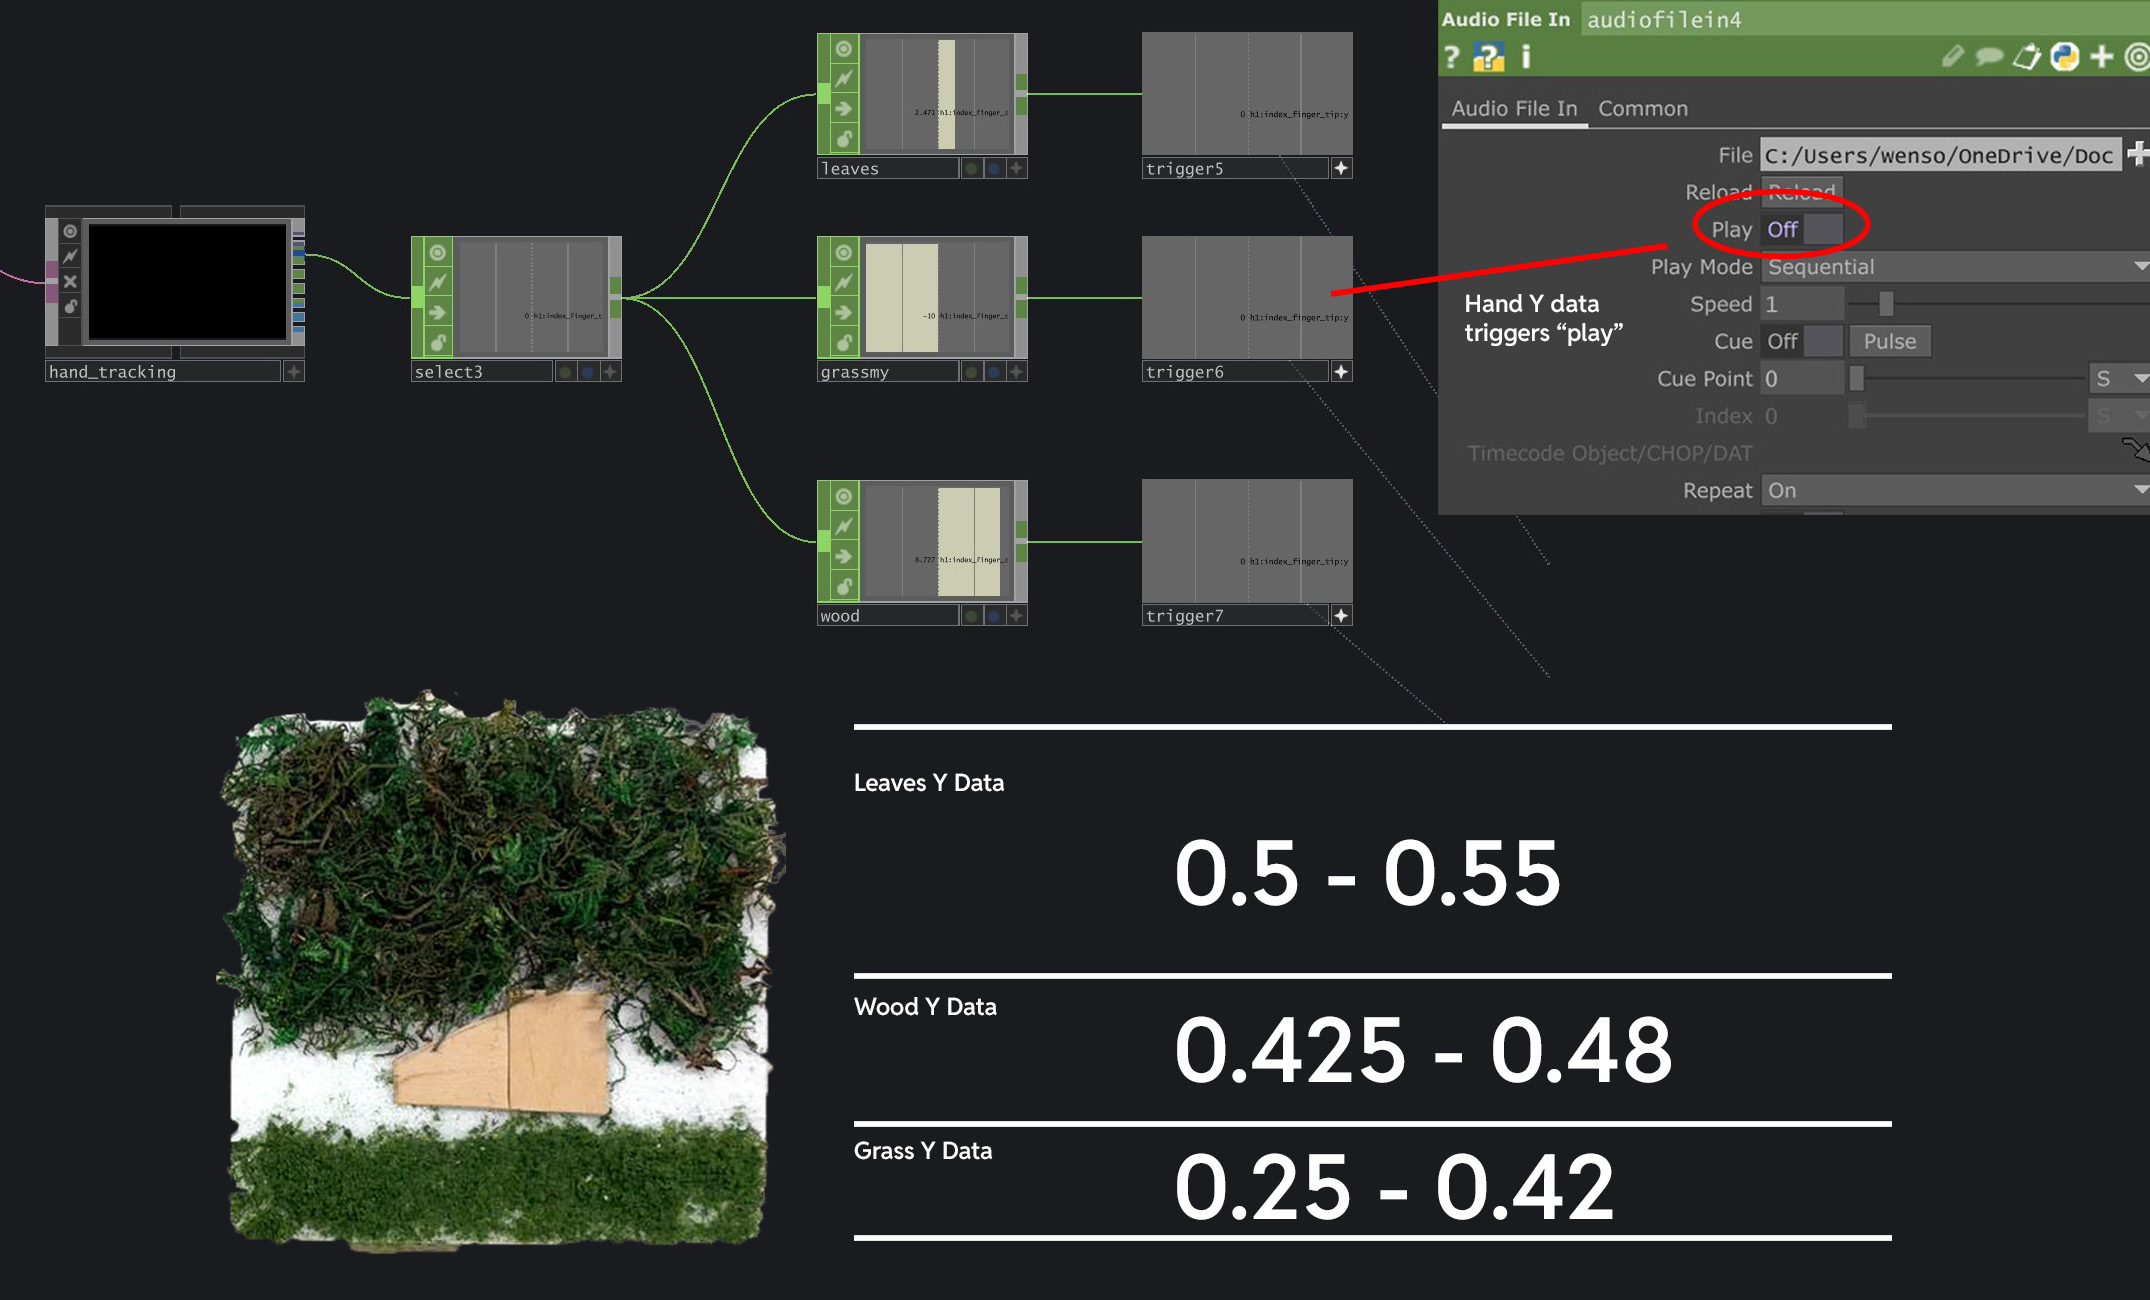
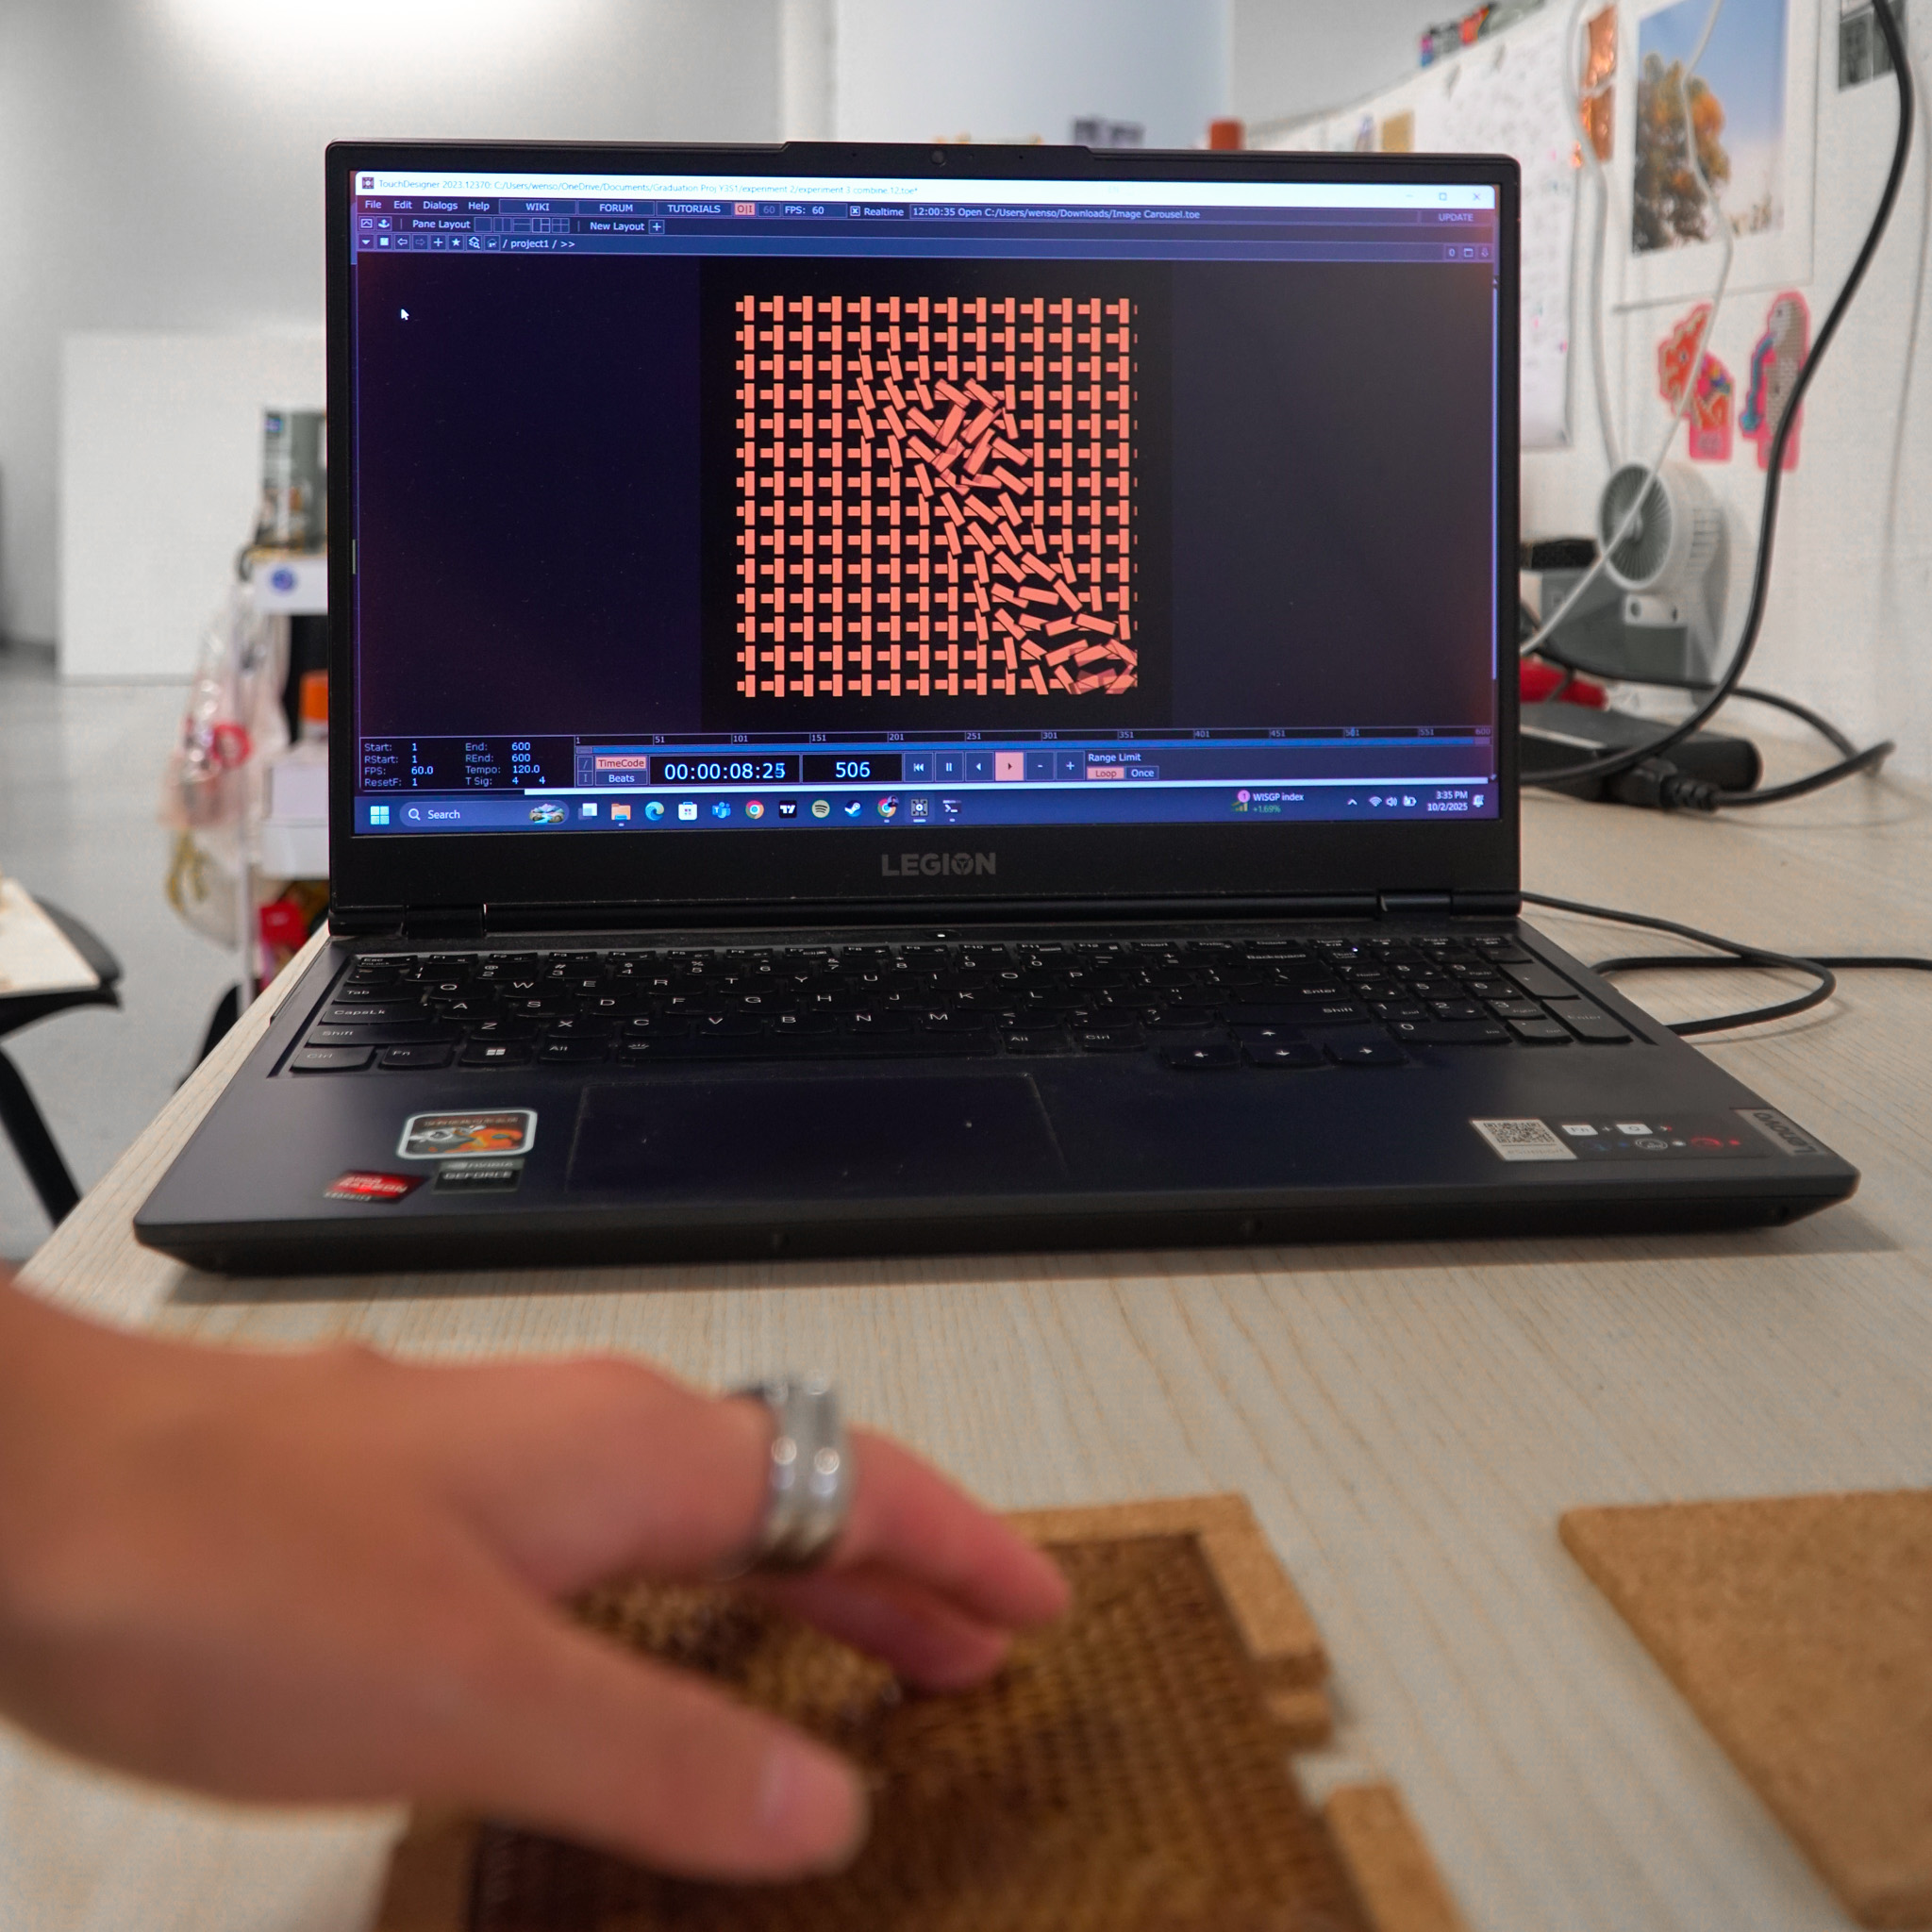
Mapping Fingertip position Y data to trigger "play" according to the different Y position of the textures.
To create the interactivity aspect of this experiment, I used Mediapipe to track the fingertip position
Y data, which basically measures where my fingertip is at along the Y axis. Since my physical texture
tile can be segmented into 3 different segments along its height, I tested and noted down the Y data
ranges for each segment. For example, the grass has a Y data range of 0.25 - 0.42. Since the wooden
bench is higher than the grass, the Y data range is 0.425 - 0.48.
Another important detail was
for me to also constrain the interaction within the width (X data) of the tile because I only want the
sounds to play when the touch is within the tile's area. To do this, I mapped the fingertip X data to
the width of the tile and only when the fingertip is within this range will the volume of the audio be
set to 1 (otherwise its 0 and muted).
Experiment 4 - Image Texture Mapping
I actually wanted to add a 4th texture. In the image, there is sand around the wooden bench. The tricky part here is that the sand texture actually shares the same Y position data as the wooden bench. It was really challenging to try to segregate the two textures apart as I had to add another constraint of the fingertip X position data. Thus after multiple failed attempts in doing so, I decided to simplify and work with 3 textures.
I really wanted to get some textures that actually resembles the texture of the leaves better. There are some fake turf textures and fake foliages at Artfriend, but they cost quite alot of money (about 10 dollar plus per pack). Thus after much walking around and searching, I decided to use this "Moss" texture pack which i felt was close enough to the texture of leaves.
Andreas provided several important points for improvement. He noted that the leaf texture wasn't pleasant to touch, and the overall build quality felt rough. Most significantly, he suggested that I've spent considerable time with this tile-based approach and Mediapipe technology, and it's time to explore new directions. He also mentioned that he liked the explorative nature of experiment 3, so maybe that's something I can bring back. Although this was some critical feedback, I actually really appreciate it because It makes me realize that I have been spending way too long on Mediapipe and this Tile experiment style. Also, I should note the need to brush up on my making skills.
I do agree with Andreas' perspective with regards to its build quality and the overuse of Mediapipe technology in my recent experiments. While i still do like the concept of my experiment (the concept of touching textures in a image), I do have to agree that I should explore other concepts and technologies to give myself more options for my graduation project. Happy to know what I can improve and work on!
1. To move on from Mediapipe and this Tile Theme
2. Pay more attention to the quality of materials (leaves texture for example was not nice to touch)
3. To explore other technology, such as Arduino.
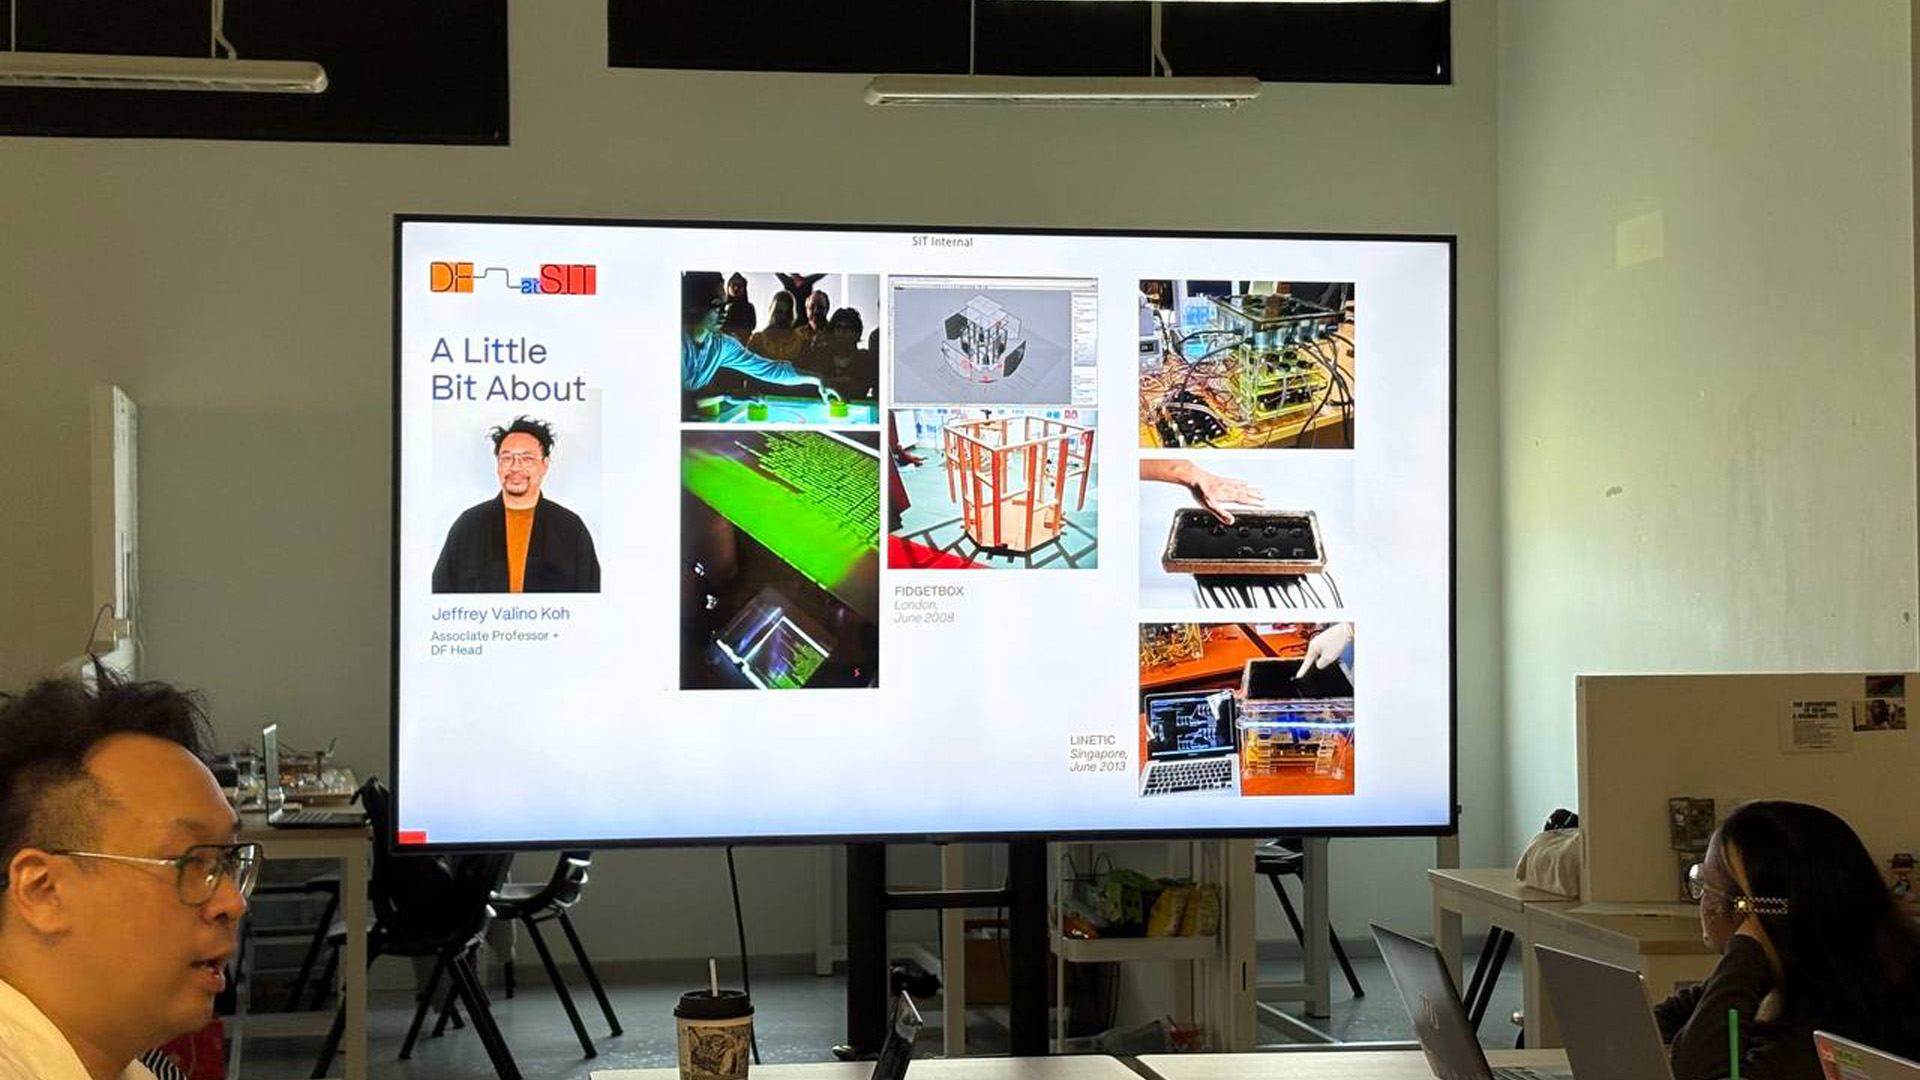
Sharing by Jeffery Koh and Aditi Neti from Design Factory (SIT)
Jeffery Koh and Aditi Neti came down to our class to gave us a very informative sharing about their works and approaches towards interactive technologies that seek to create a positive community impact. Below are some learning points I got from their sharing.

Portion of the 132 metre long Punggol Digital District Mural
It was inspiring to see the project done for Punggol Digital Distract Mural. I really appreciate the project's way of telling the story of how Punggol changed over the years through a mural that is painted by various members of the community, including the specially-abled. This way of participatory design/art is a great reminder to me of how sometimes having audience participation in the outcome might create something unique and meaningful.
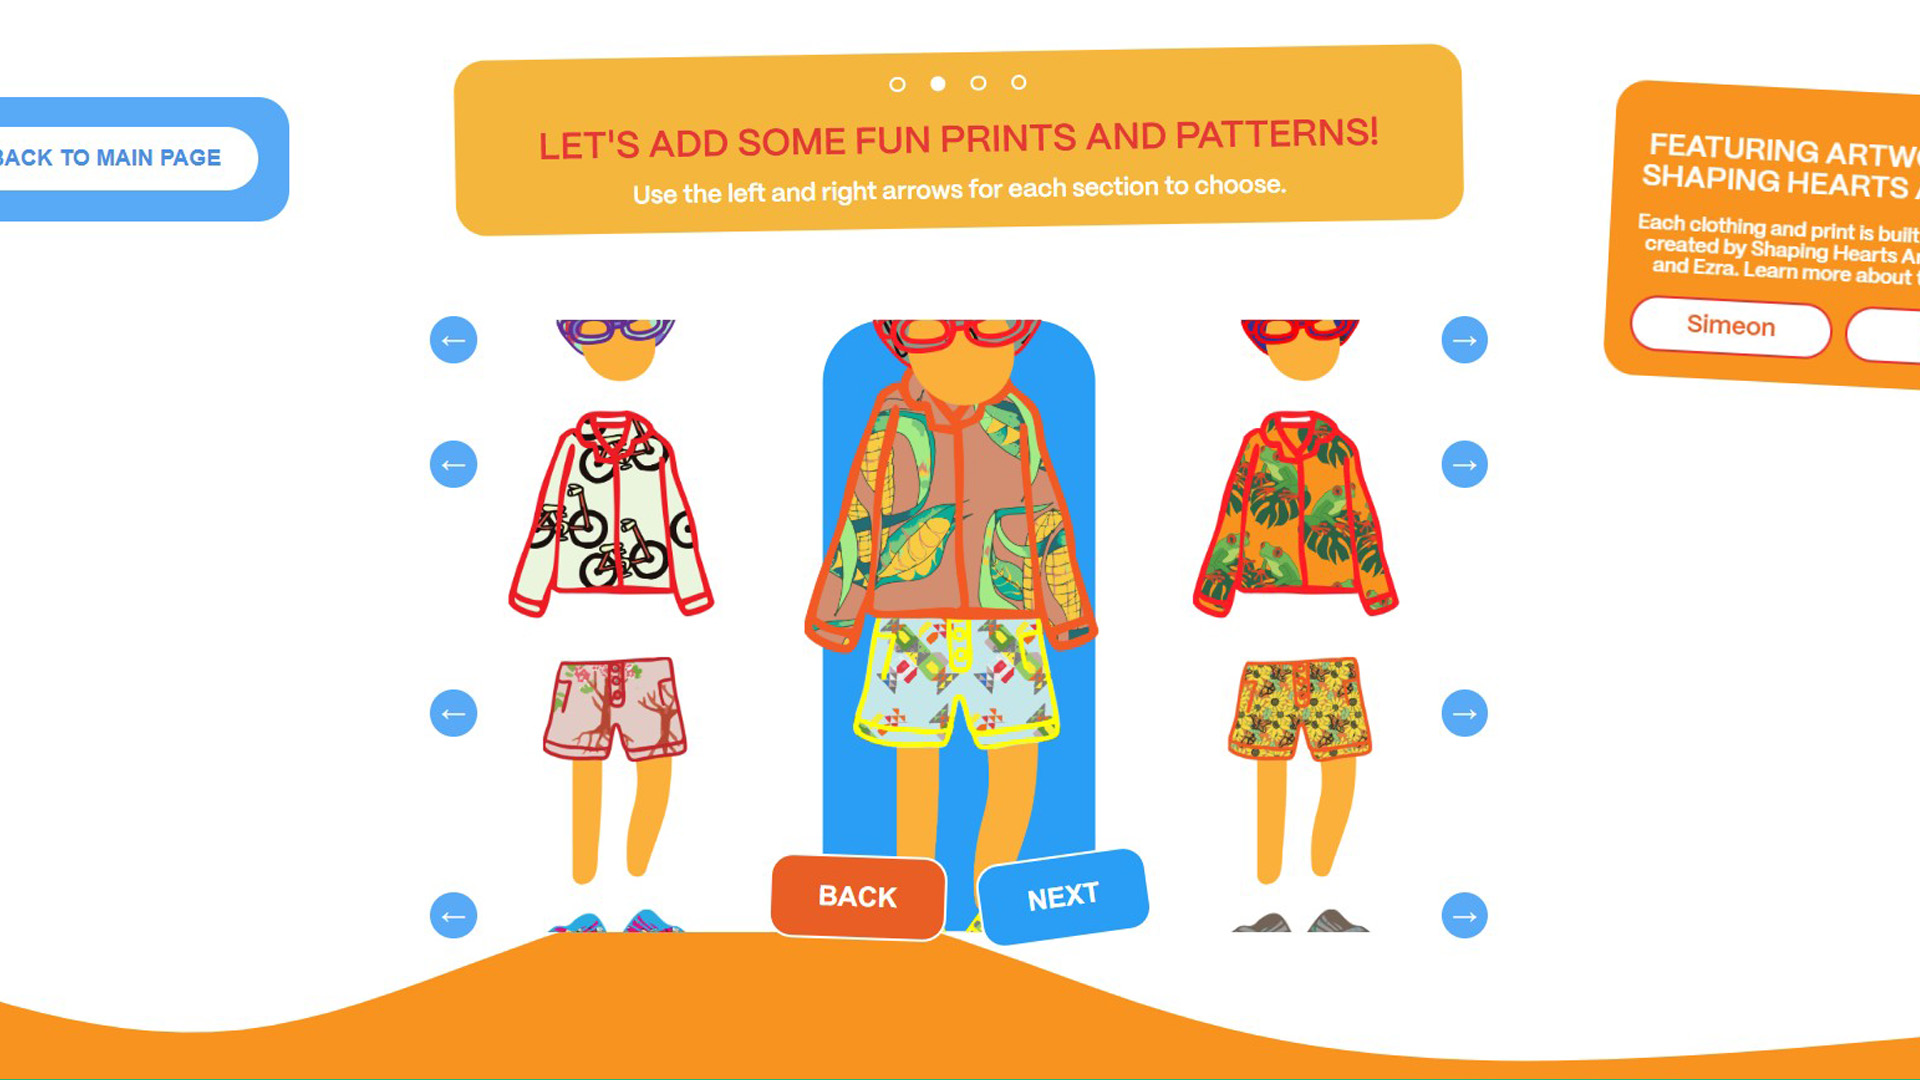
Making my avatar
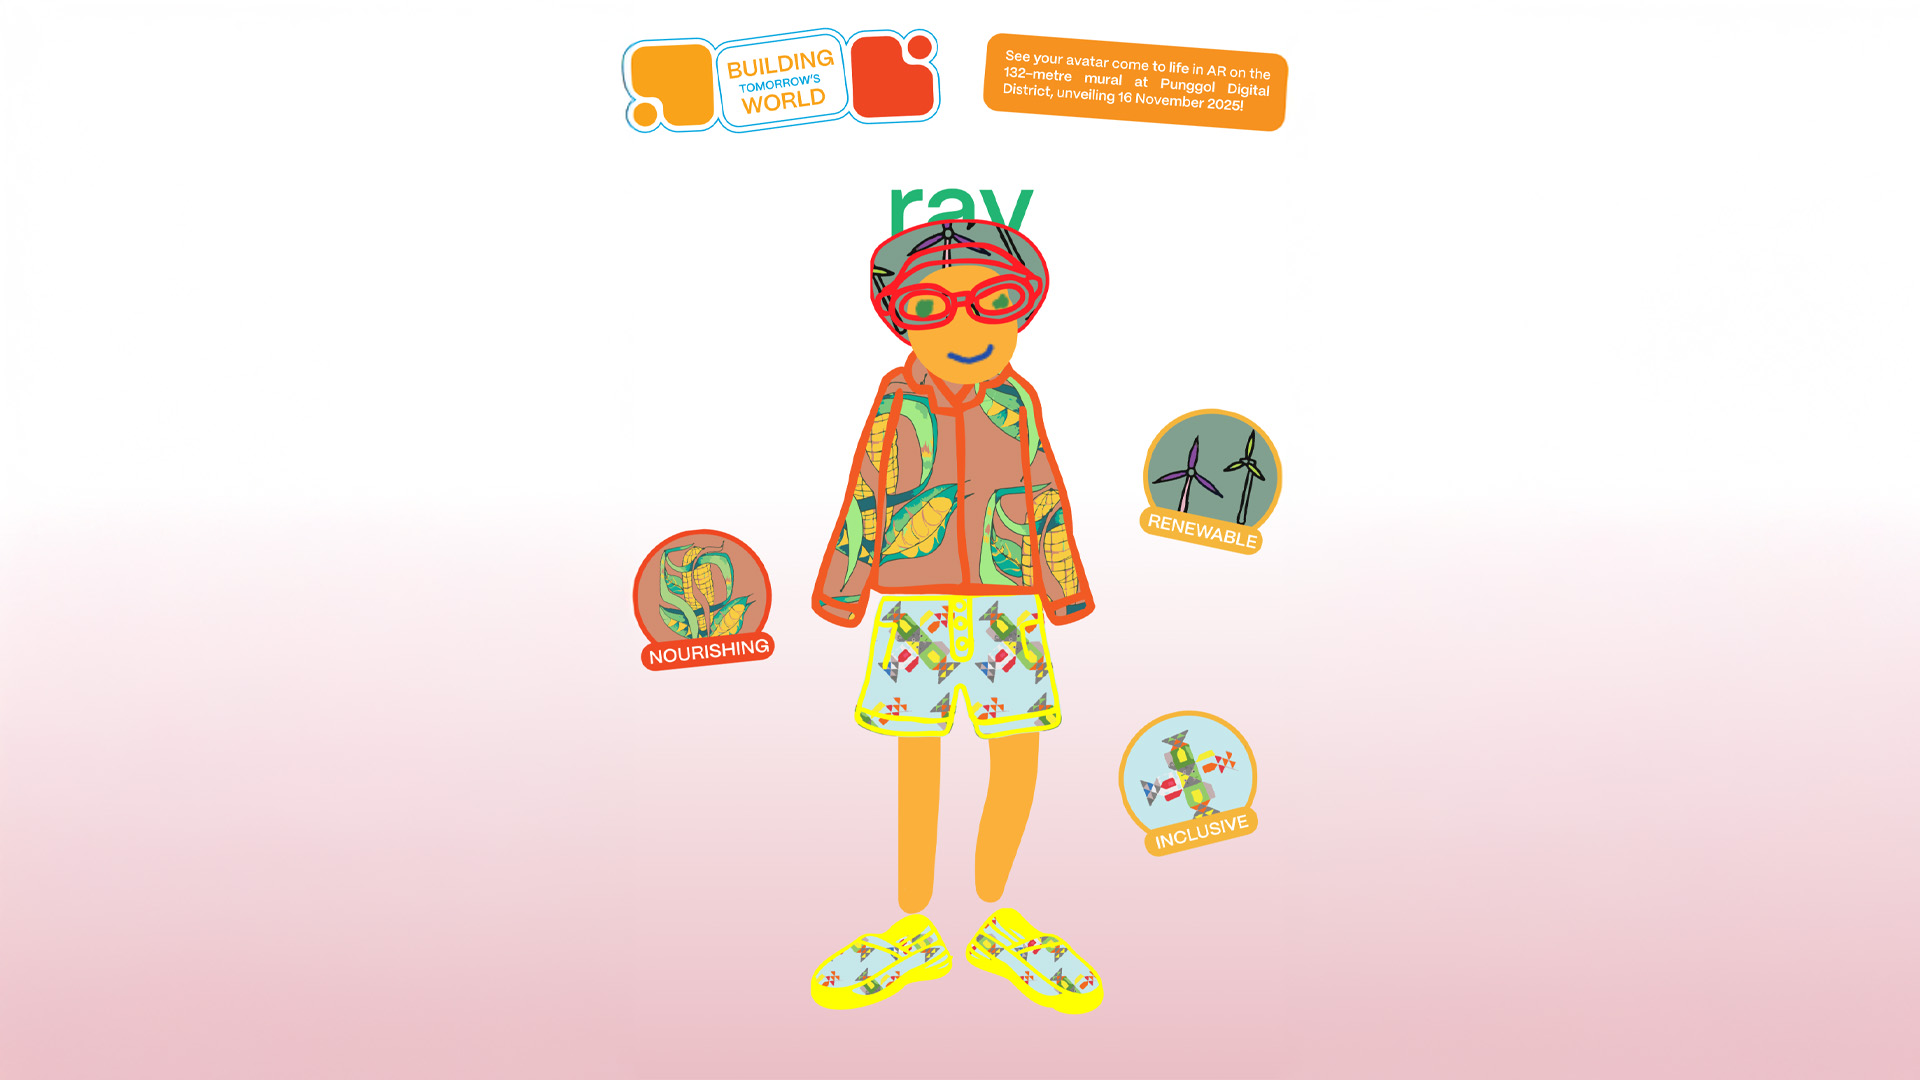
My final avatar
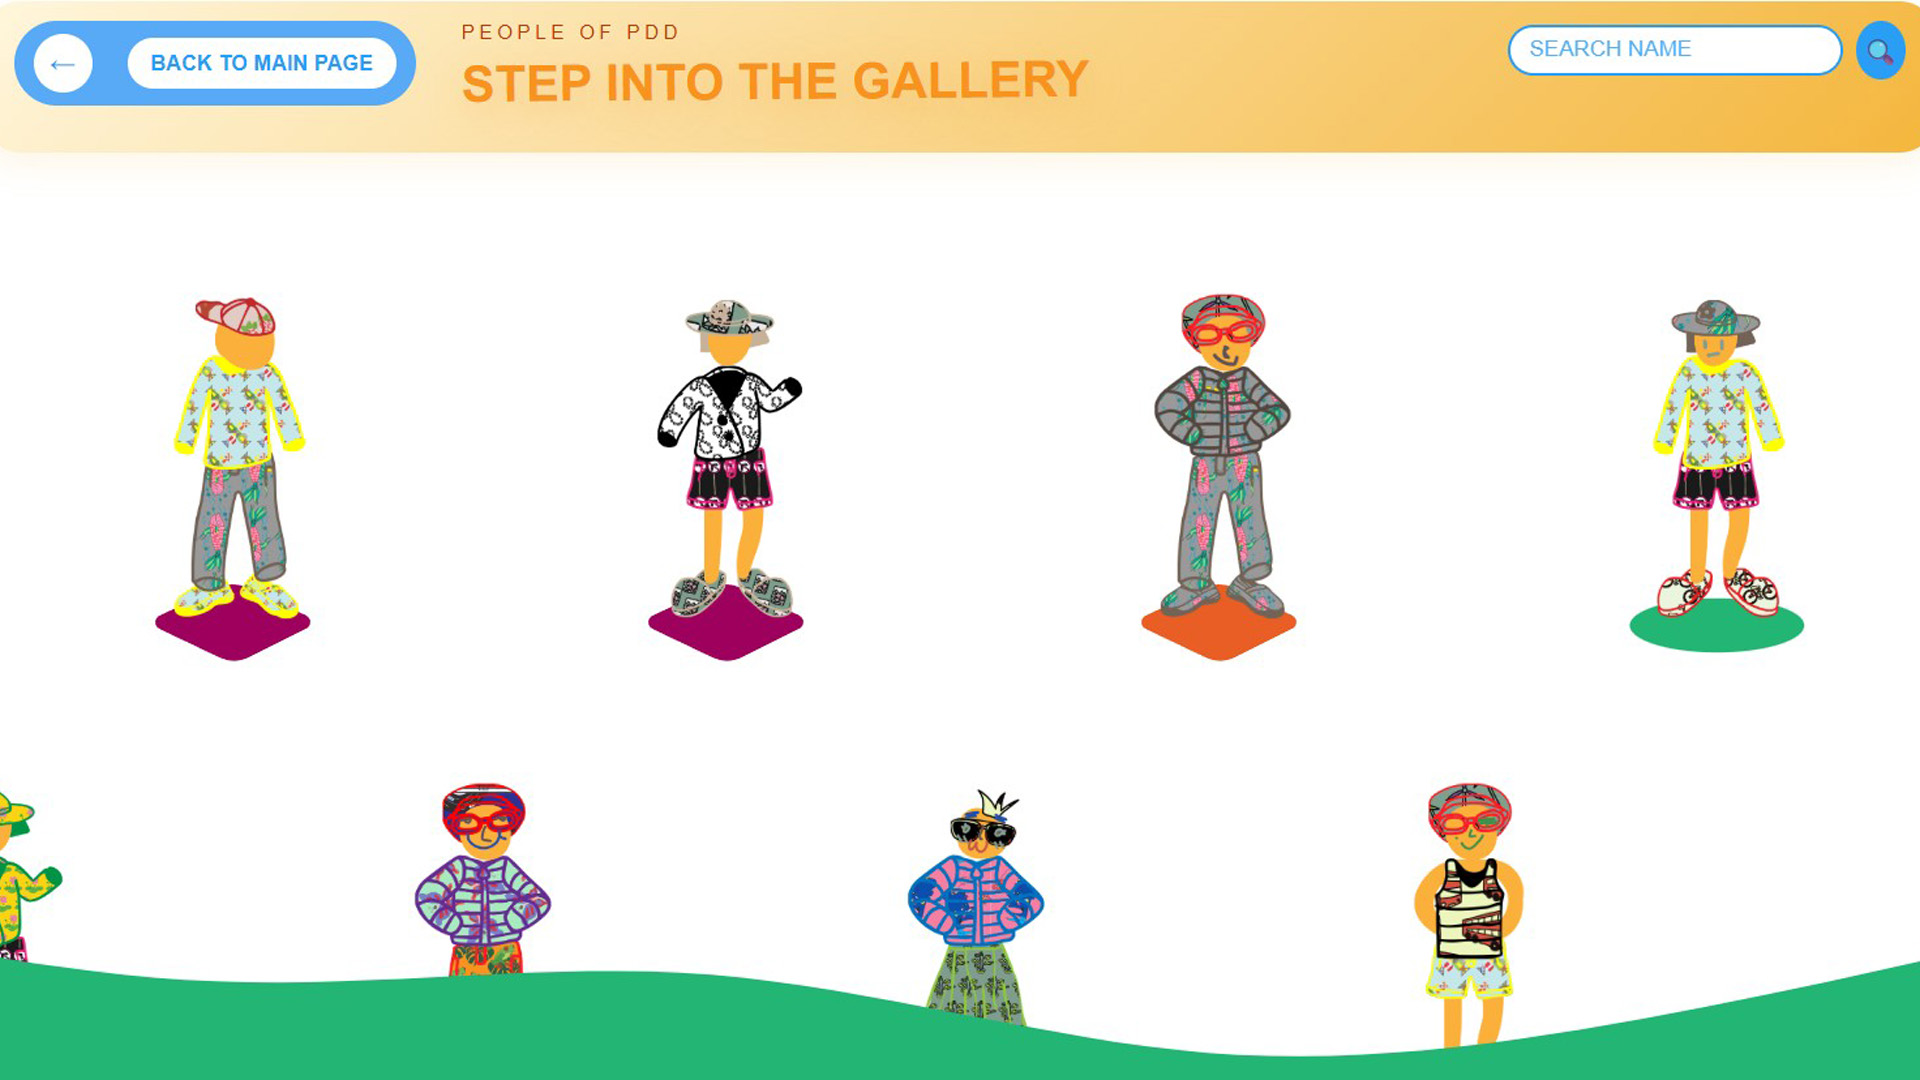
The web gallery space - see other's avatar
Peopleofpdd.sg is a site that allows residents of punggol to create their own avatar that they feel represents them. This avatar uses artwork drawn by talented, specially abled artists, Simeon and Ezra, and the outcome will be added into the web gallery where we can see all the other personas other people create. I have tried the experience and it felt really fun to customise my own avatar and to view others as well in the web gallery. Similar to above, I feel that the effectiveness of this whole experience is linked to its participatory design approach. Getting audience engaged adds a personal touch to the experiece and having their work shared with others in the gallery also serves as a opportunity for others to understand more about their fellow Punggol resident mates and strengthening their community bond!
Jeffery also shared with us this custom GPT in ChatGPT that is programmed to be a interactive storytelling experiencne about the Hock Lee Bus Riots. There was some options that I can choose from, such as the character I am playing as (bus driver, policeman etc) and I can choose how the story goes. I am also linked to relevant images and context so i can refer to real facts and learn. I really liked how Design Factory capitalize on the capabilities and trends of ChatGPT to create this experience. ChatGPT is a familiar engine for many of us, and using this to faciliate the storytelling for students definitely makes it a more intuitive and comfortable user experience for them.
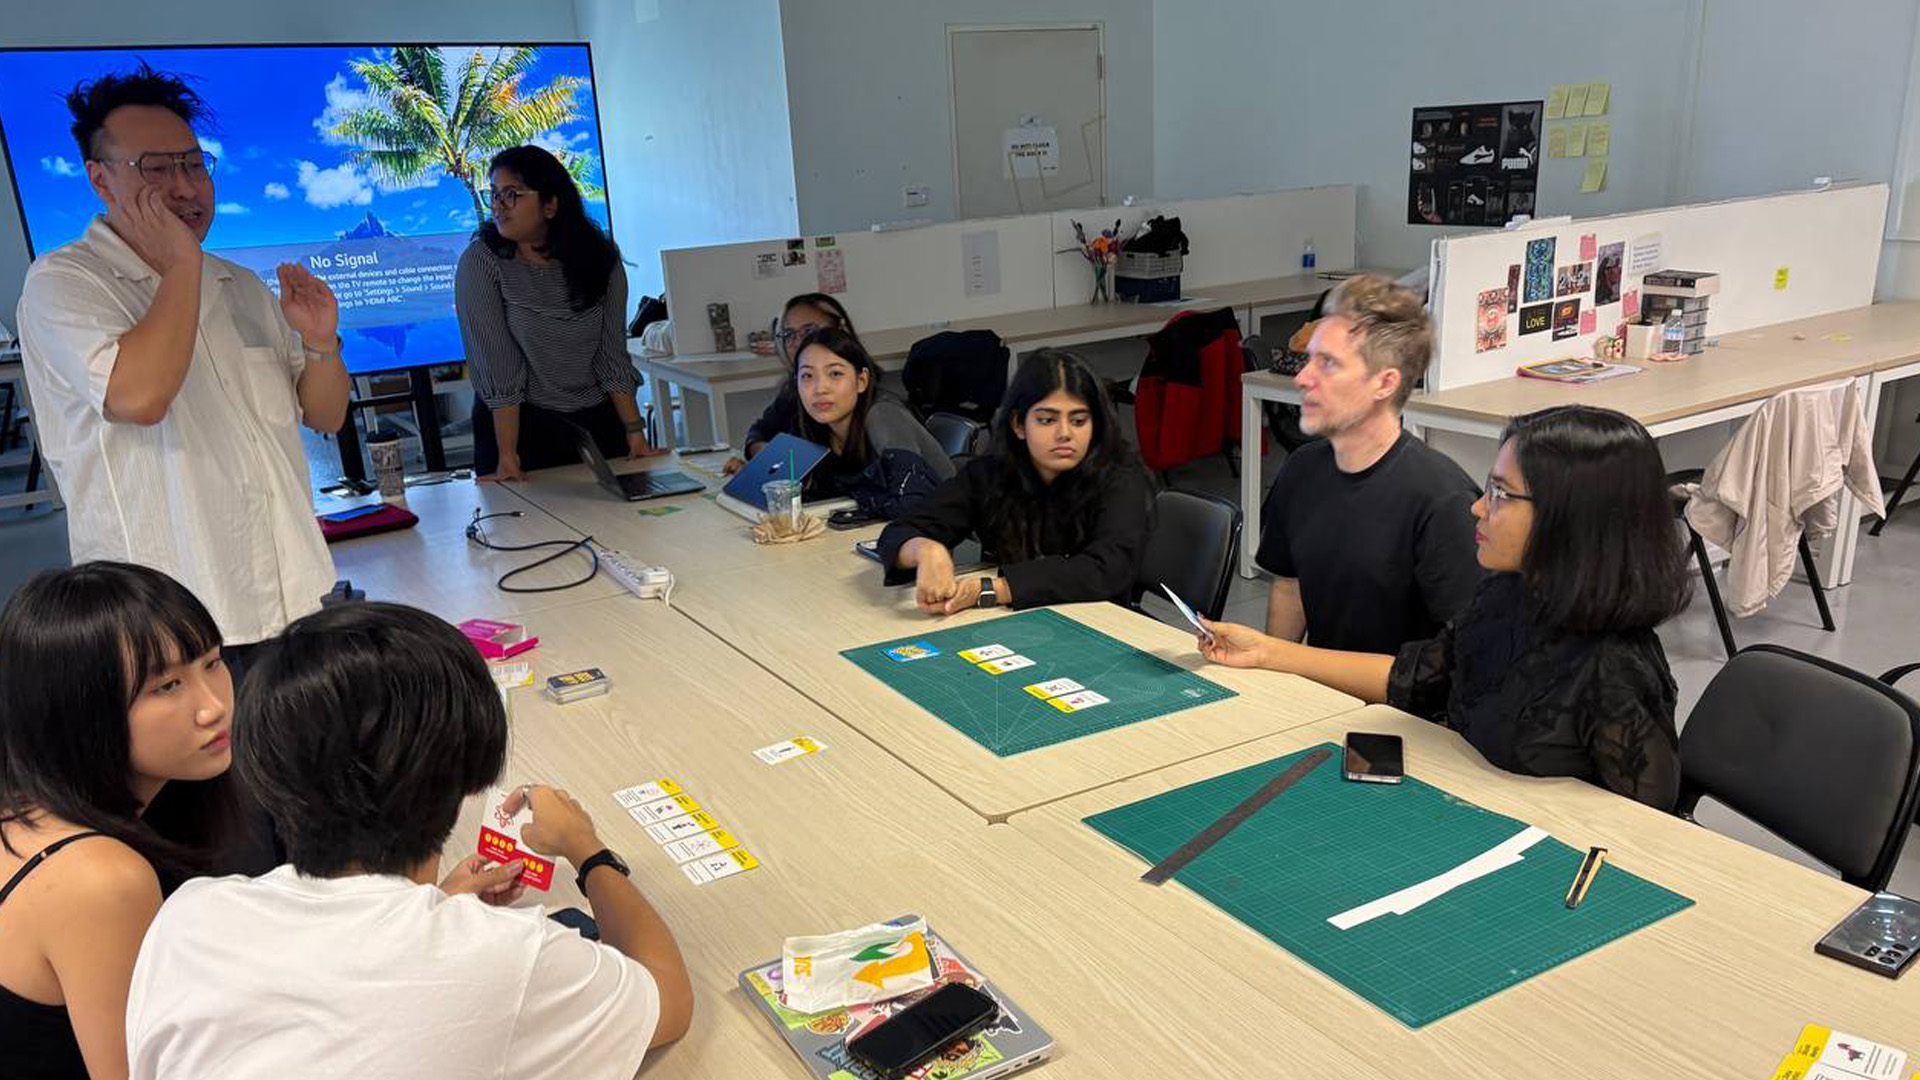
Us in action!
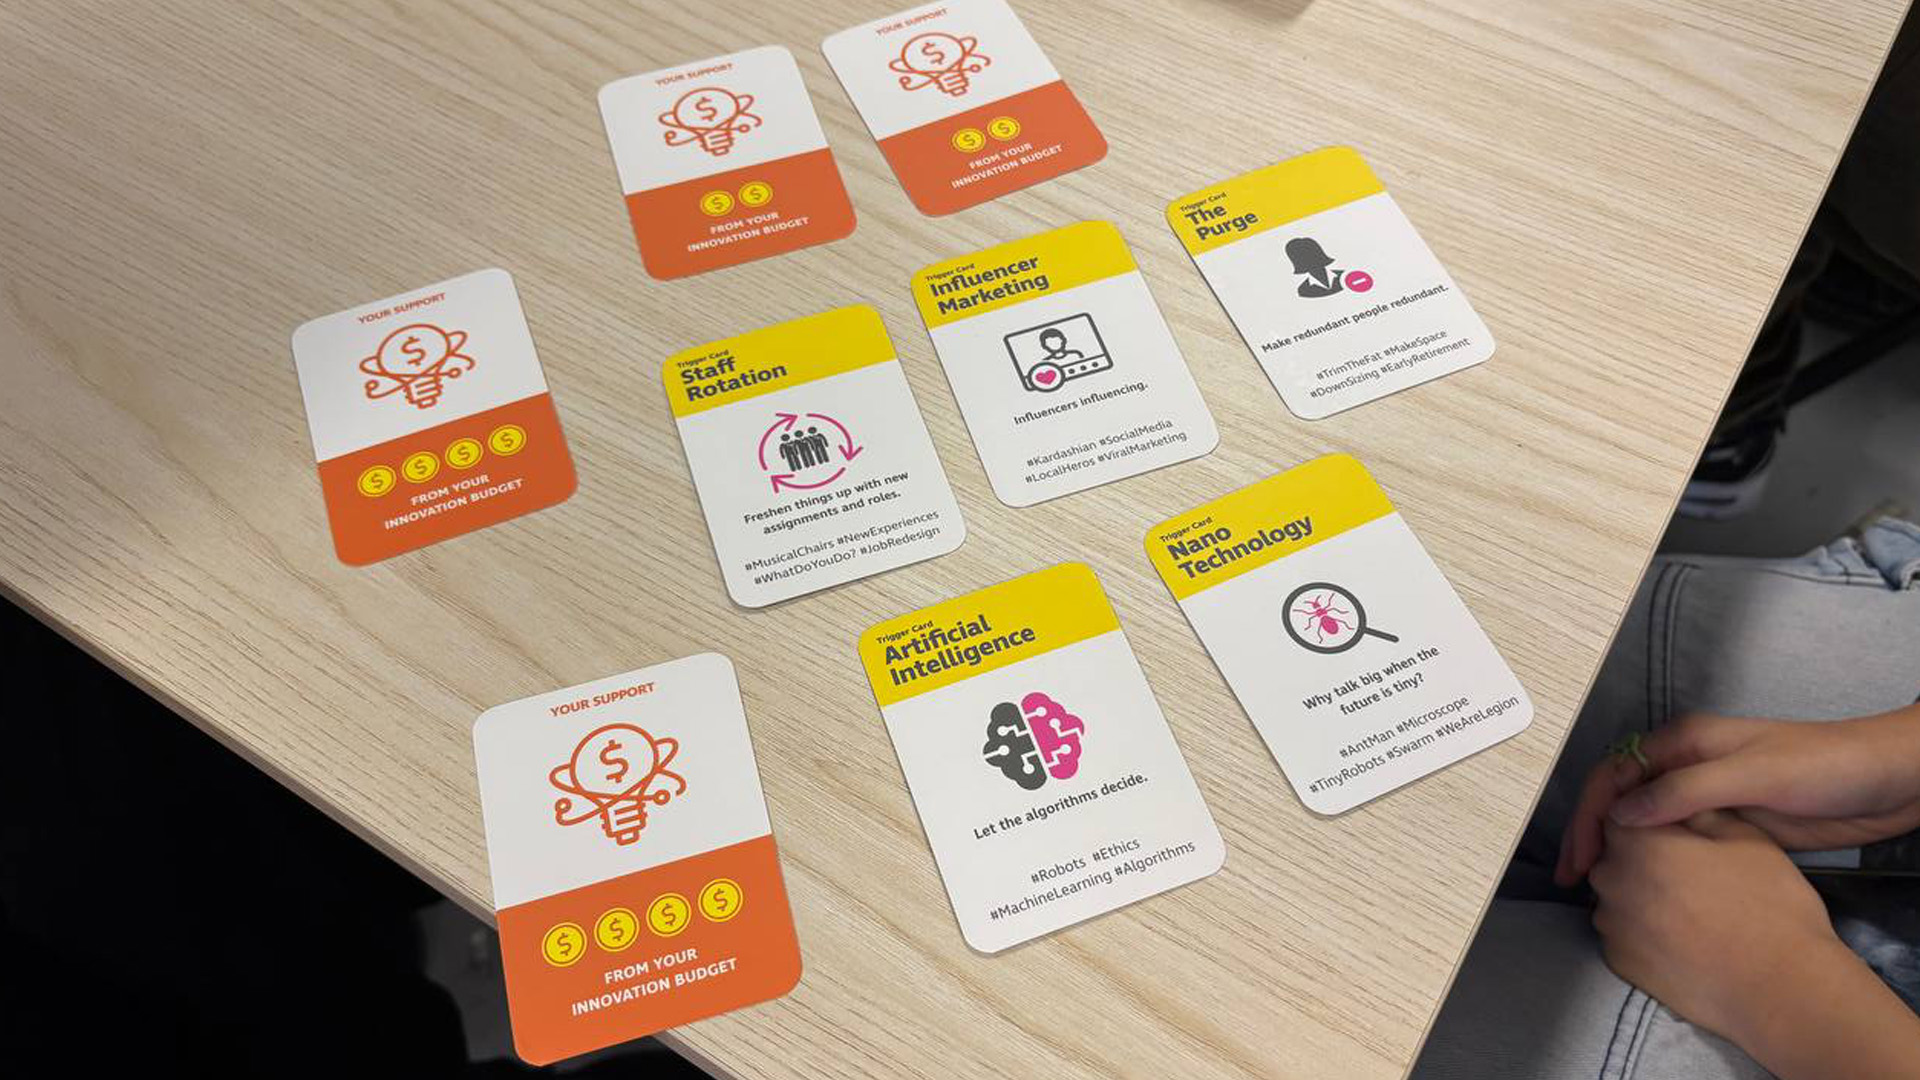
Our dealt cards and possible solutions (we earned no money)
We also had the chance to play this fun card game that encourages our creative and entreupeunial thinking. We group up to different teams and take turn to pitch to the innovation director our design solution for a selected issue. It was definitely something that tested my critical thinking, as I had to make up some funny/weird idea with my friends to earn money/points. Me and peers really enjoyed it, maybe because we heard alot of silly and funny ideas!